Q: What’s shiny and white and mudded all over?
A: Our bathroom tile!
Honk, Honk! The Nest’s bathrooms just got a little touch of subway flair…tile, that is. We chose a simple white, glossy subway tile for the showers because it suits our style and the era of our home. We punched it up a little by using pewter colored grout and adding a simple accent of “pencil tiles” around the perimeter of the shower walls about ¾ of the way up. We also opted to add little niches in each shower to hold shampoo bottles, etc.
The new stuff is fun and, as it turns out, MUCH easier than repairing and restoring the old… but we knew that already, didn’t we? (Cue my parents saying, “Nothing worth having comes easy.”)
The Saga of the Snaggletooth Tiles
Besides being absolutely filthy, the tile in our nest’s bathrooms was in relatively good shape and because we decided to keep the old cast iron bath tubs, too (taking those monsters out would have destroyed the tile around them), we decided that it was a no-brainer to save the original tile. However, there were a few “snaggletooth” holes to fill where we had relocated doorways and some patching needed around the edges of the rooms where we lost a few tiles during the plaster demo.
The only problem: it was impossible to find replacement tiles that would even come close to matching our original ones [insert “they don’t make things like the used to” comment here]. Our tile professional was too chicken to attempt concerned by the only option left: to “harvest” tiles from parts of the floor that would be covered by a vanity, so Matthew and I were forced to try our hand at chiseling out these precious tiles on our own. Thankfully, it was a DIY success not a disaster…although, it definitely tested our marriage a few times. Whew! Glad that’s over.
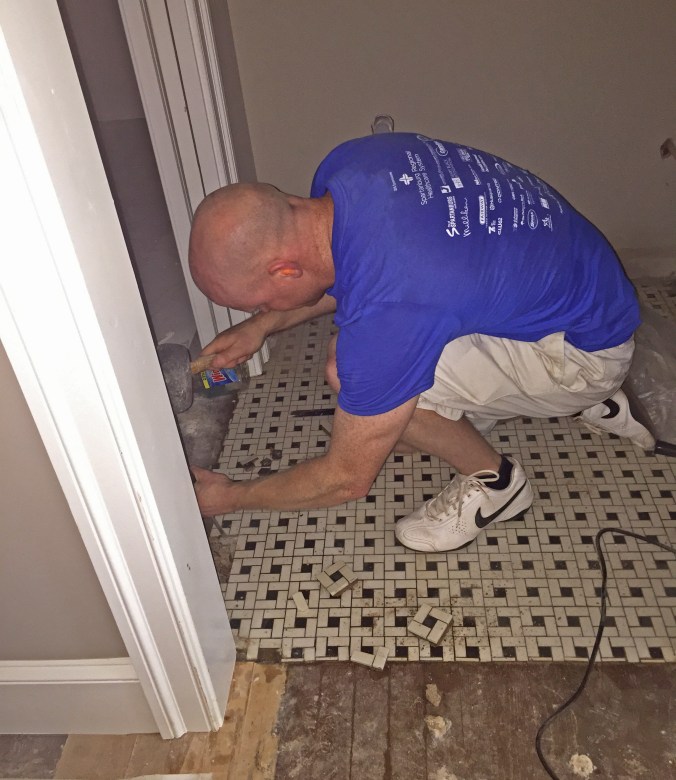
Hard at work harvesting tiles.

Mid-jigsaw puzzle.
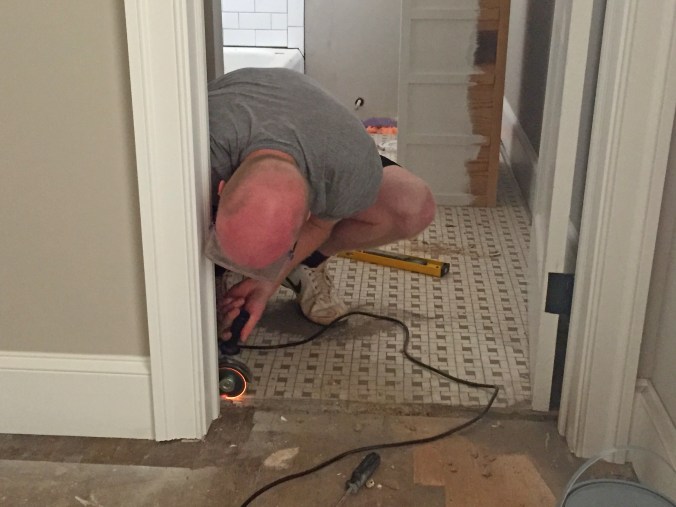
Grinding away at the space for a new marble threshold in the hall bathroom.

Threshold installed! Not bad for a couple of newbies, right?? (Not as easy as it looks, though…we broke the first one trying to level it.)

Finally starting to clean up the old tiles!

Many hours of elbow grease later…good as new!

Shower niche installed!
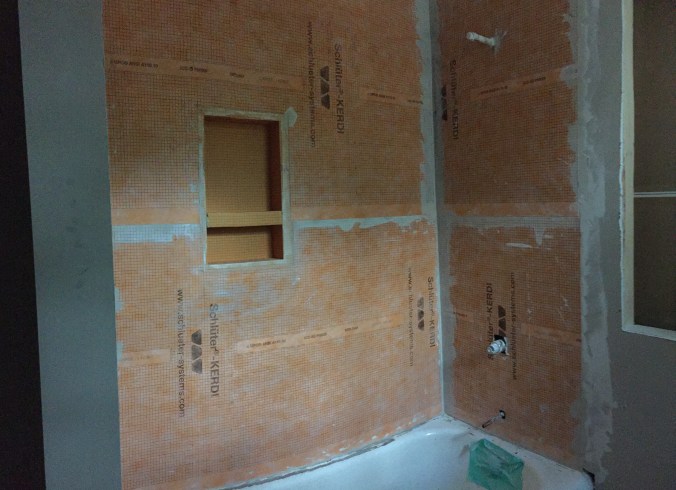
This orange KERDI backing is a moisture-proof “wallpaper”that goes right over the sheetrock before tile installation.

Tile selection! Classic white subway tiles and pewter grout (we went with the medium gray at bottom).

Boxes and boxes of tile… here we go!

Eeeeeeek! Major progress!
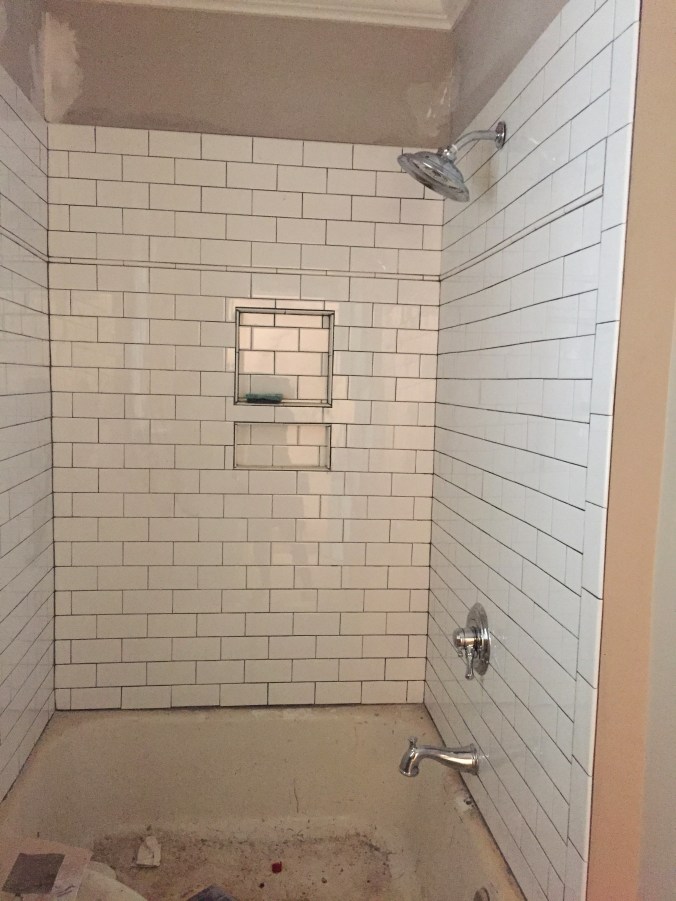
Master shower’s tile is up!

Hall bath, too!
Tub Transformation
Once the new tile was installed, that pristine white subway tile only accentuated the sad state of our bathtubs. We knew that refinishing them ourselves was not in our wheelhouse, so we called in the professionals. After some research, Matthew found a company called GlazePro in North Carolina that would travel down and – in just two days – completely transform our beat-up bathtubs by scouring, sanding, stripping, patching, and re-glazing. I don’t know much more about the process, but the results are nothing short of miraculous! Take a look-see for yourself:

The miracle worker in action – scraping, sanding, and patching all the imperfections.

Patching complete.
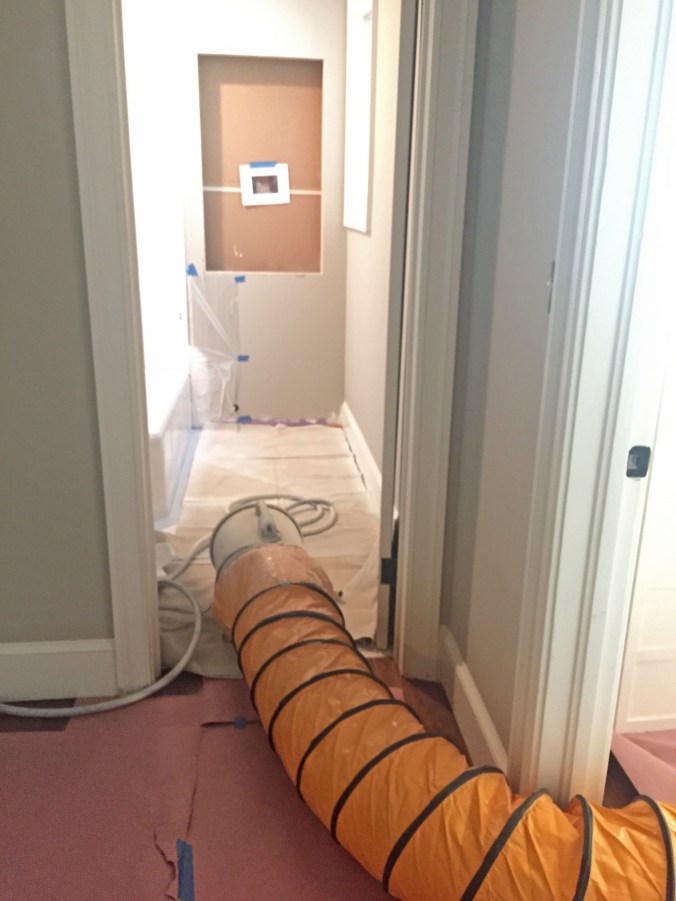
Reglazing in progress… That orange contraption is a portable exhaust system to vent the paint fumes outside. Impressive!

Can you believe how good this looks??? We were shocked by the transformation. It’s perfect. I think I heard angels singing when I laid eyes on our BRAND NEW old tubs!!

Beautiful! So impressed with you two. Love the selections!
LikeLiked by 1 person
Looks GREAT!! You’re ready to be stars on HGTV!
LikeLiked by 1 person