You’re the Mantel to my Fireplace

Milk and Cookies.
Waves and the Ocean.
French Fries and Ketchup.
Simon and Garfunkel.
Peanut Butter and Jelly.
Fountains and Pennies.
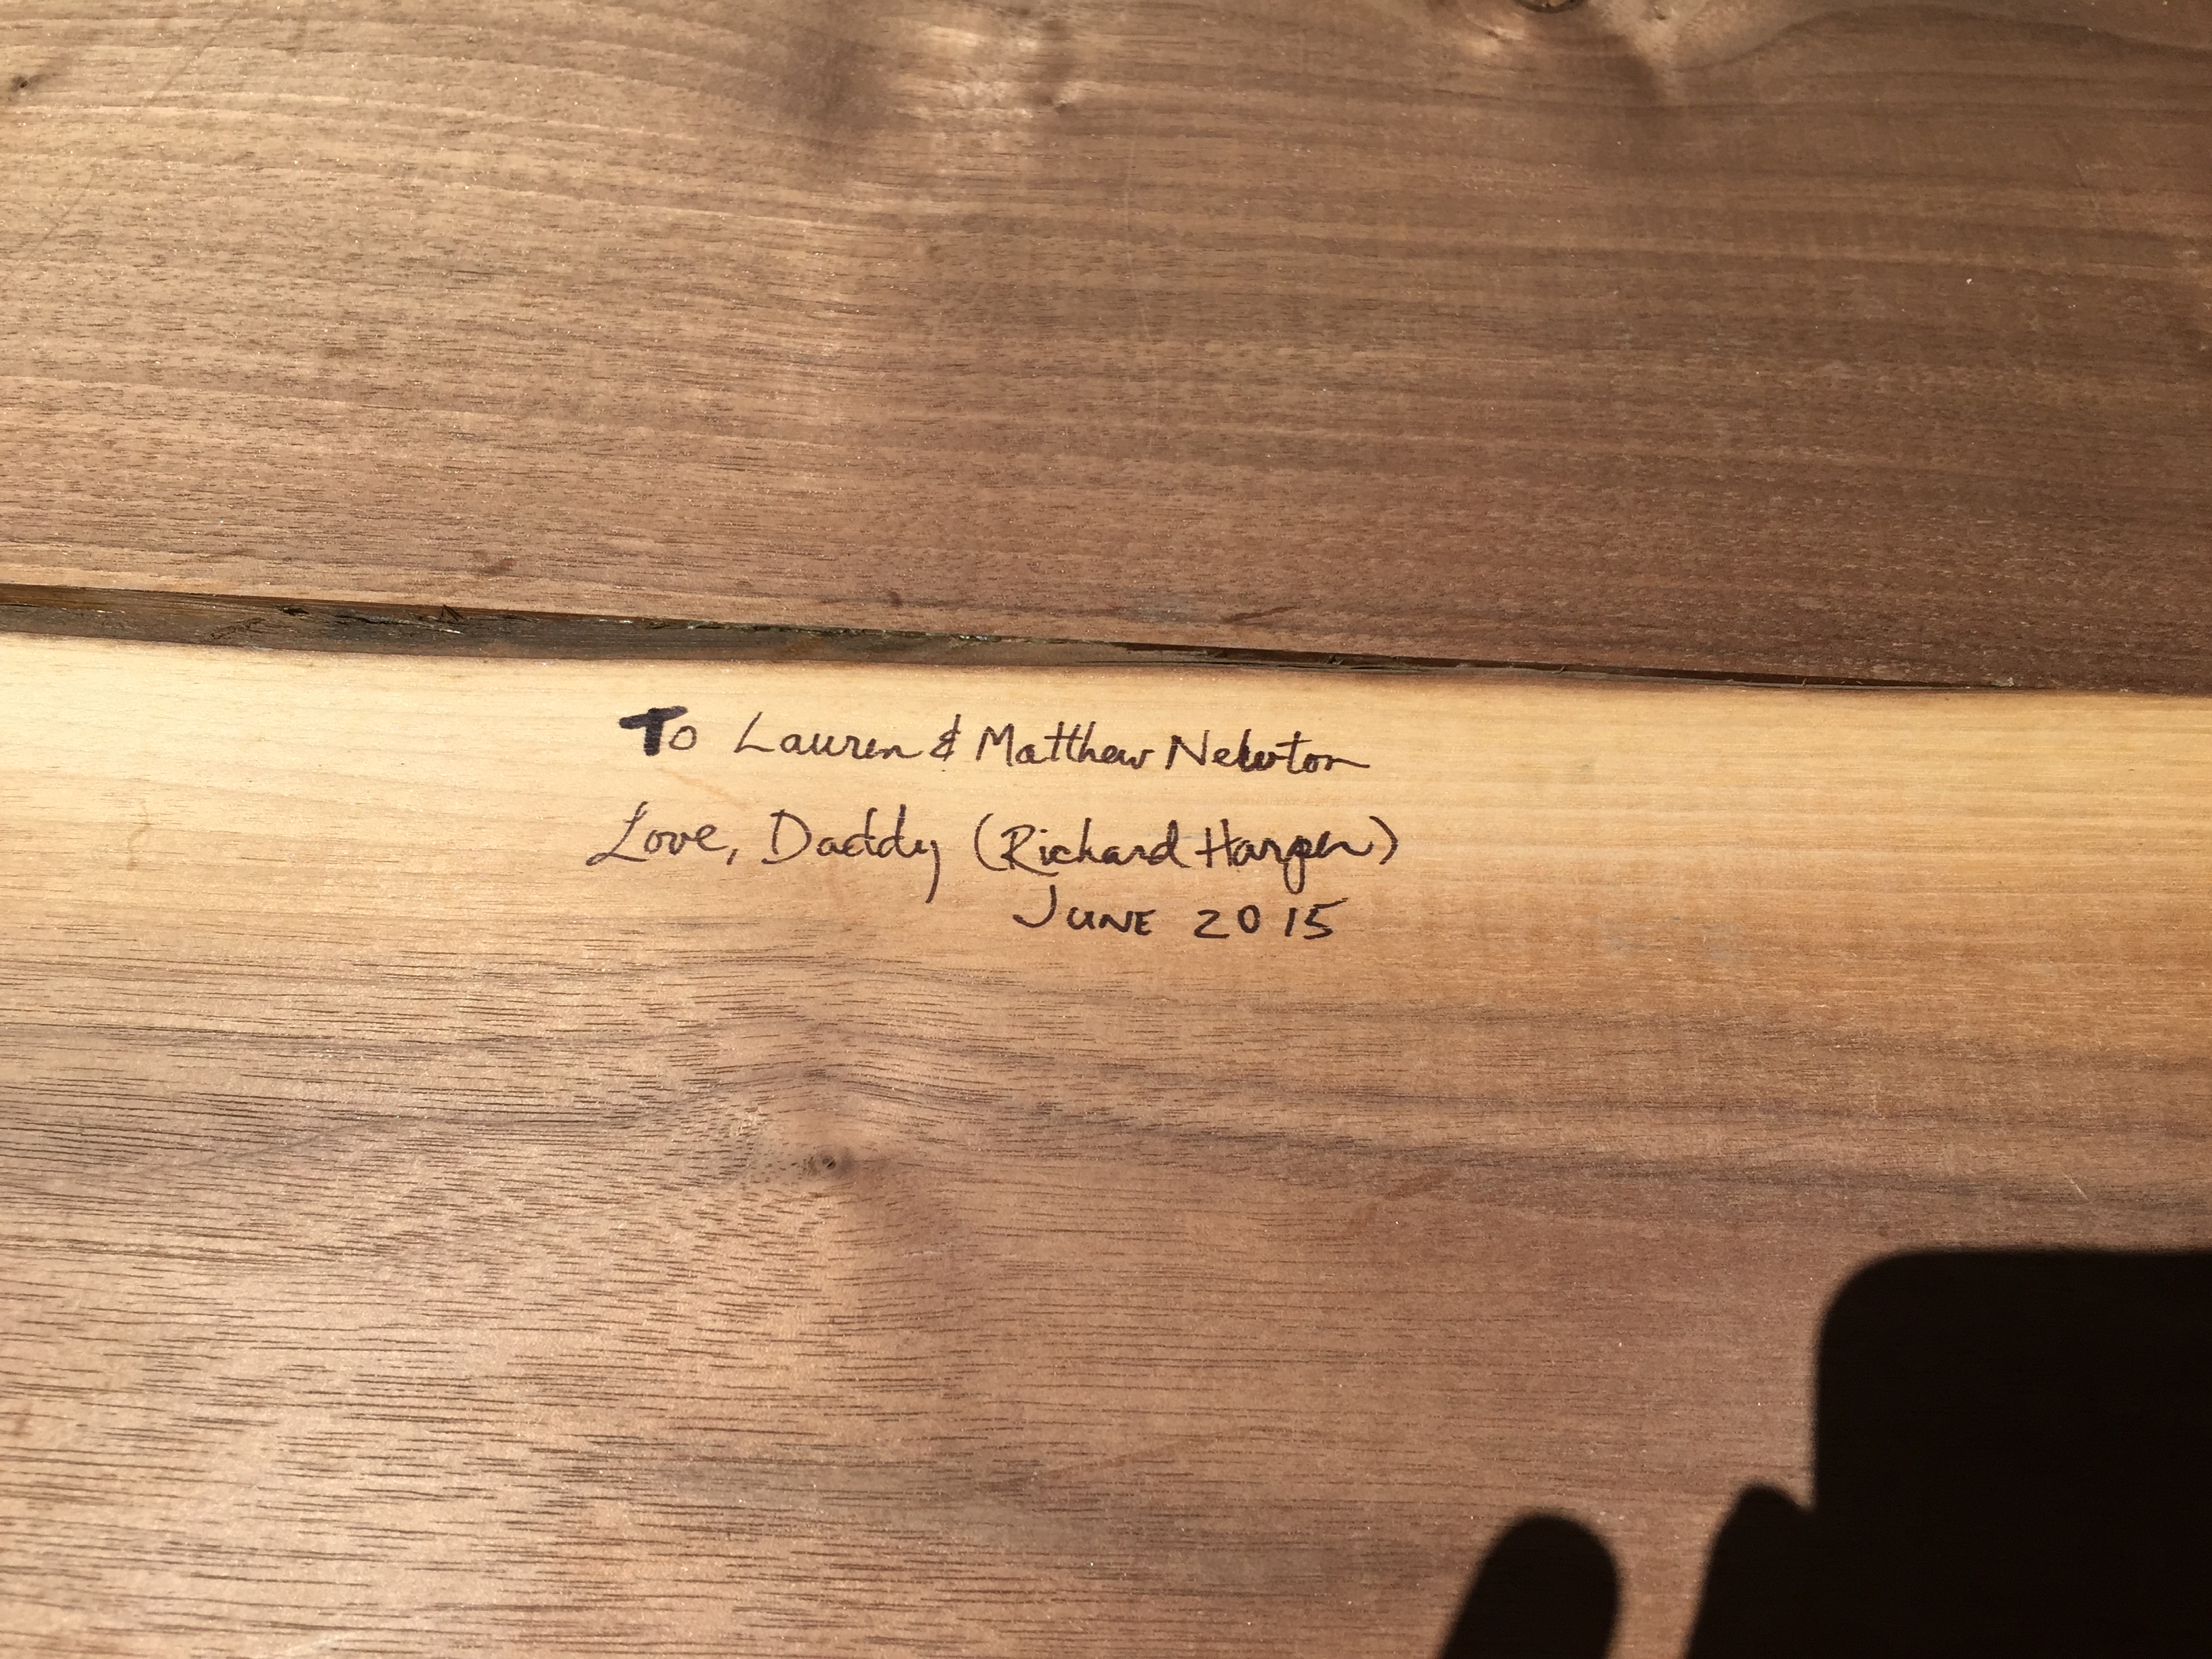
Lauren and Matthew.
Miss Pepper and Chasing Squirrels.
See where I’m going here, people? Some things just go together. 😉

So, you can’t have a fireplace without a good mantelpiece, am I right??

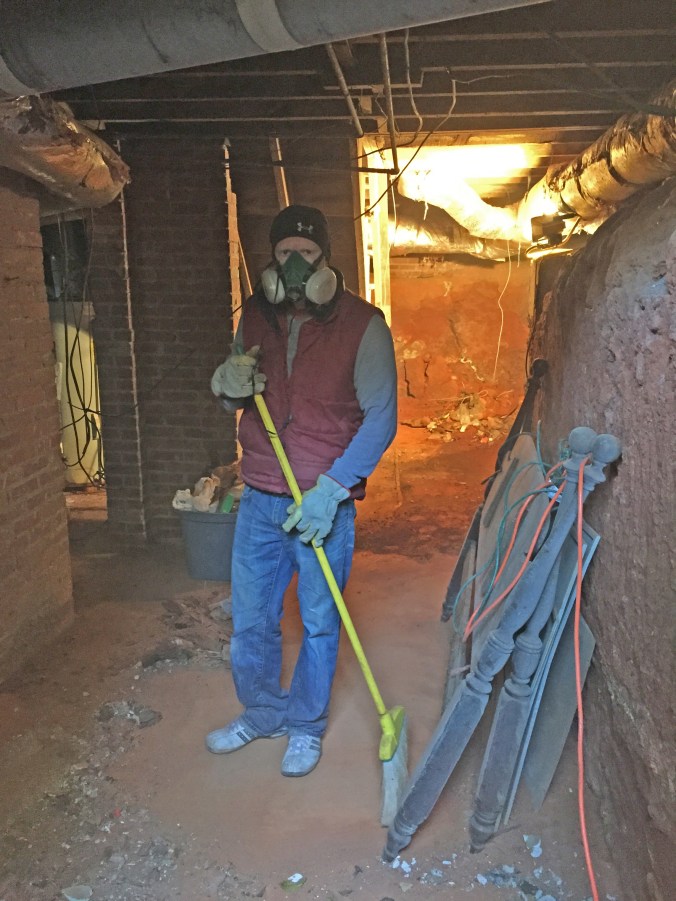
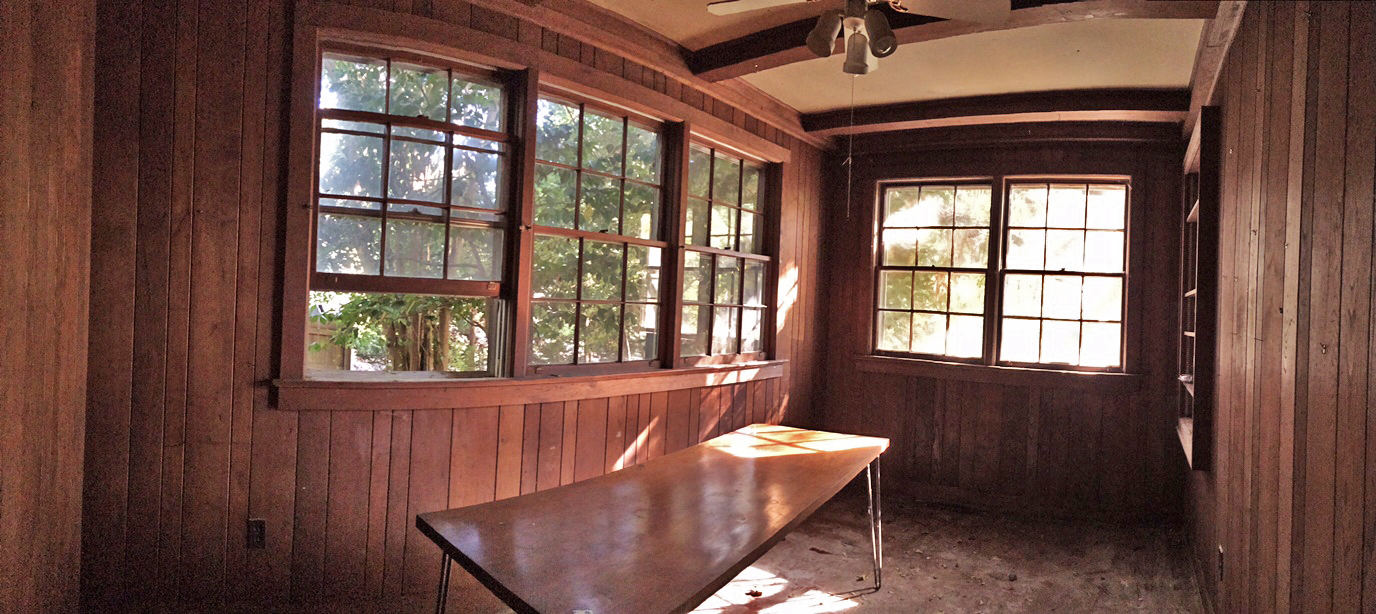
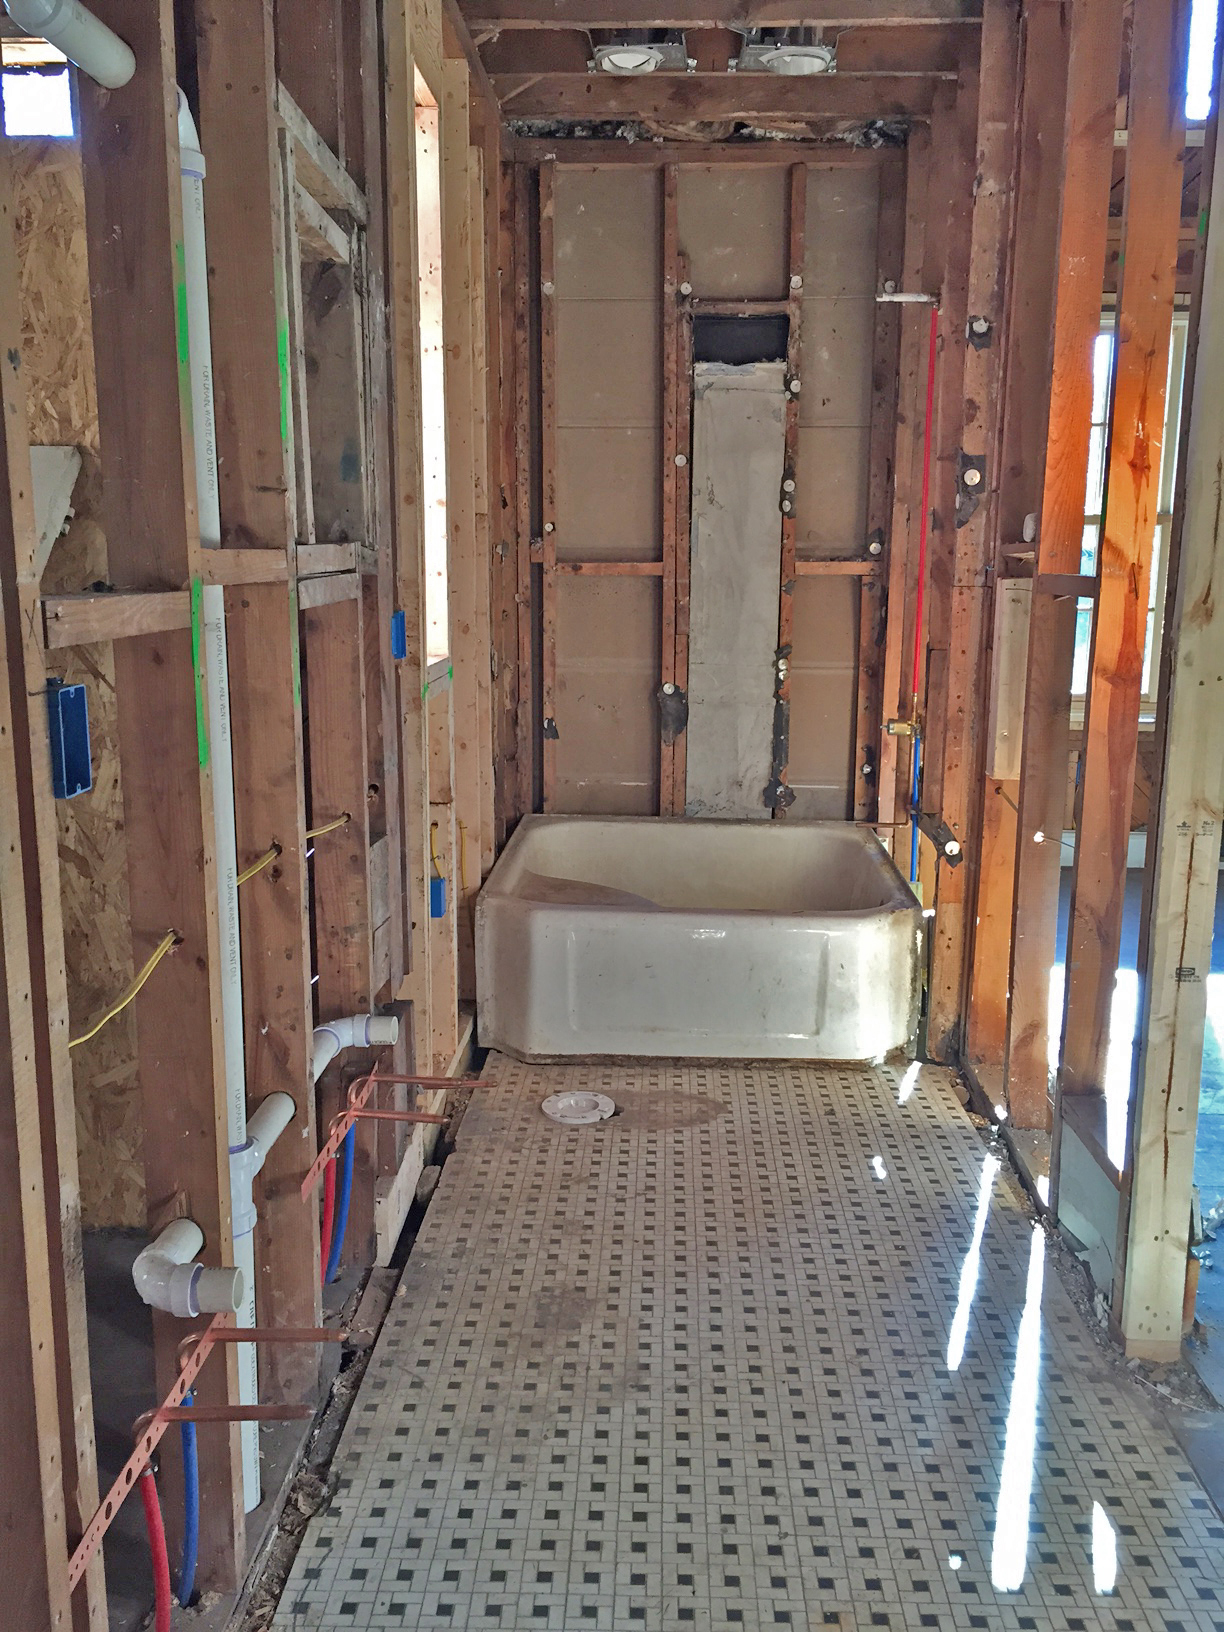
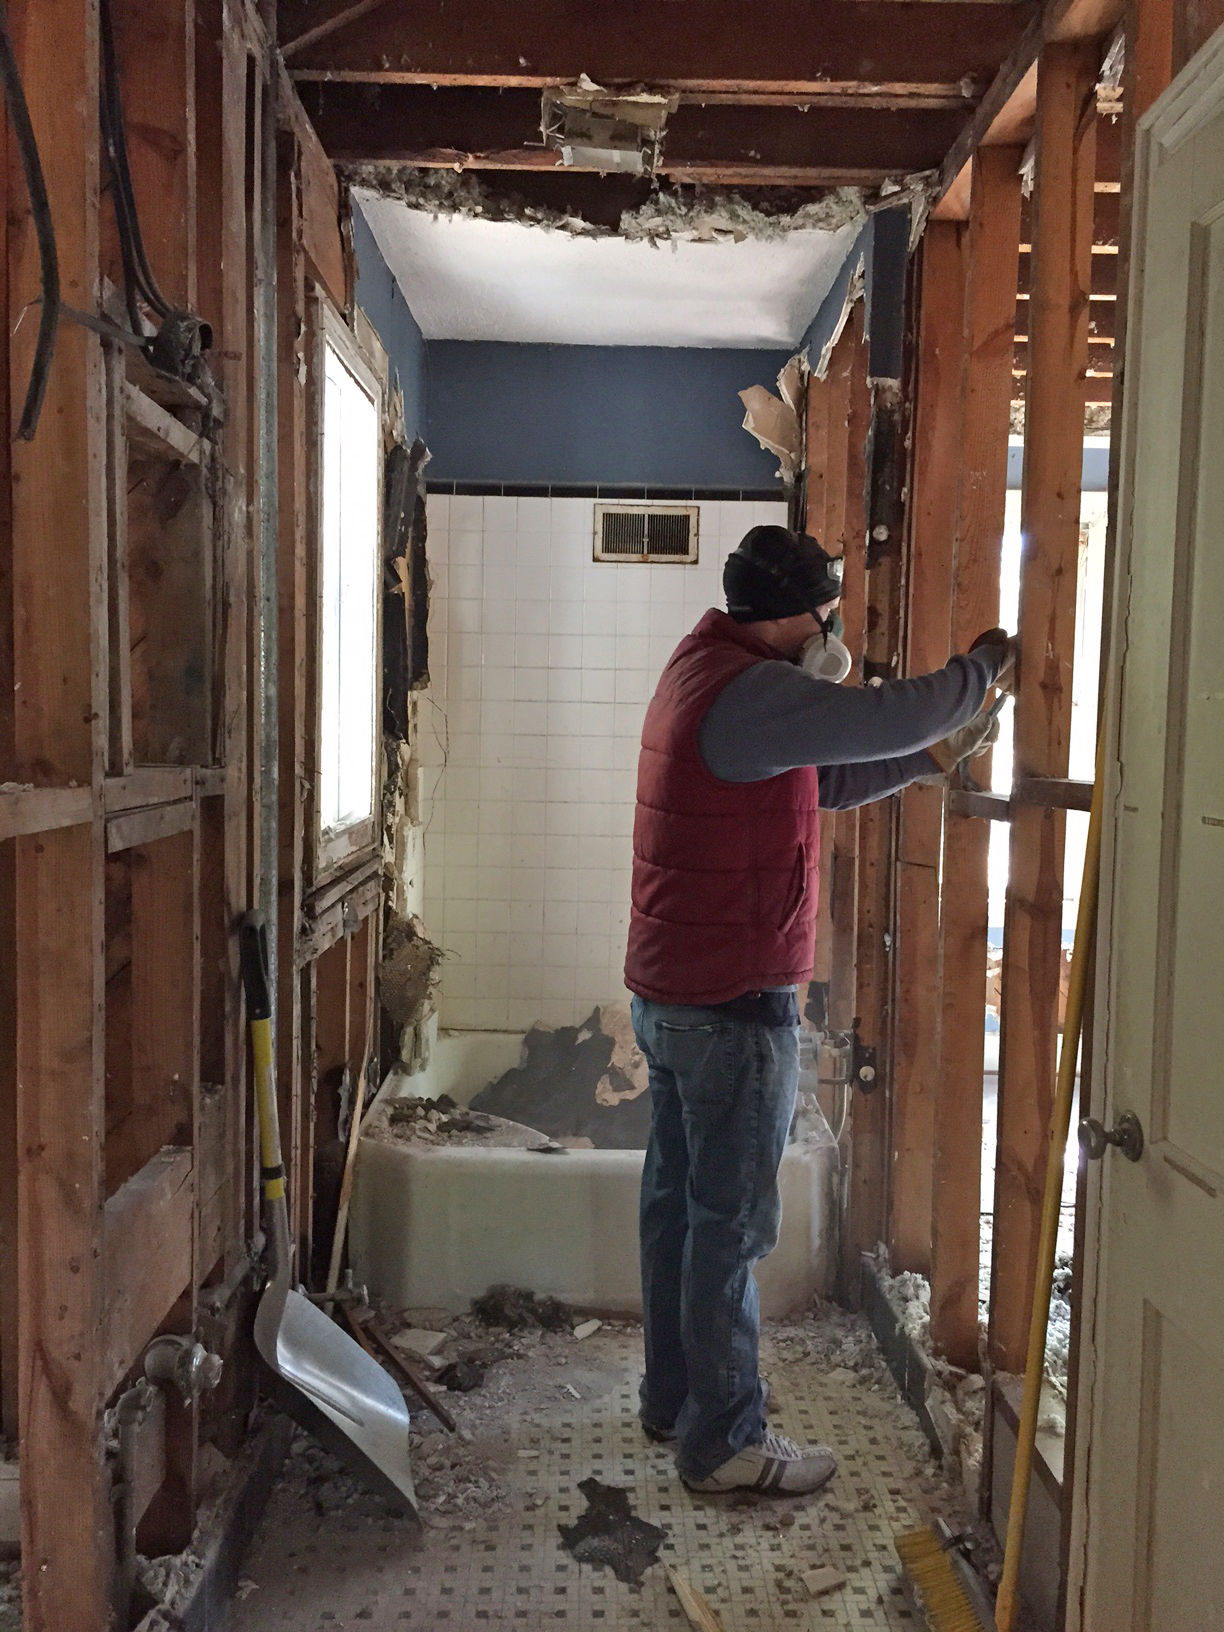
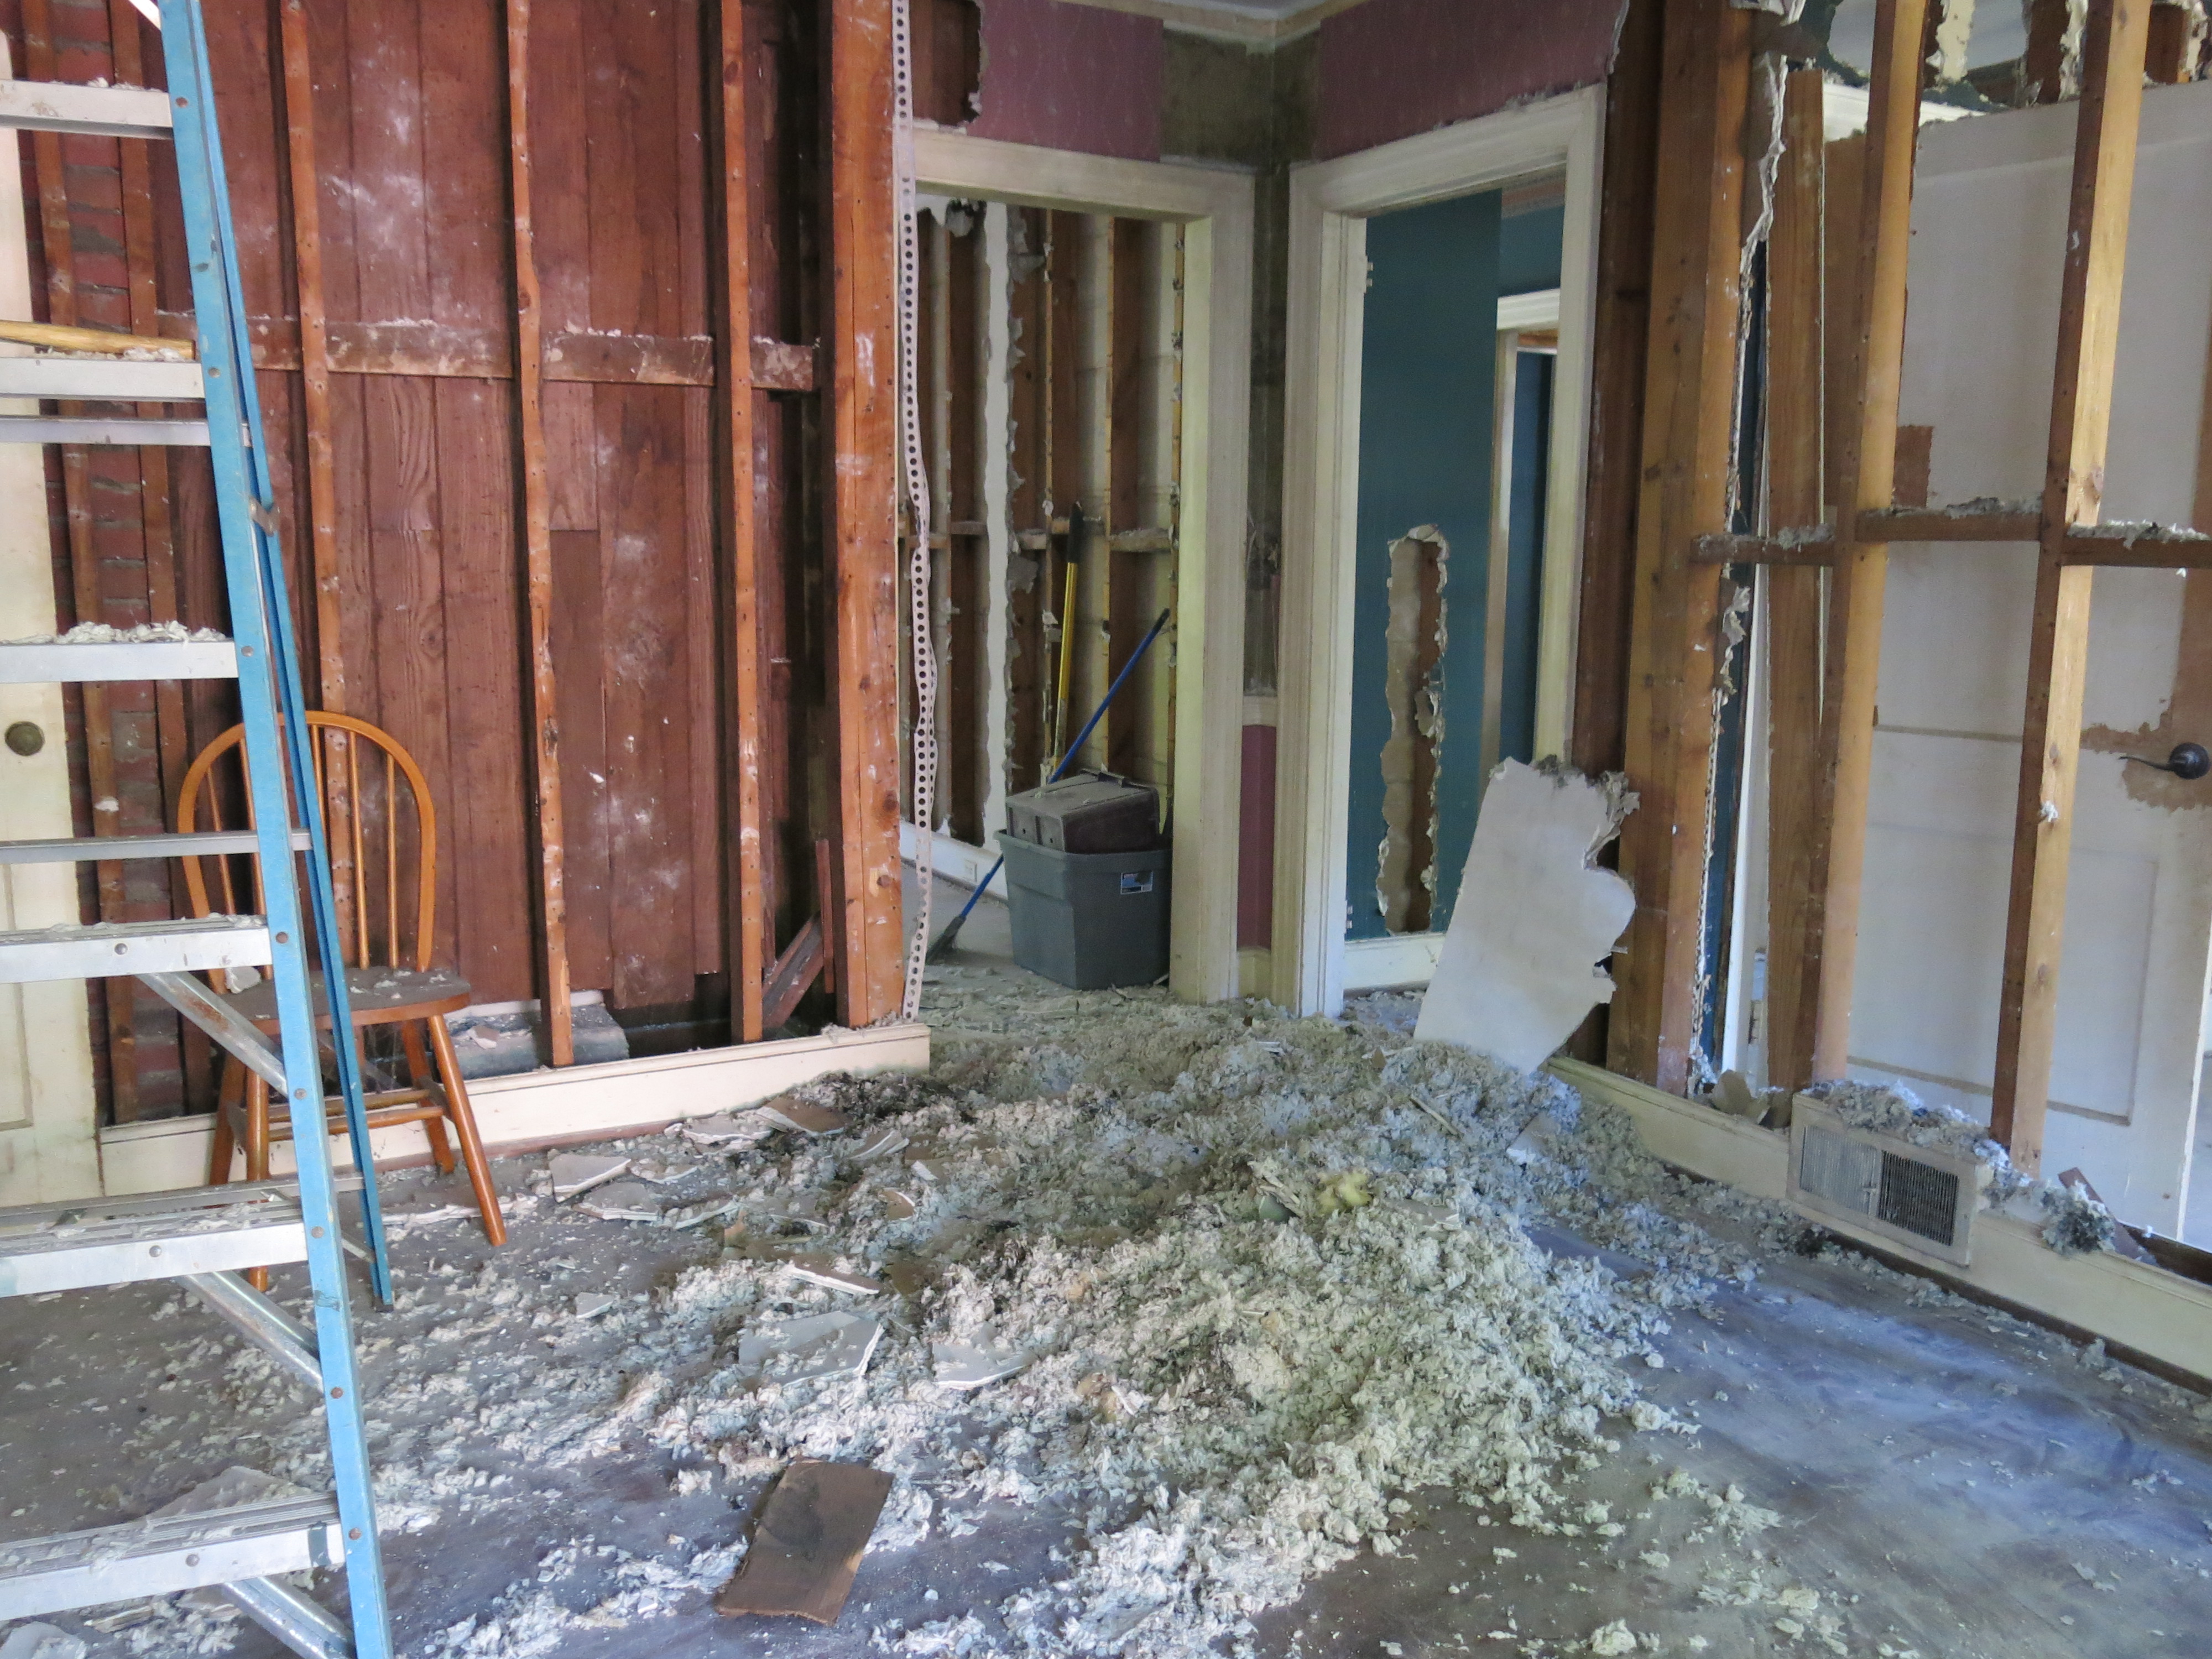
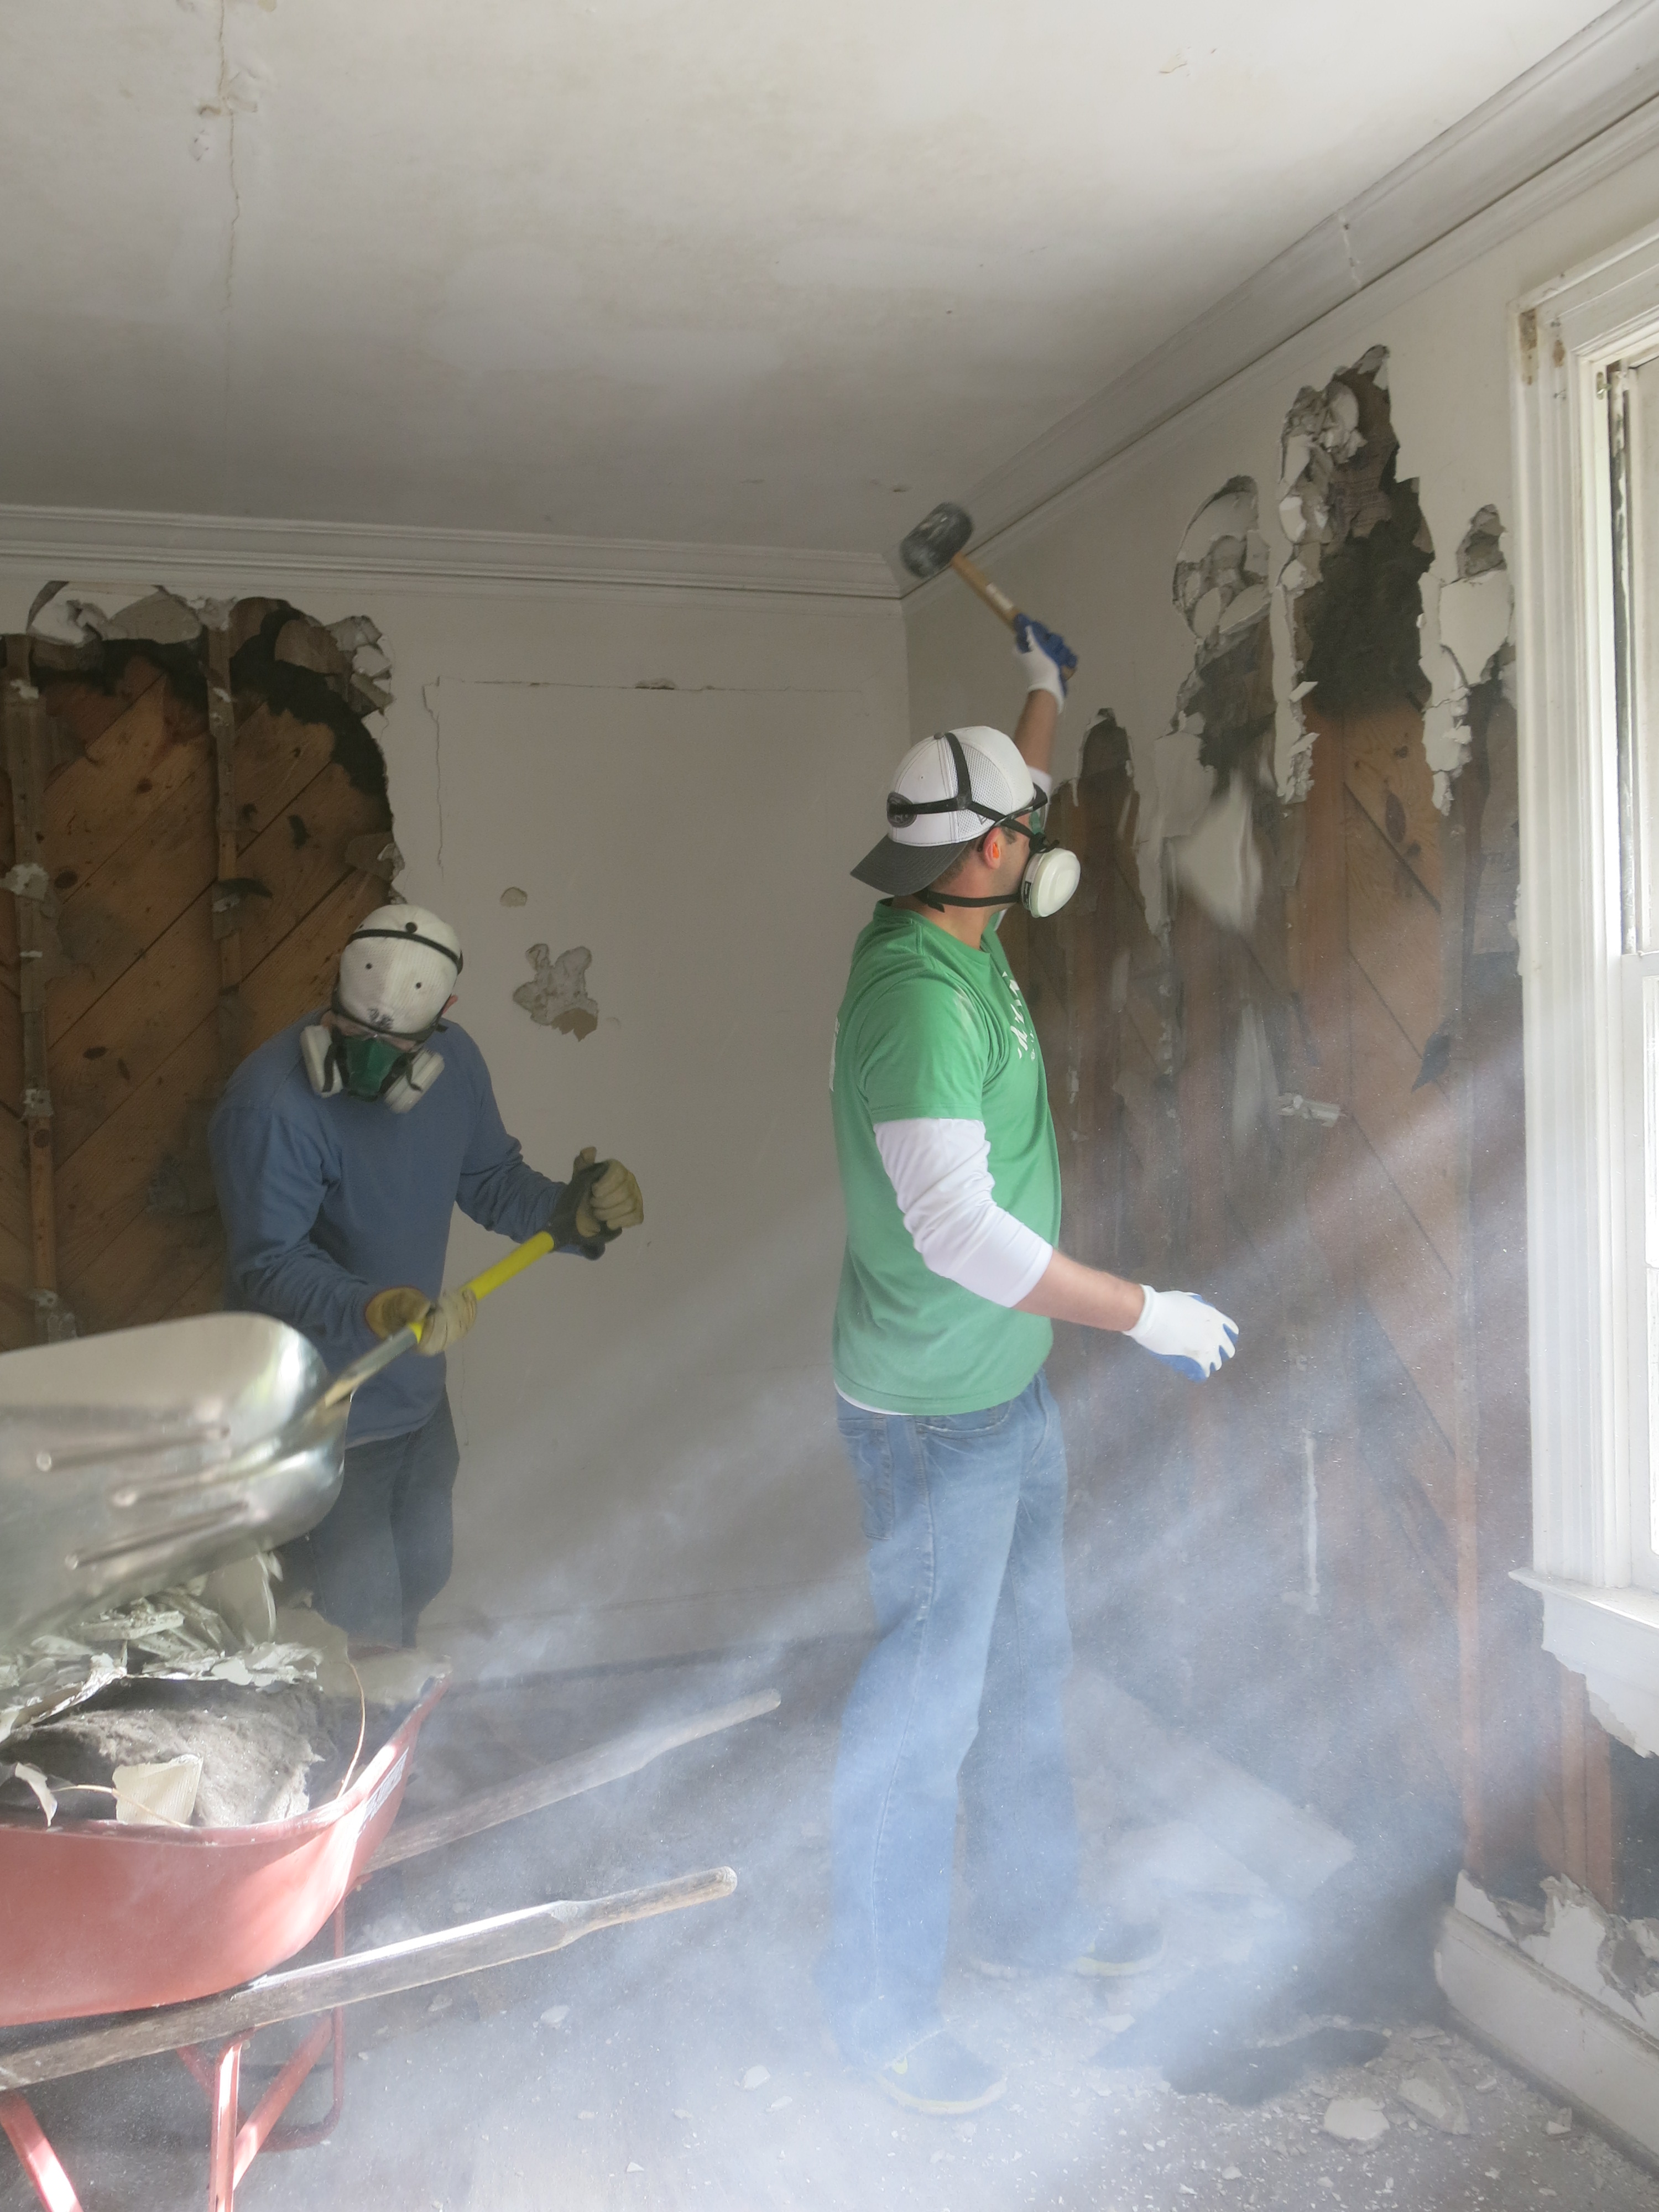
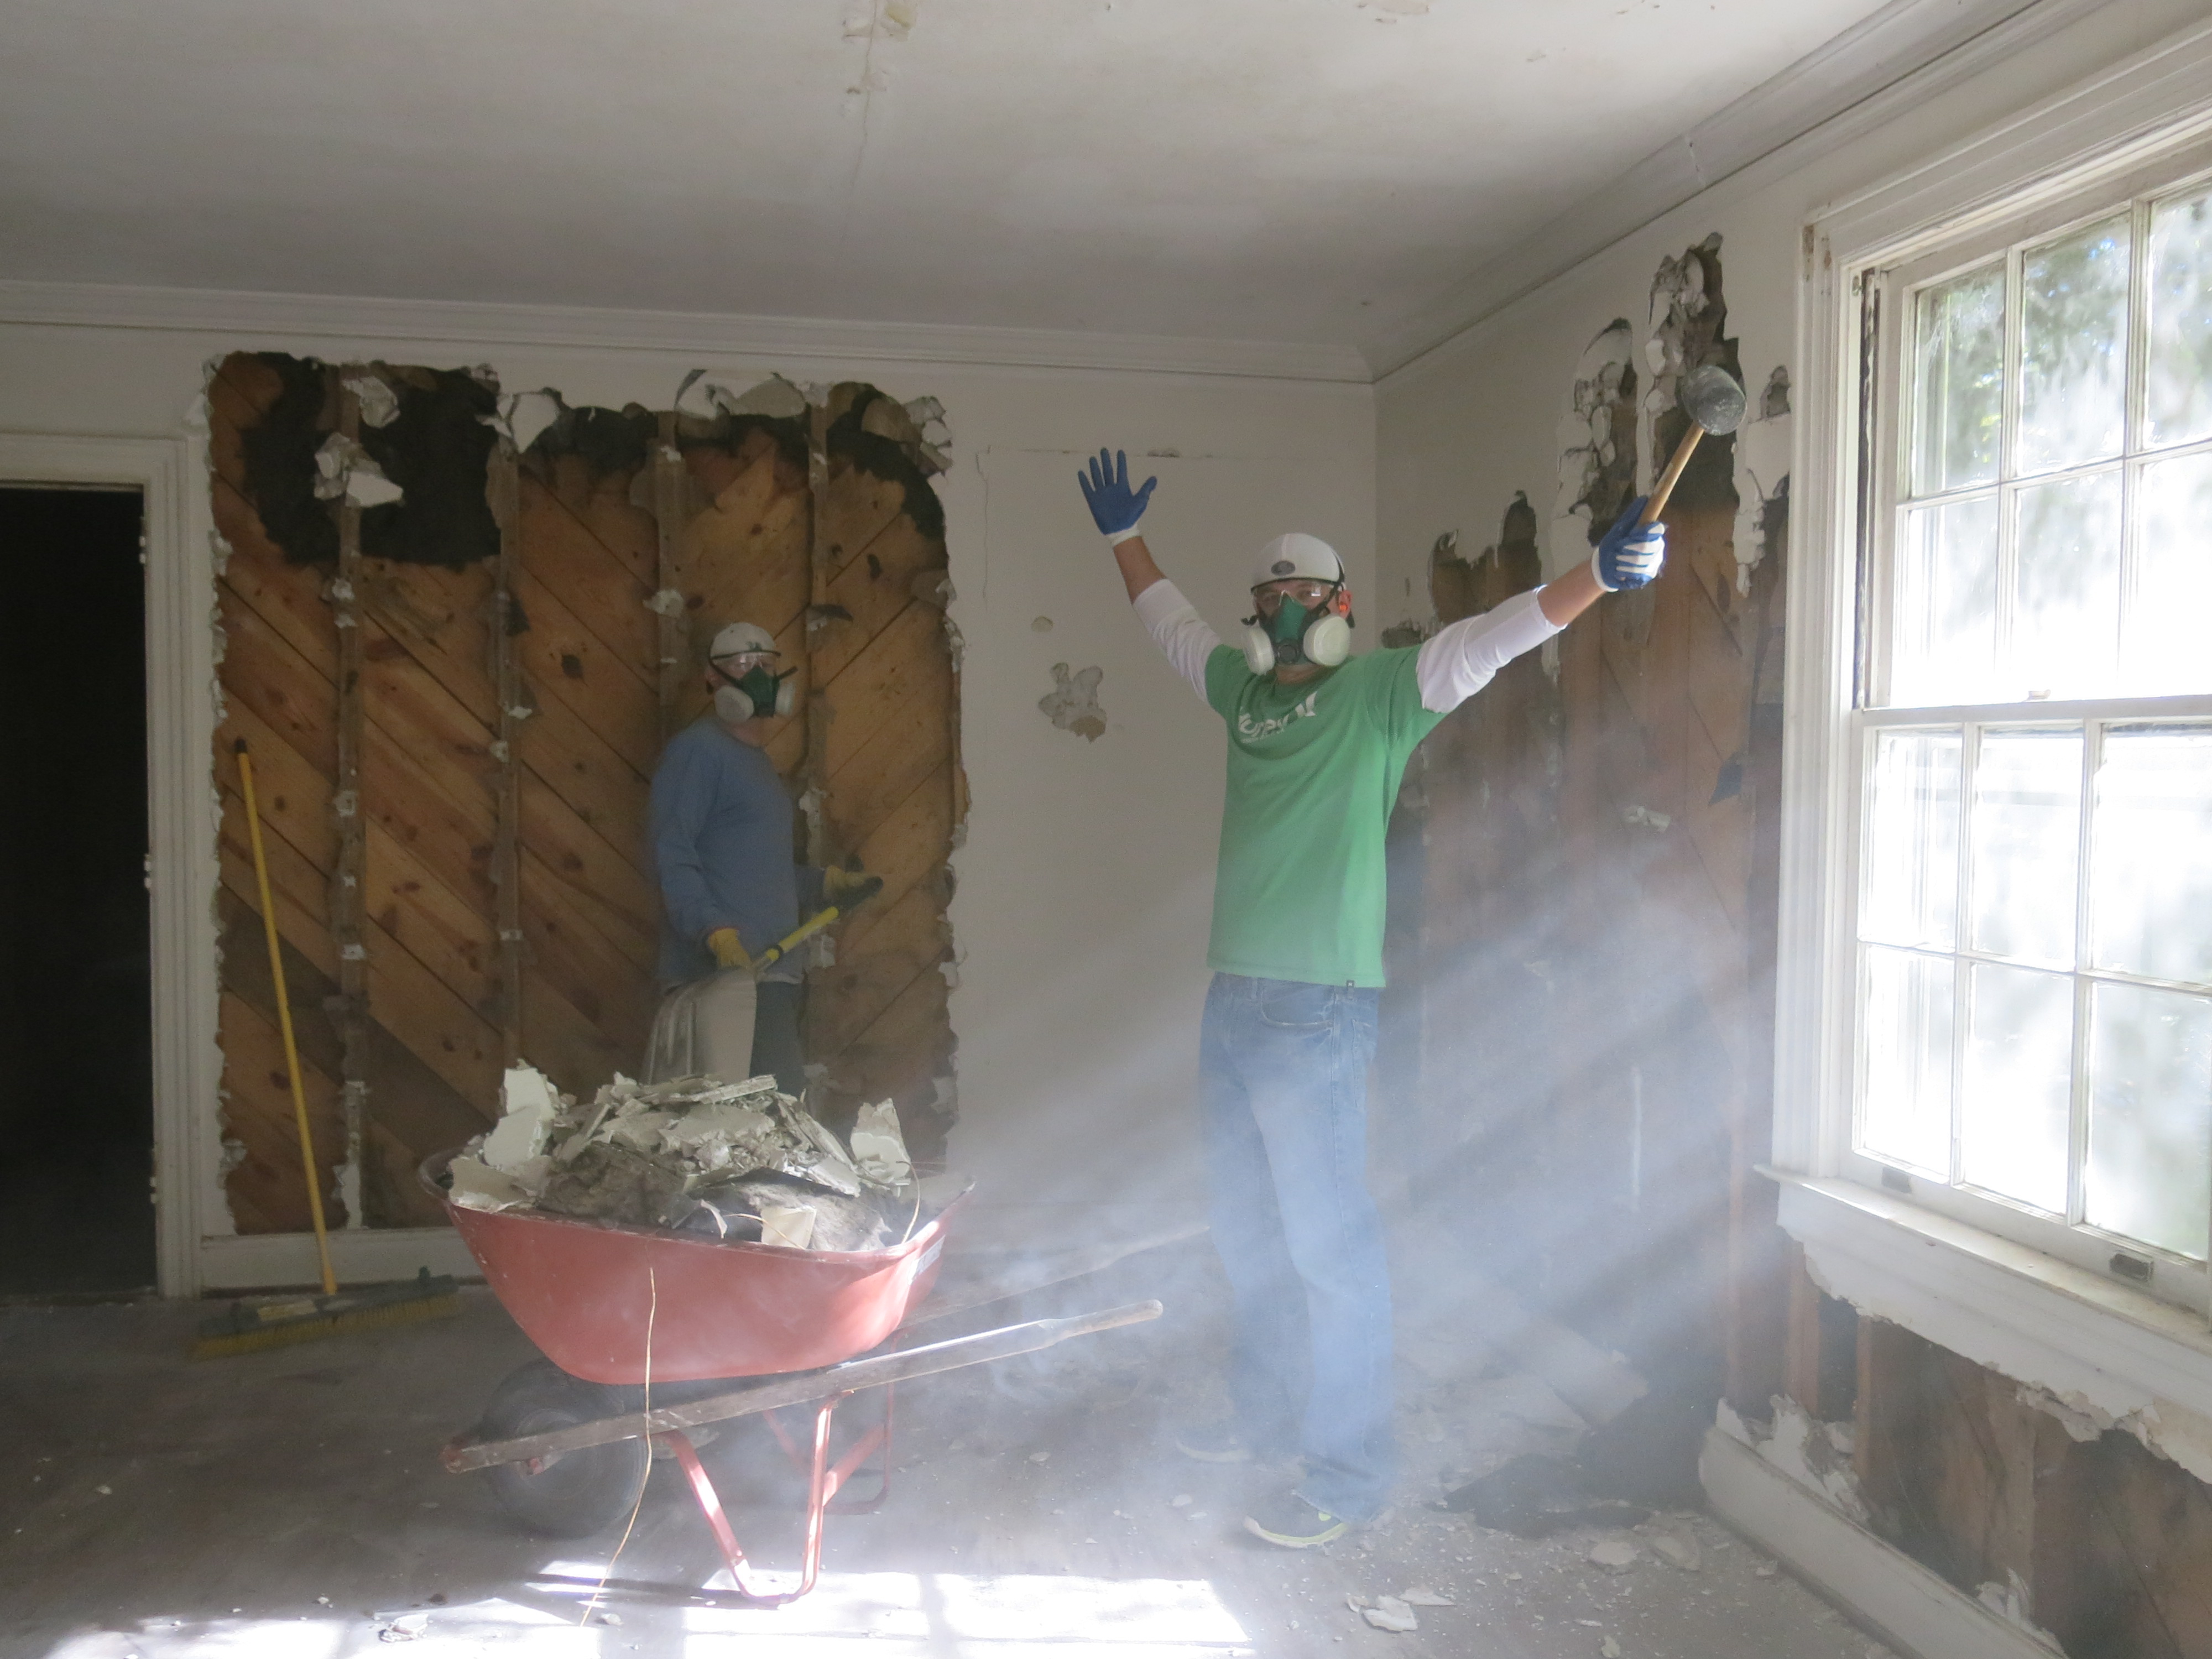
Our family room fireplace has come a loooooong way, my friends. Early on, we knew this was one of our little house’s “problem areas” considering every time it would rain, water would flood in through the firebox.

The Newton Nest_Fireplace Reno_IMG_9394

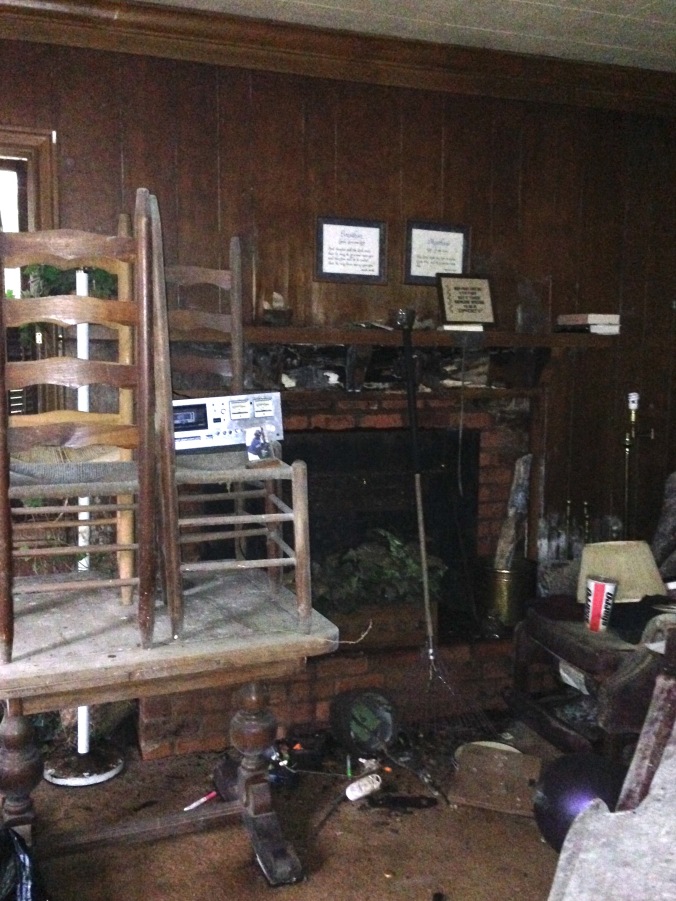
This is a very early “before” picture…like, before we closed and cleaned the belongings out of the house…but you can see the water damage has rotted the entire mantelpiece.

IMG_6937

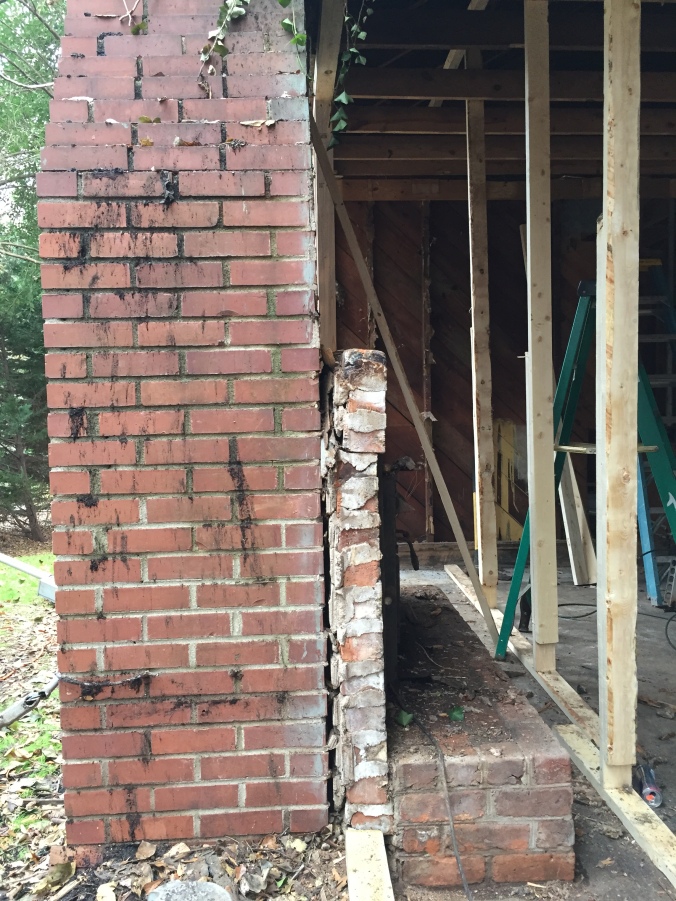
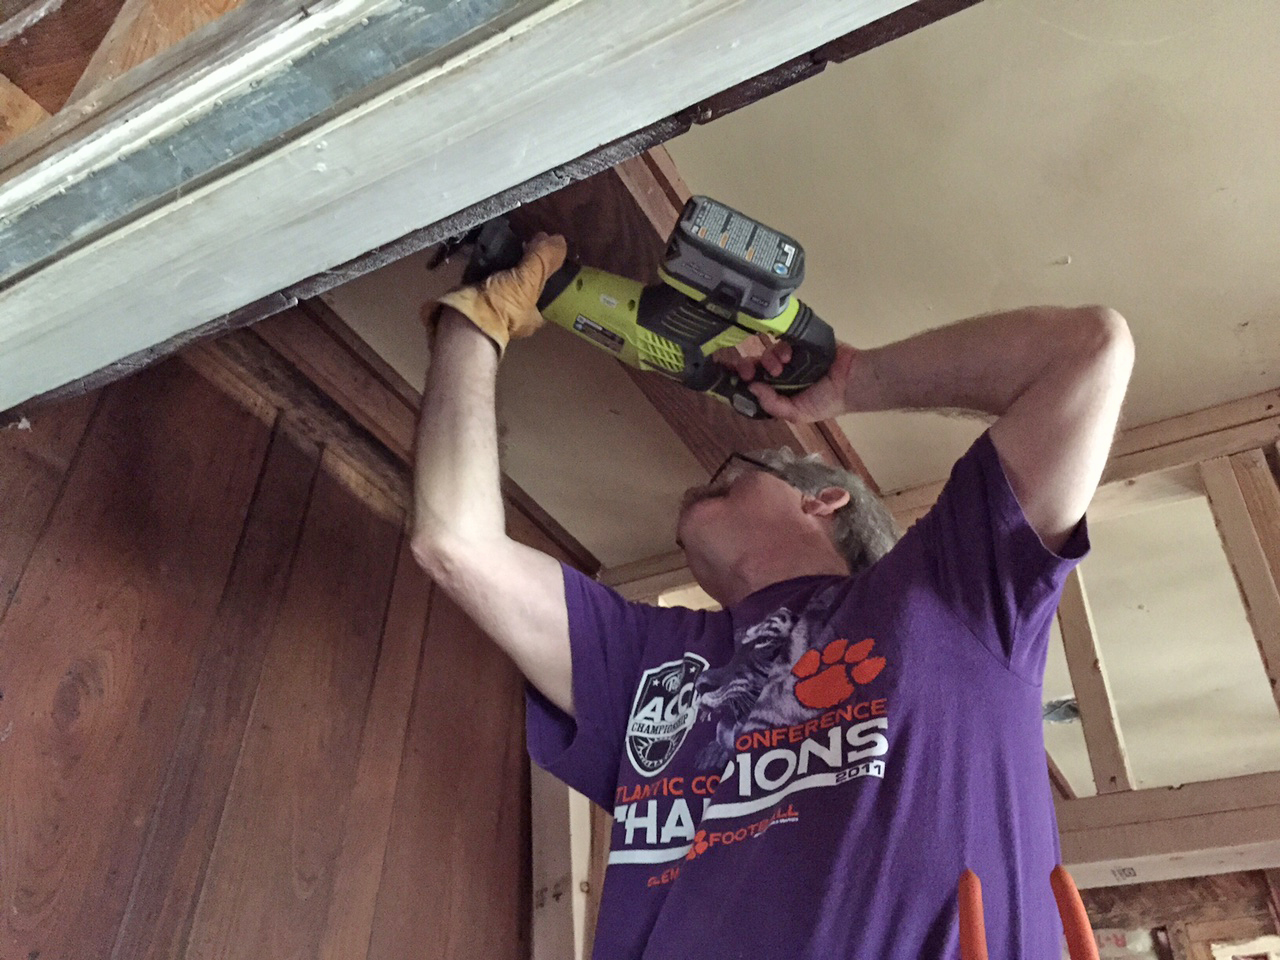
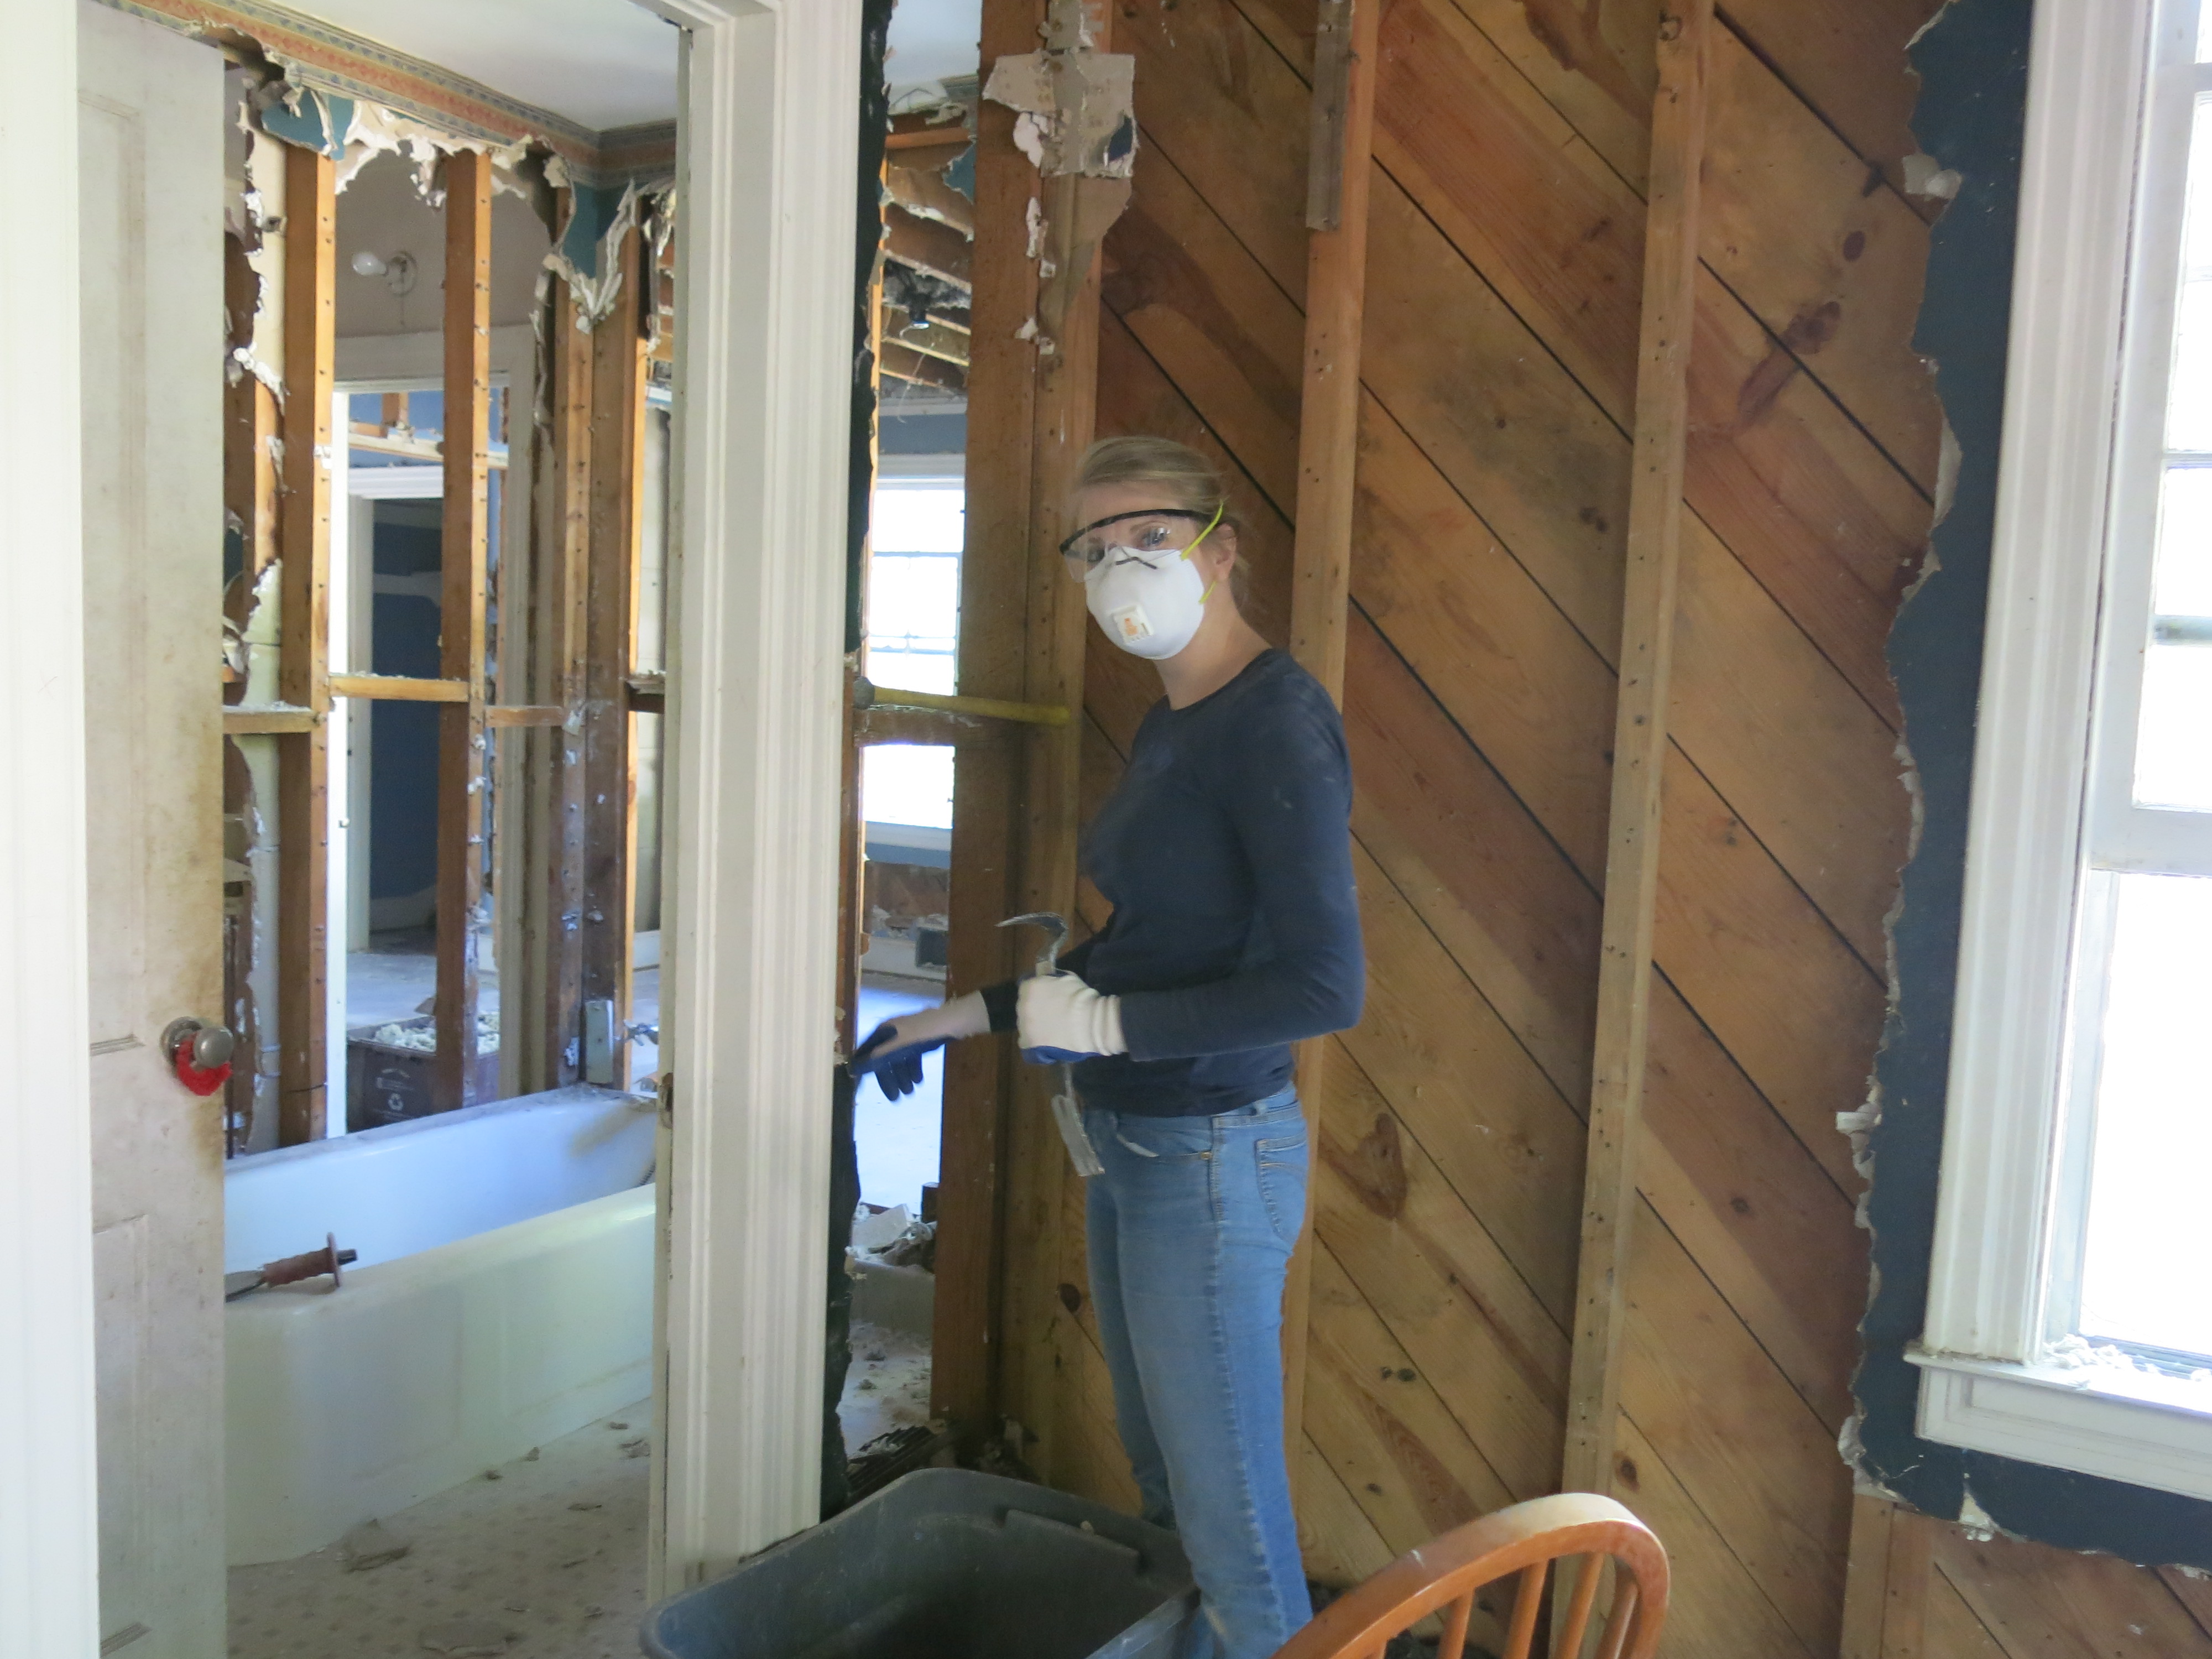
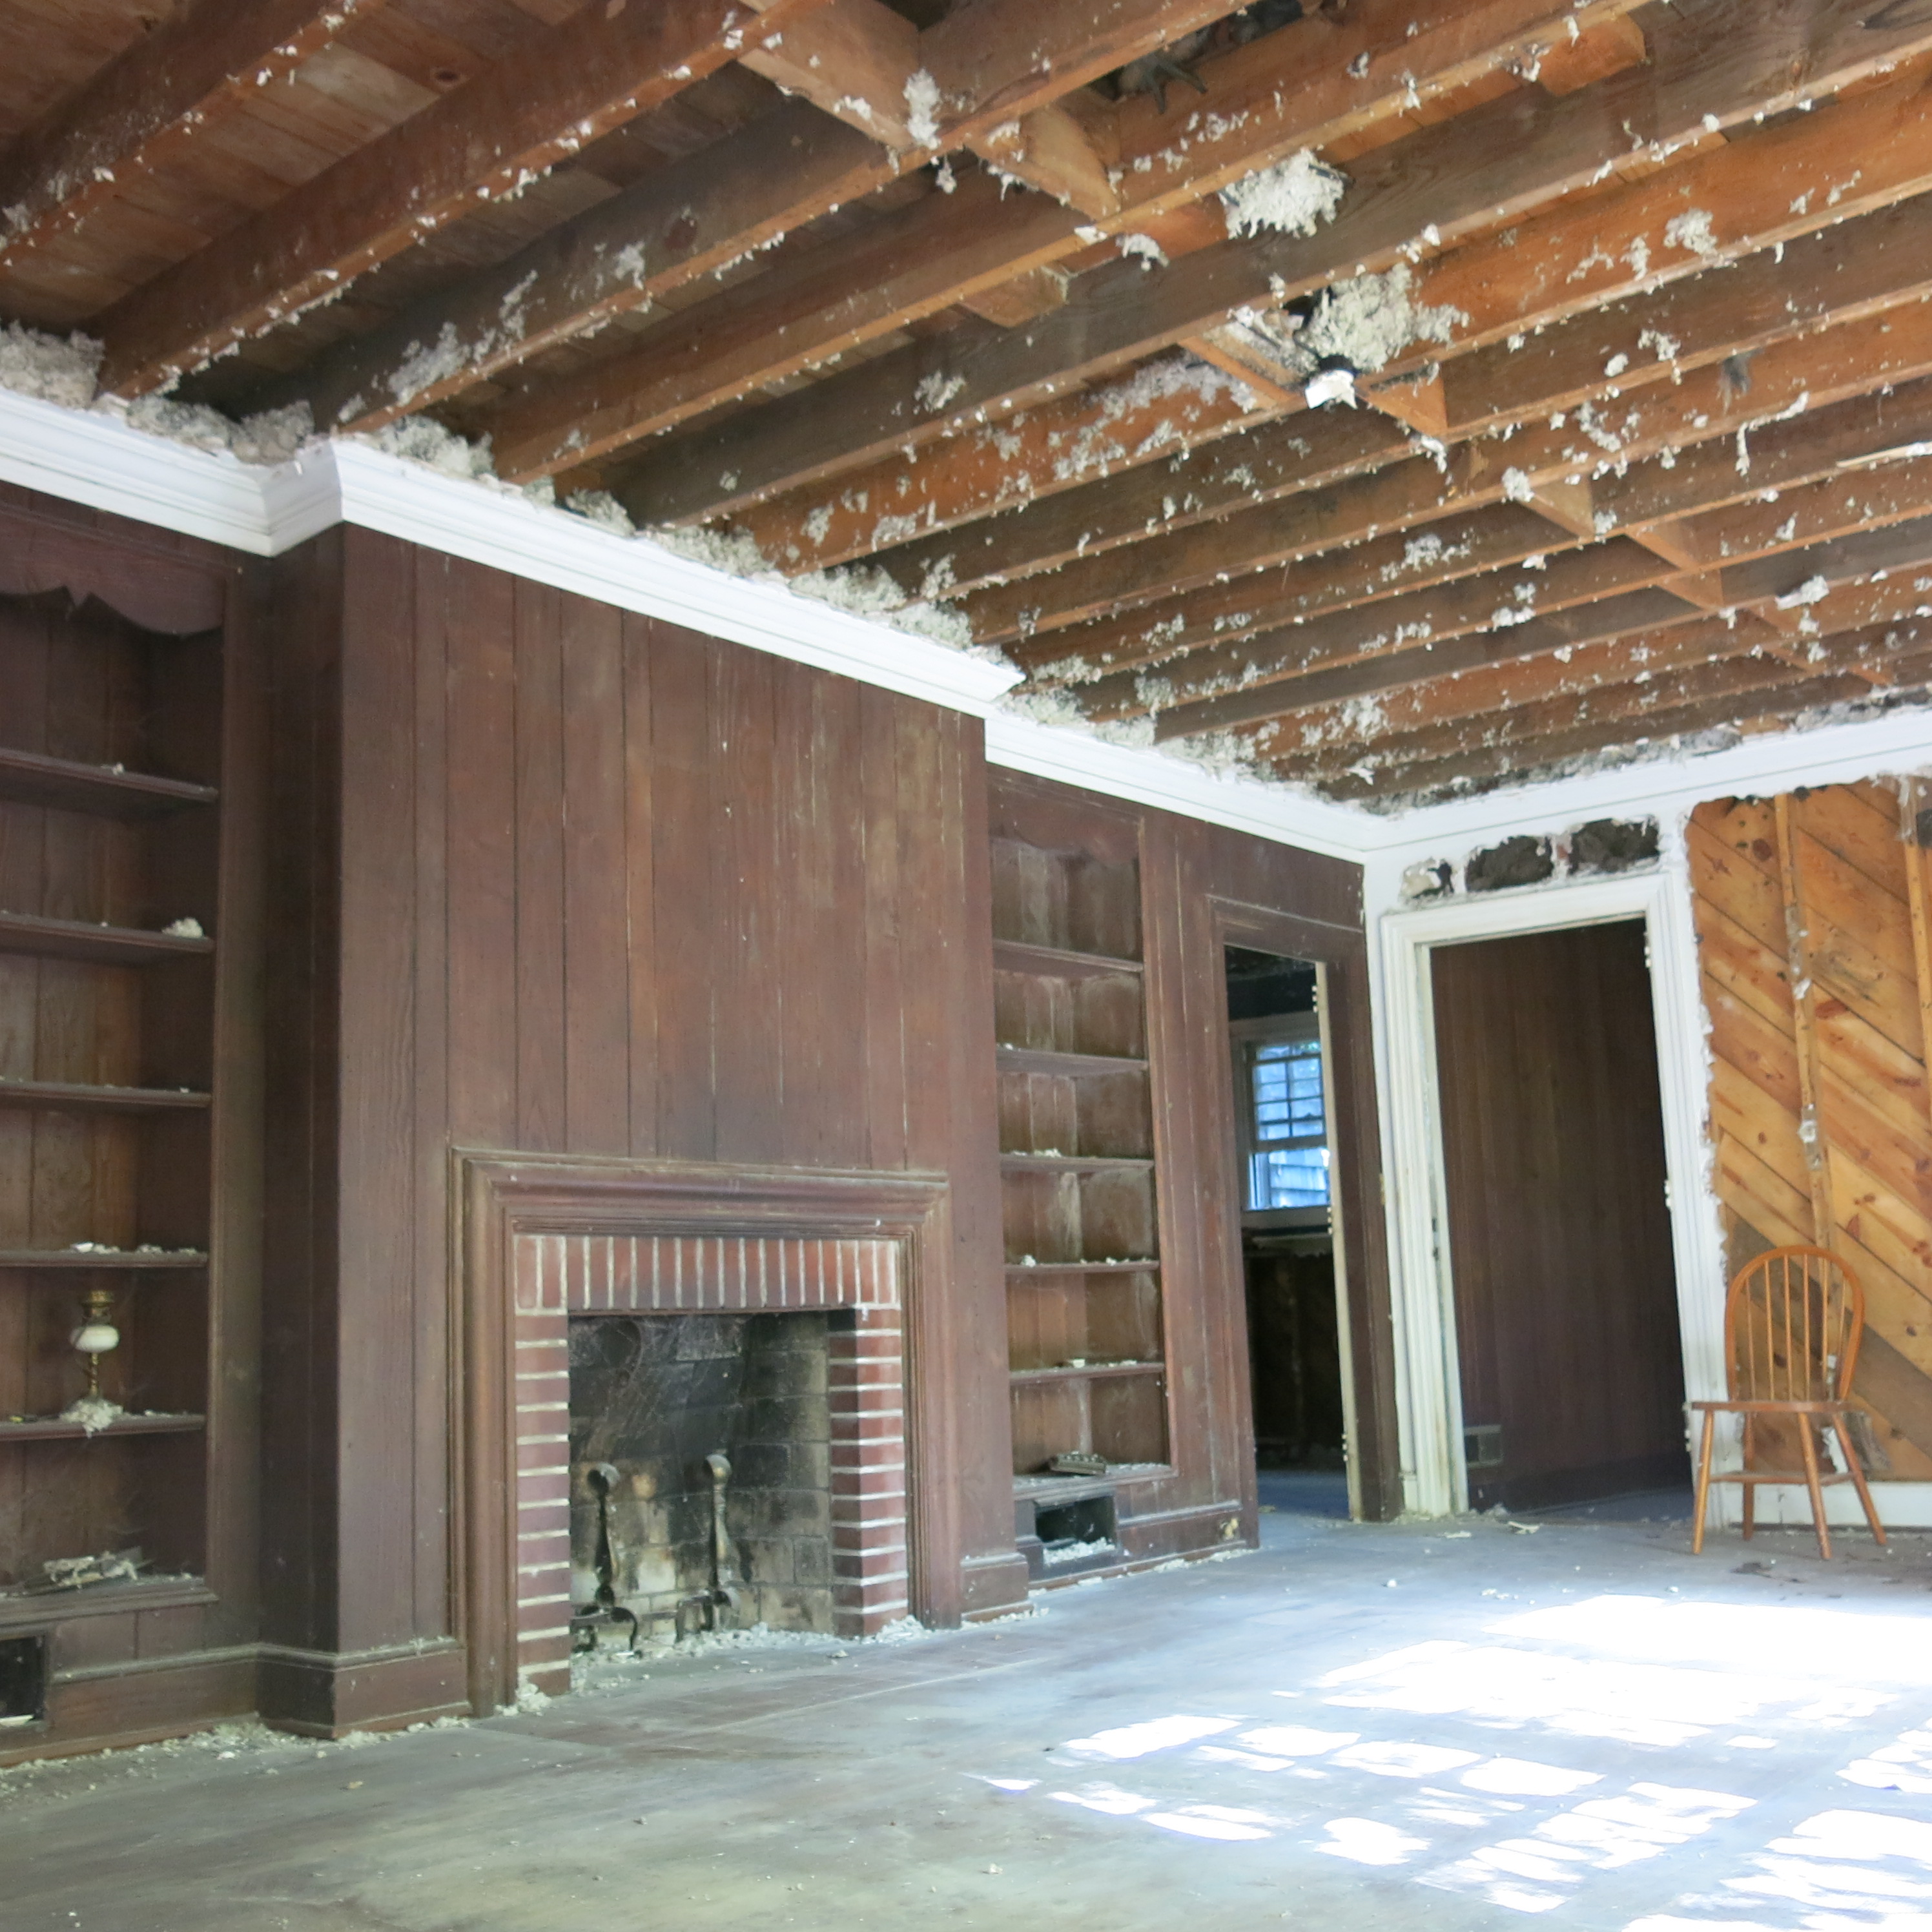
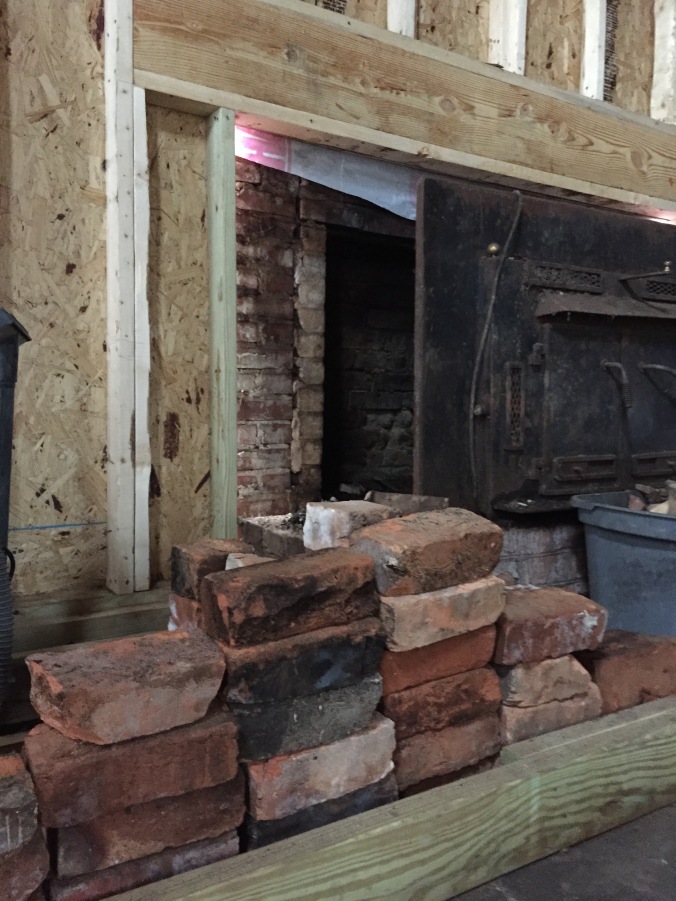
Once we tore away the wall, we discovered that the brick fireplace surround had completely separated from the chimney.

As you may remember, we completely rebuilt the wall on which the fireplace sits and we even contemplated cutting our losses and removing the entire thing (chimney and all) during a moment of insanity. But with the help of some professionals, we were able to diagnose the problem, repair the chimney and rebuild the firebox.

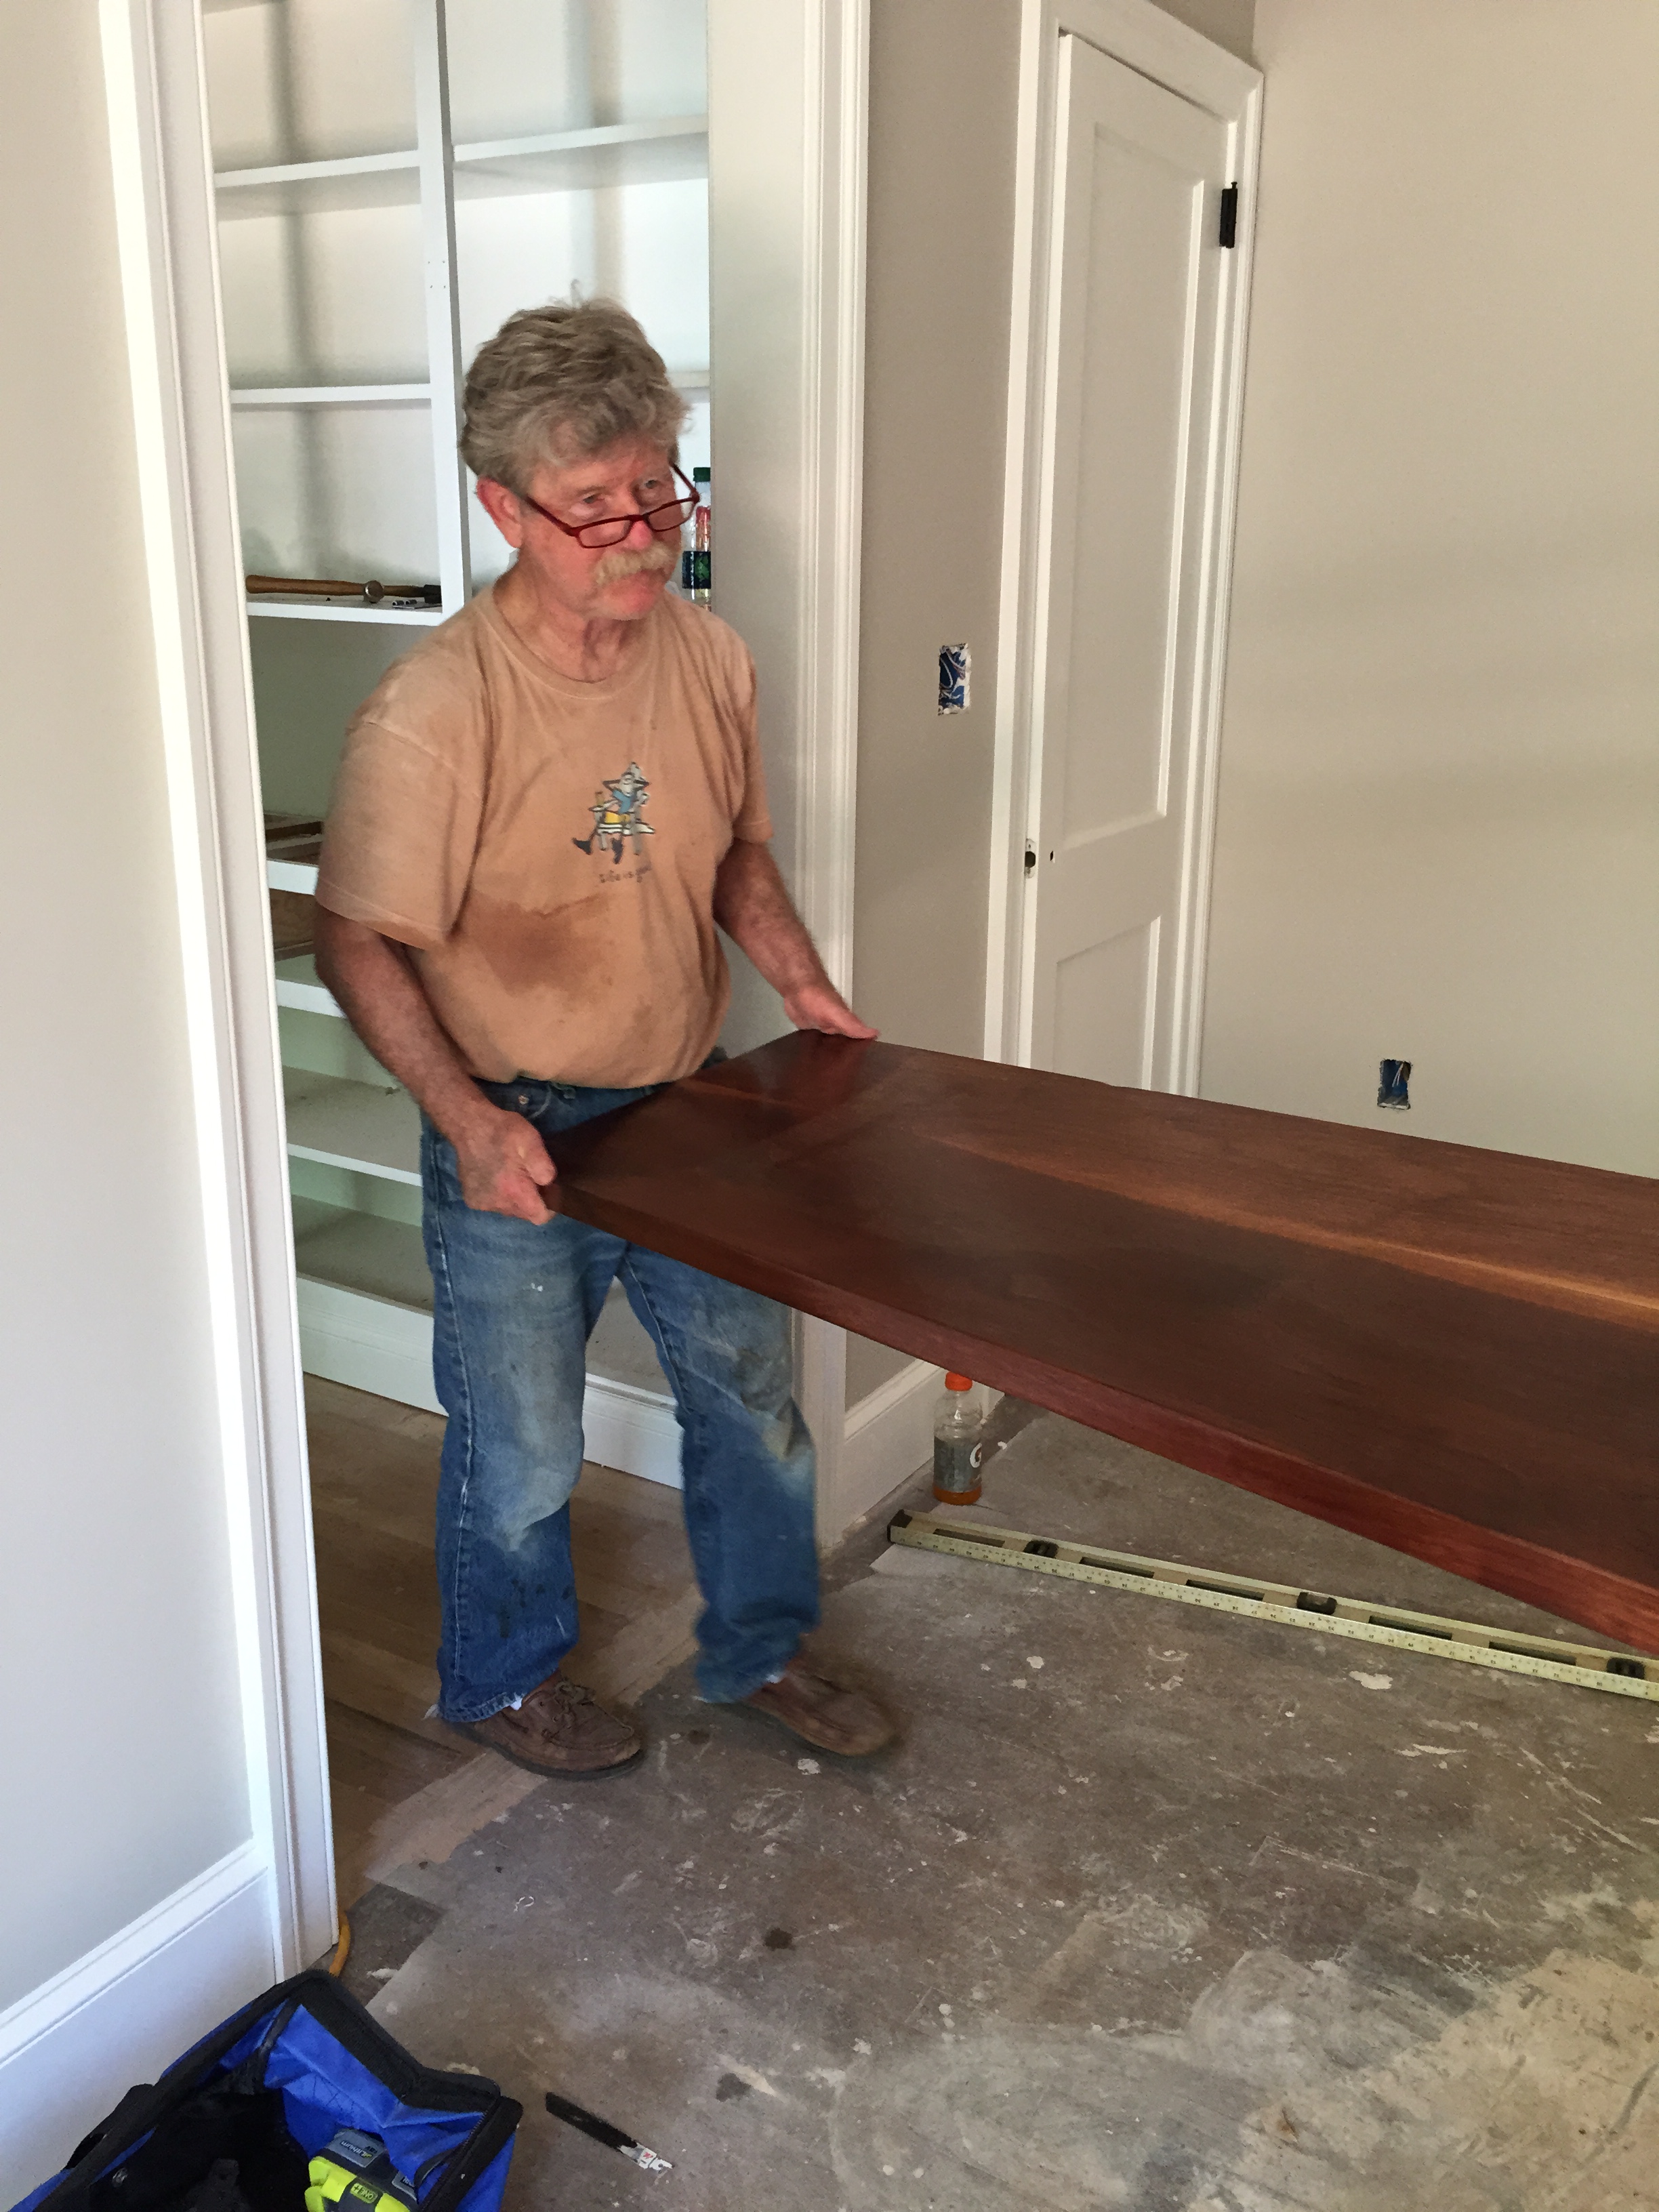
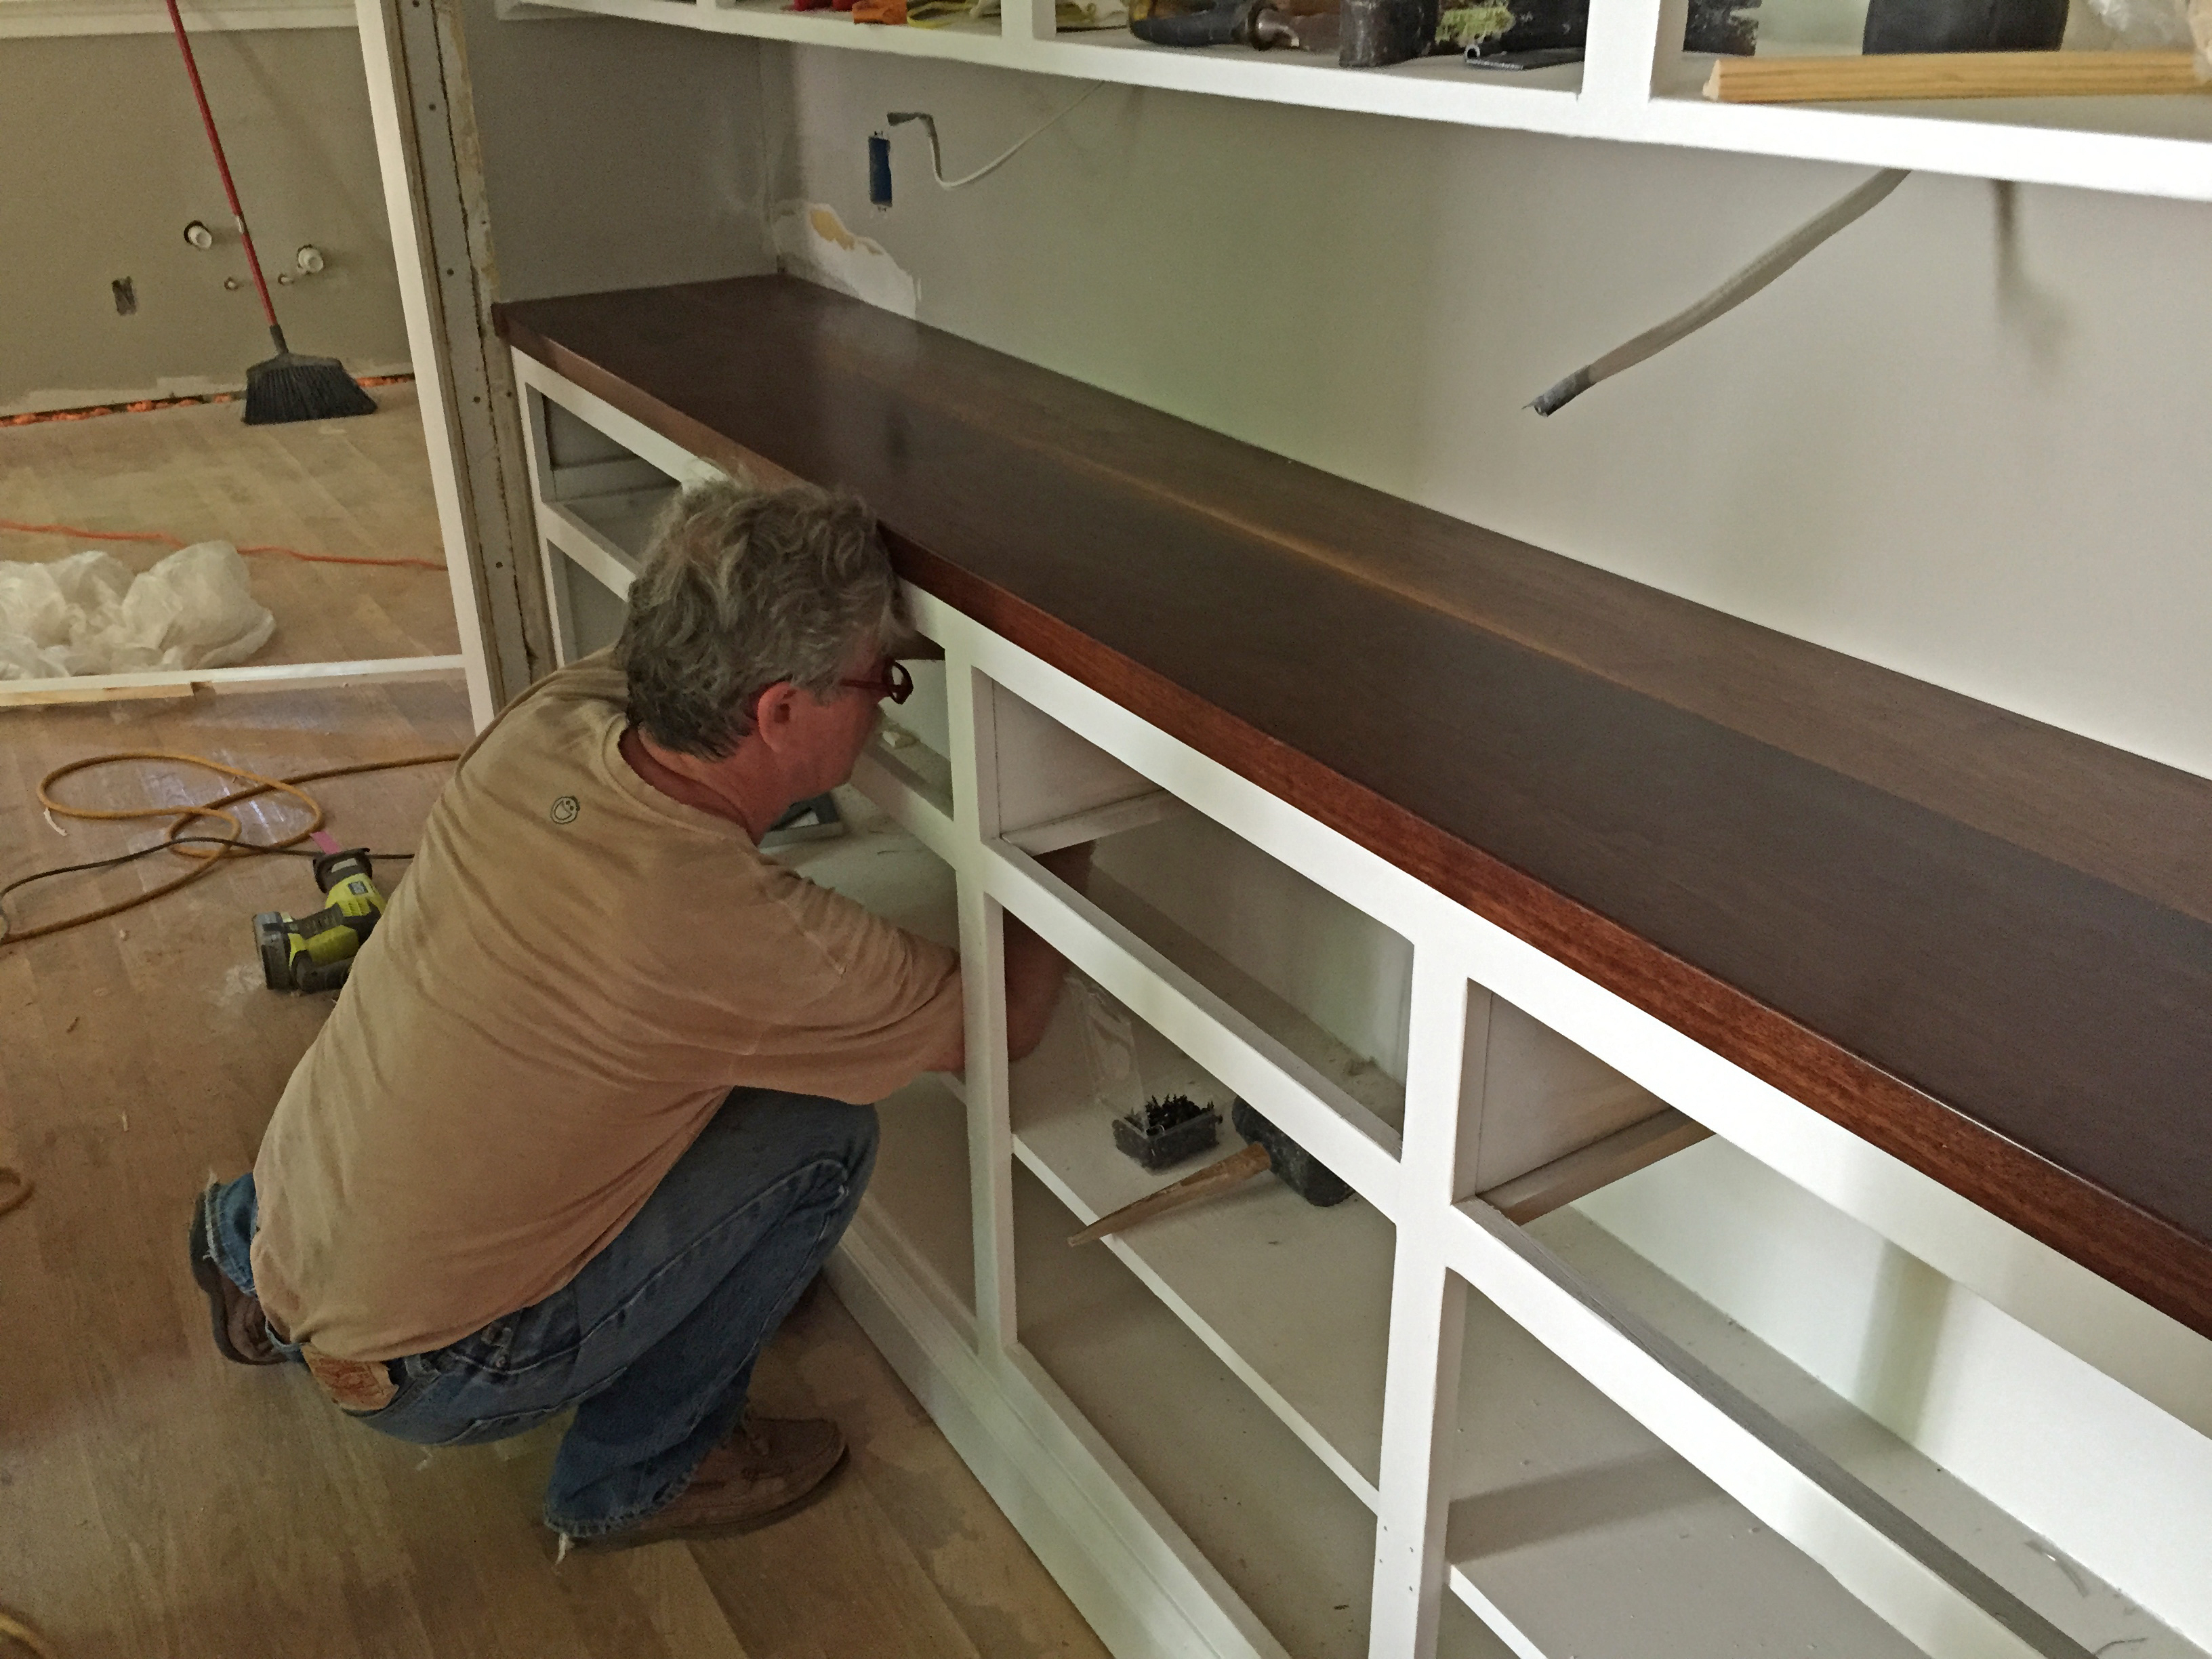
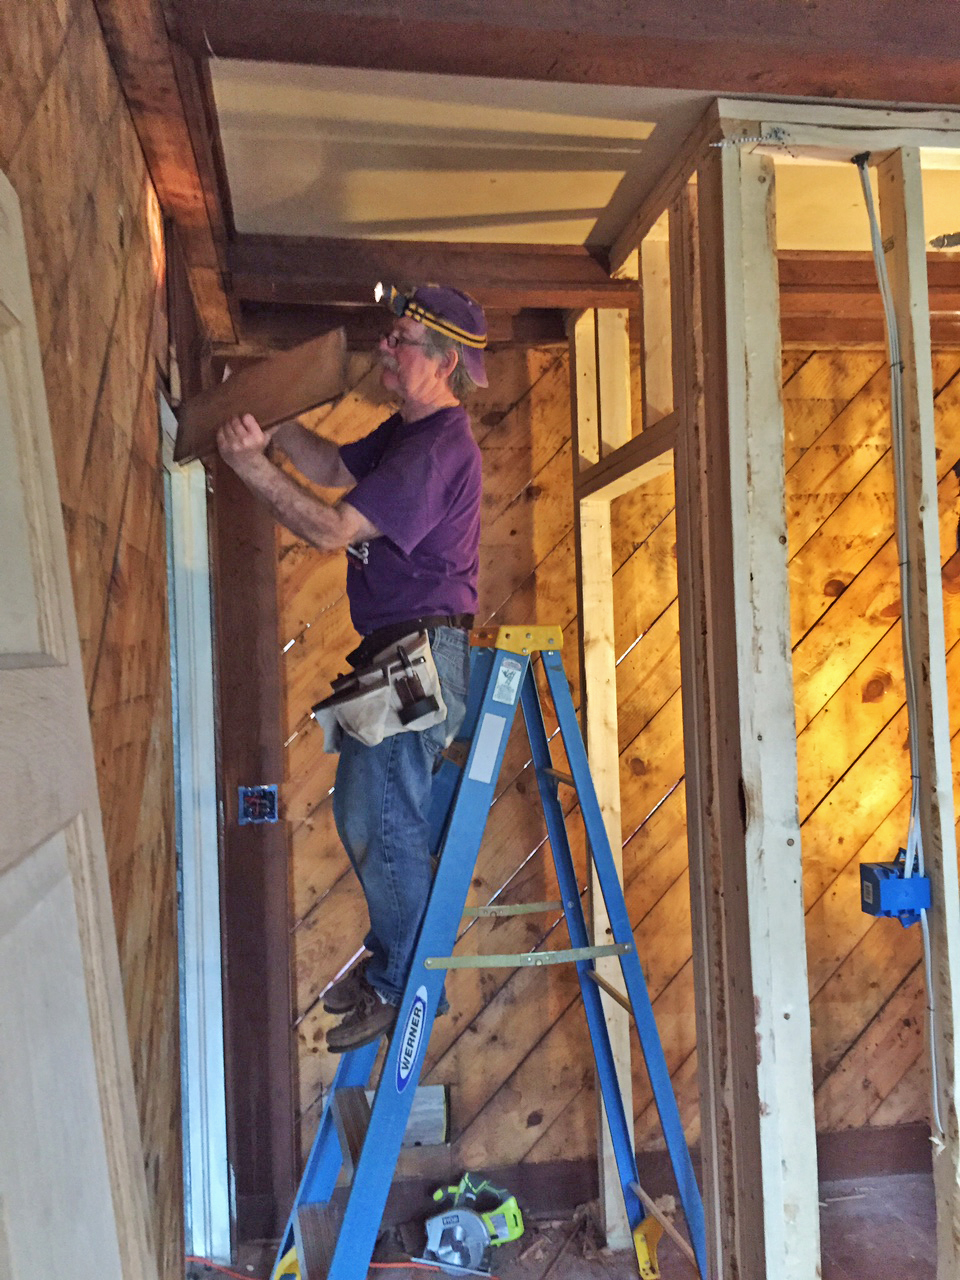
With all the brickwork complete, it was starting to look like a proper fireplace again…except we were still missing the crowned jewel, our mantelpiece!

Since our family room is open to the kitchen, we decided to stay with the same simple shaker-style look as with our cabinets. We think it turned out pretty nice:
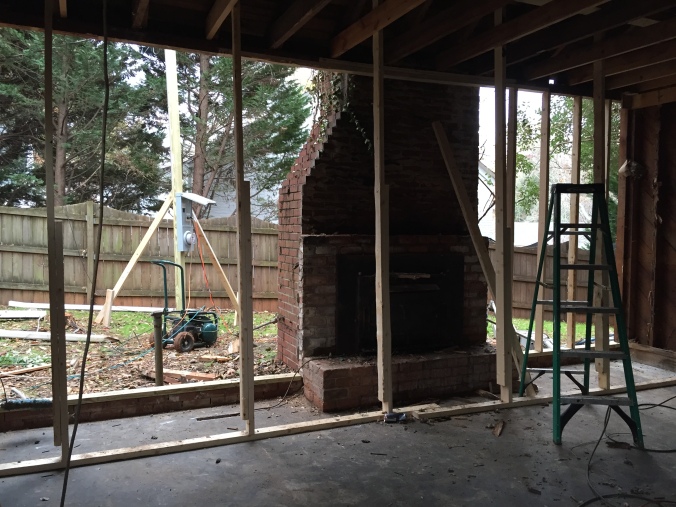
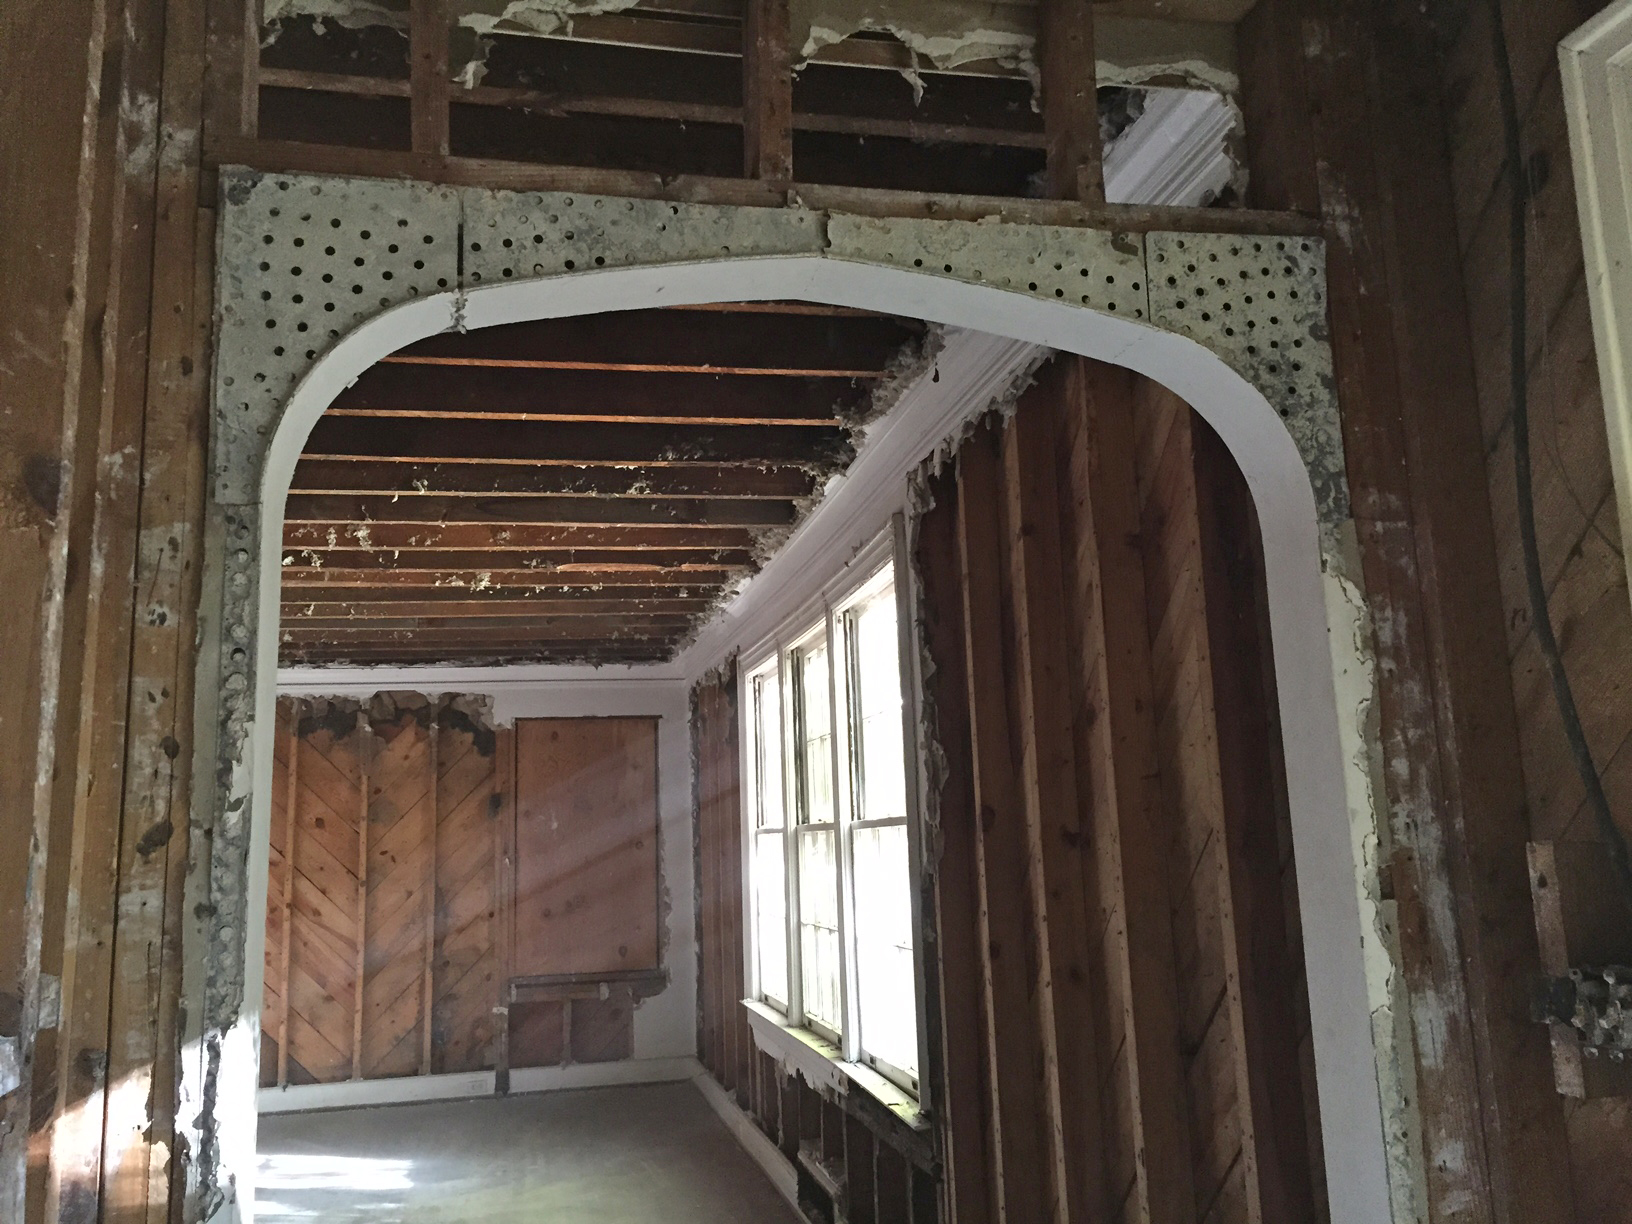
The Newton Nest_Fireplace Reno_IMG_6923

Bye, wall!

The Newton Nest_Fireplace Reno_IMG_7150 copy

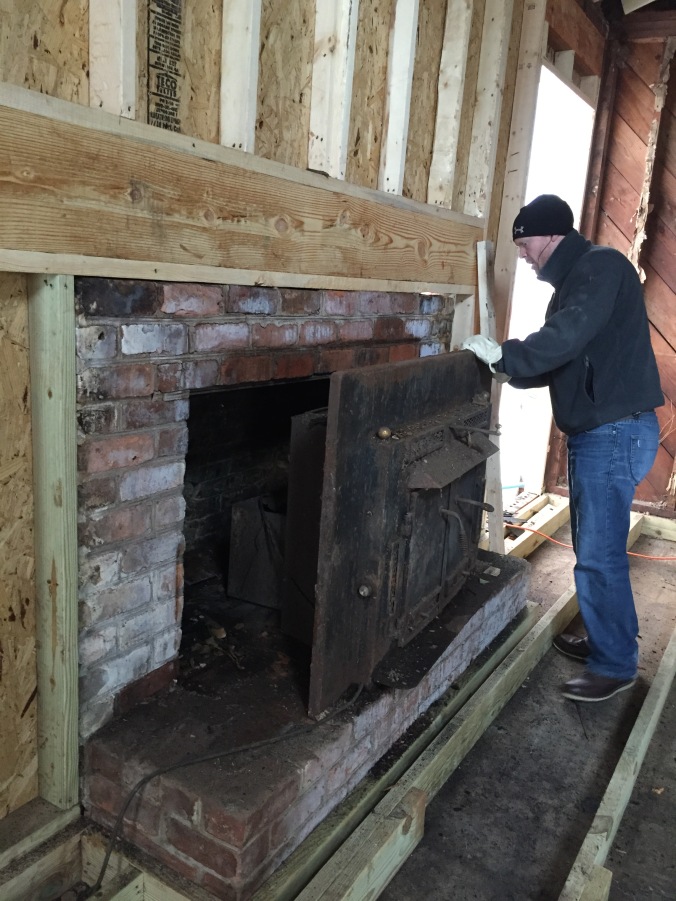
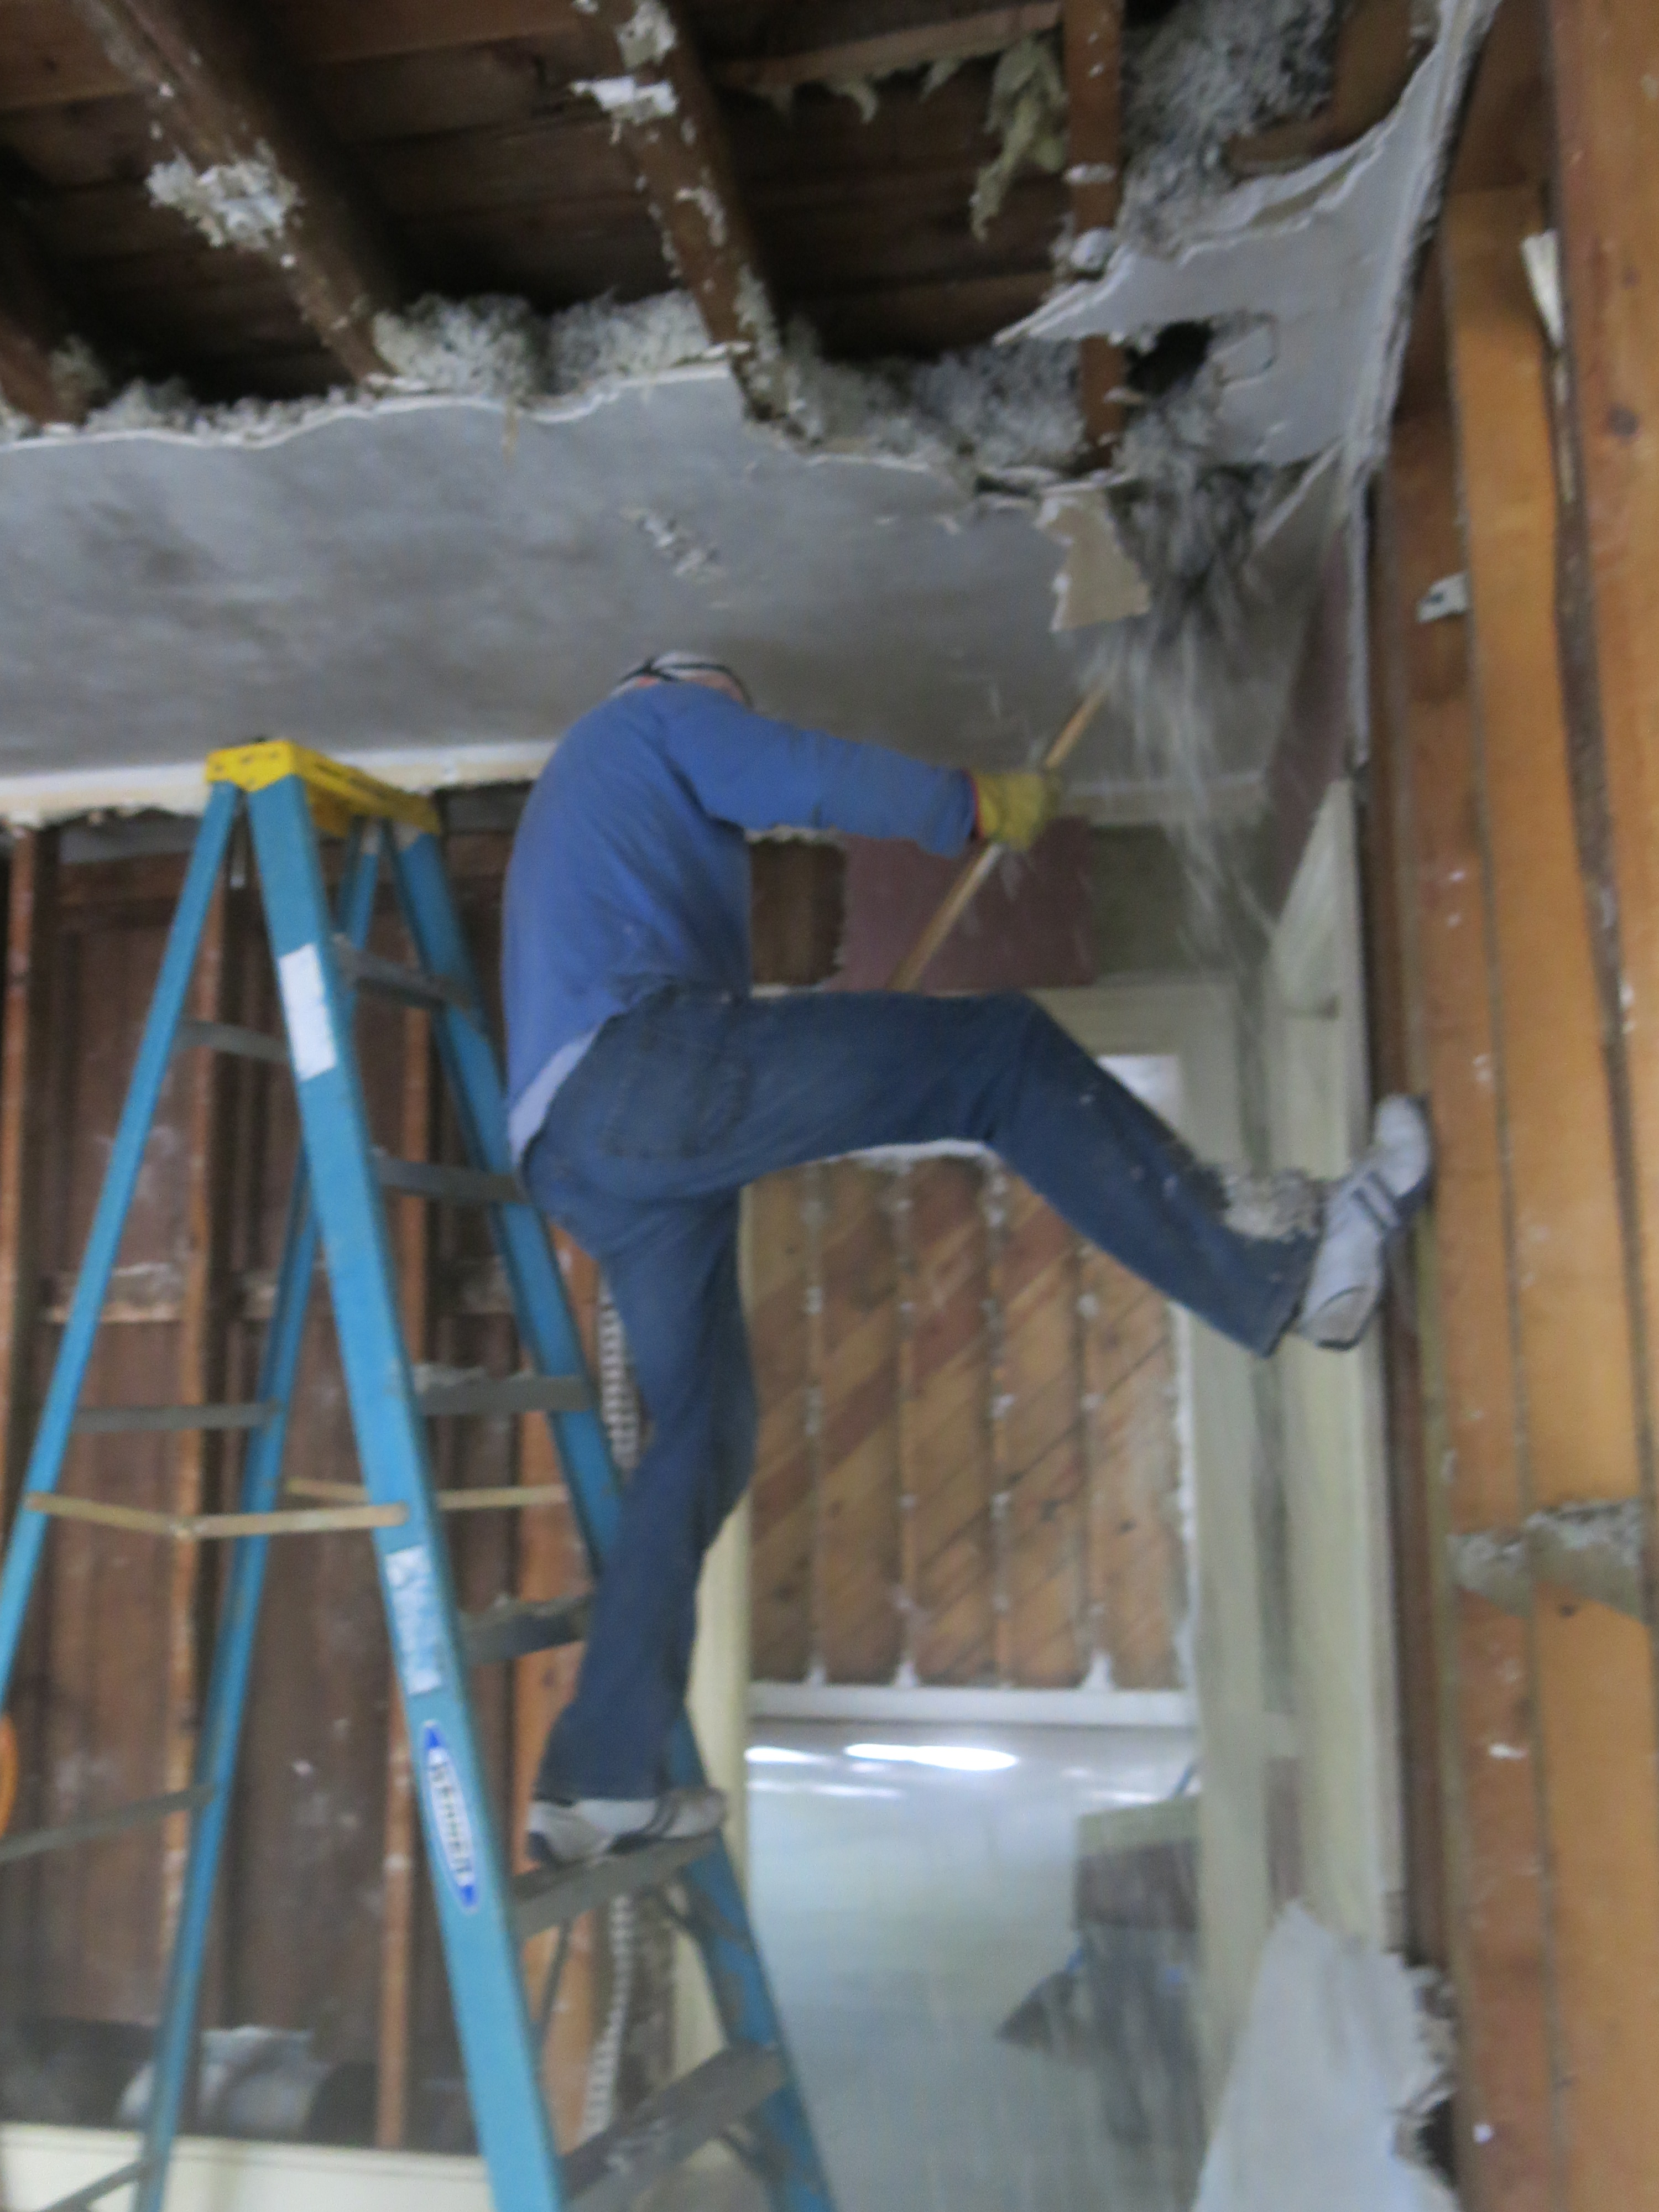
Matthew surveying the scene and contemplating how to remove the very old and very heavy iron stove insert…

The Newton Nest_Fireplace Reno_IMG_7151

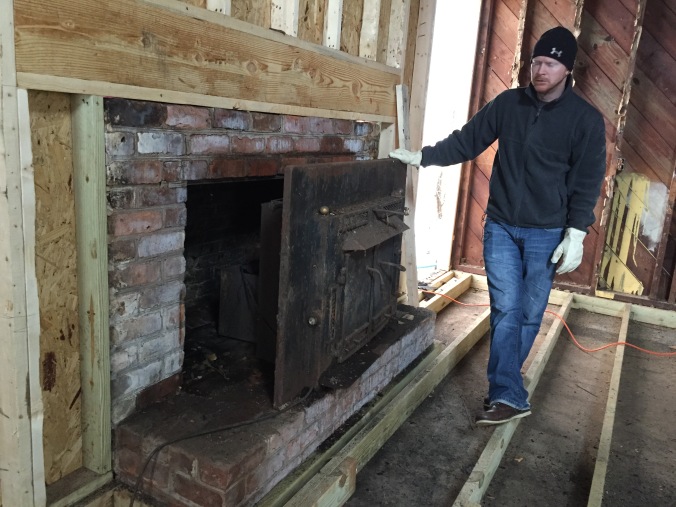
…realizing this is not a one-man job.

The Newton Nest_Fireplace Reno_

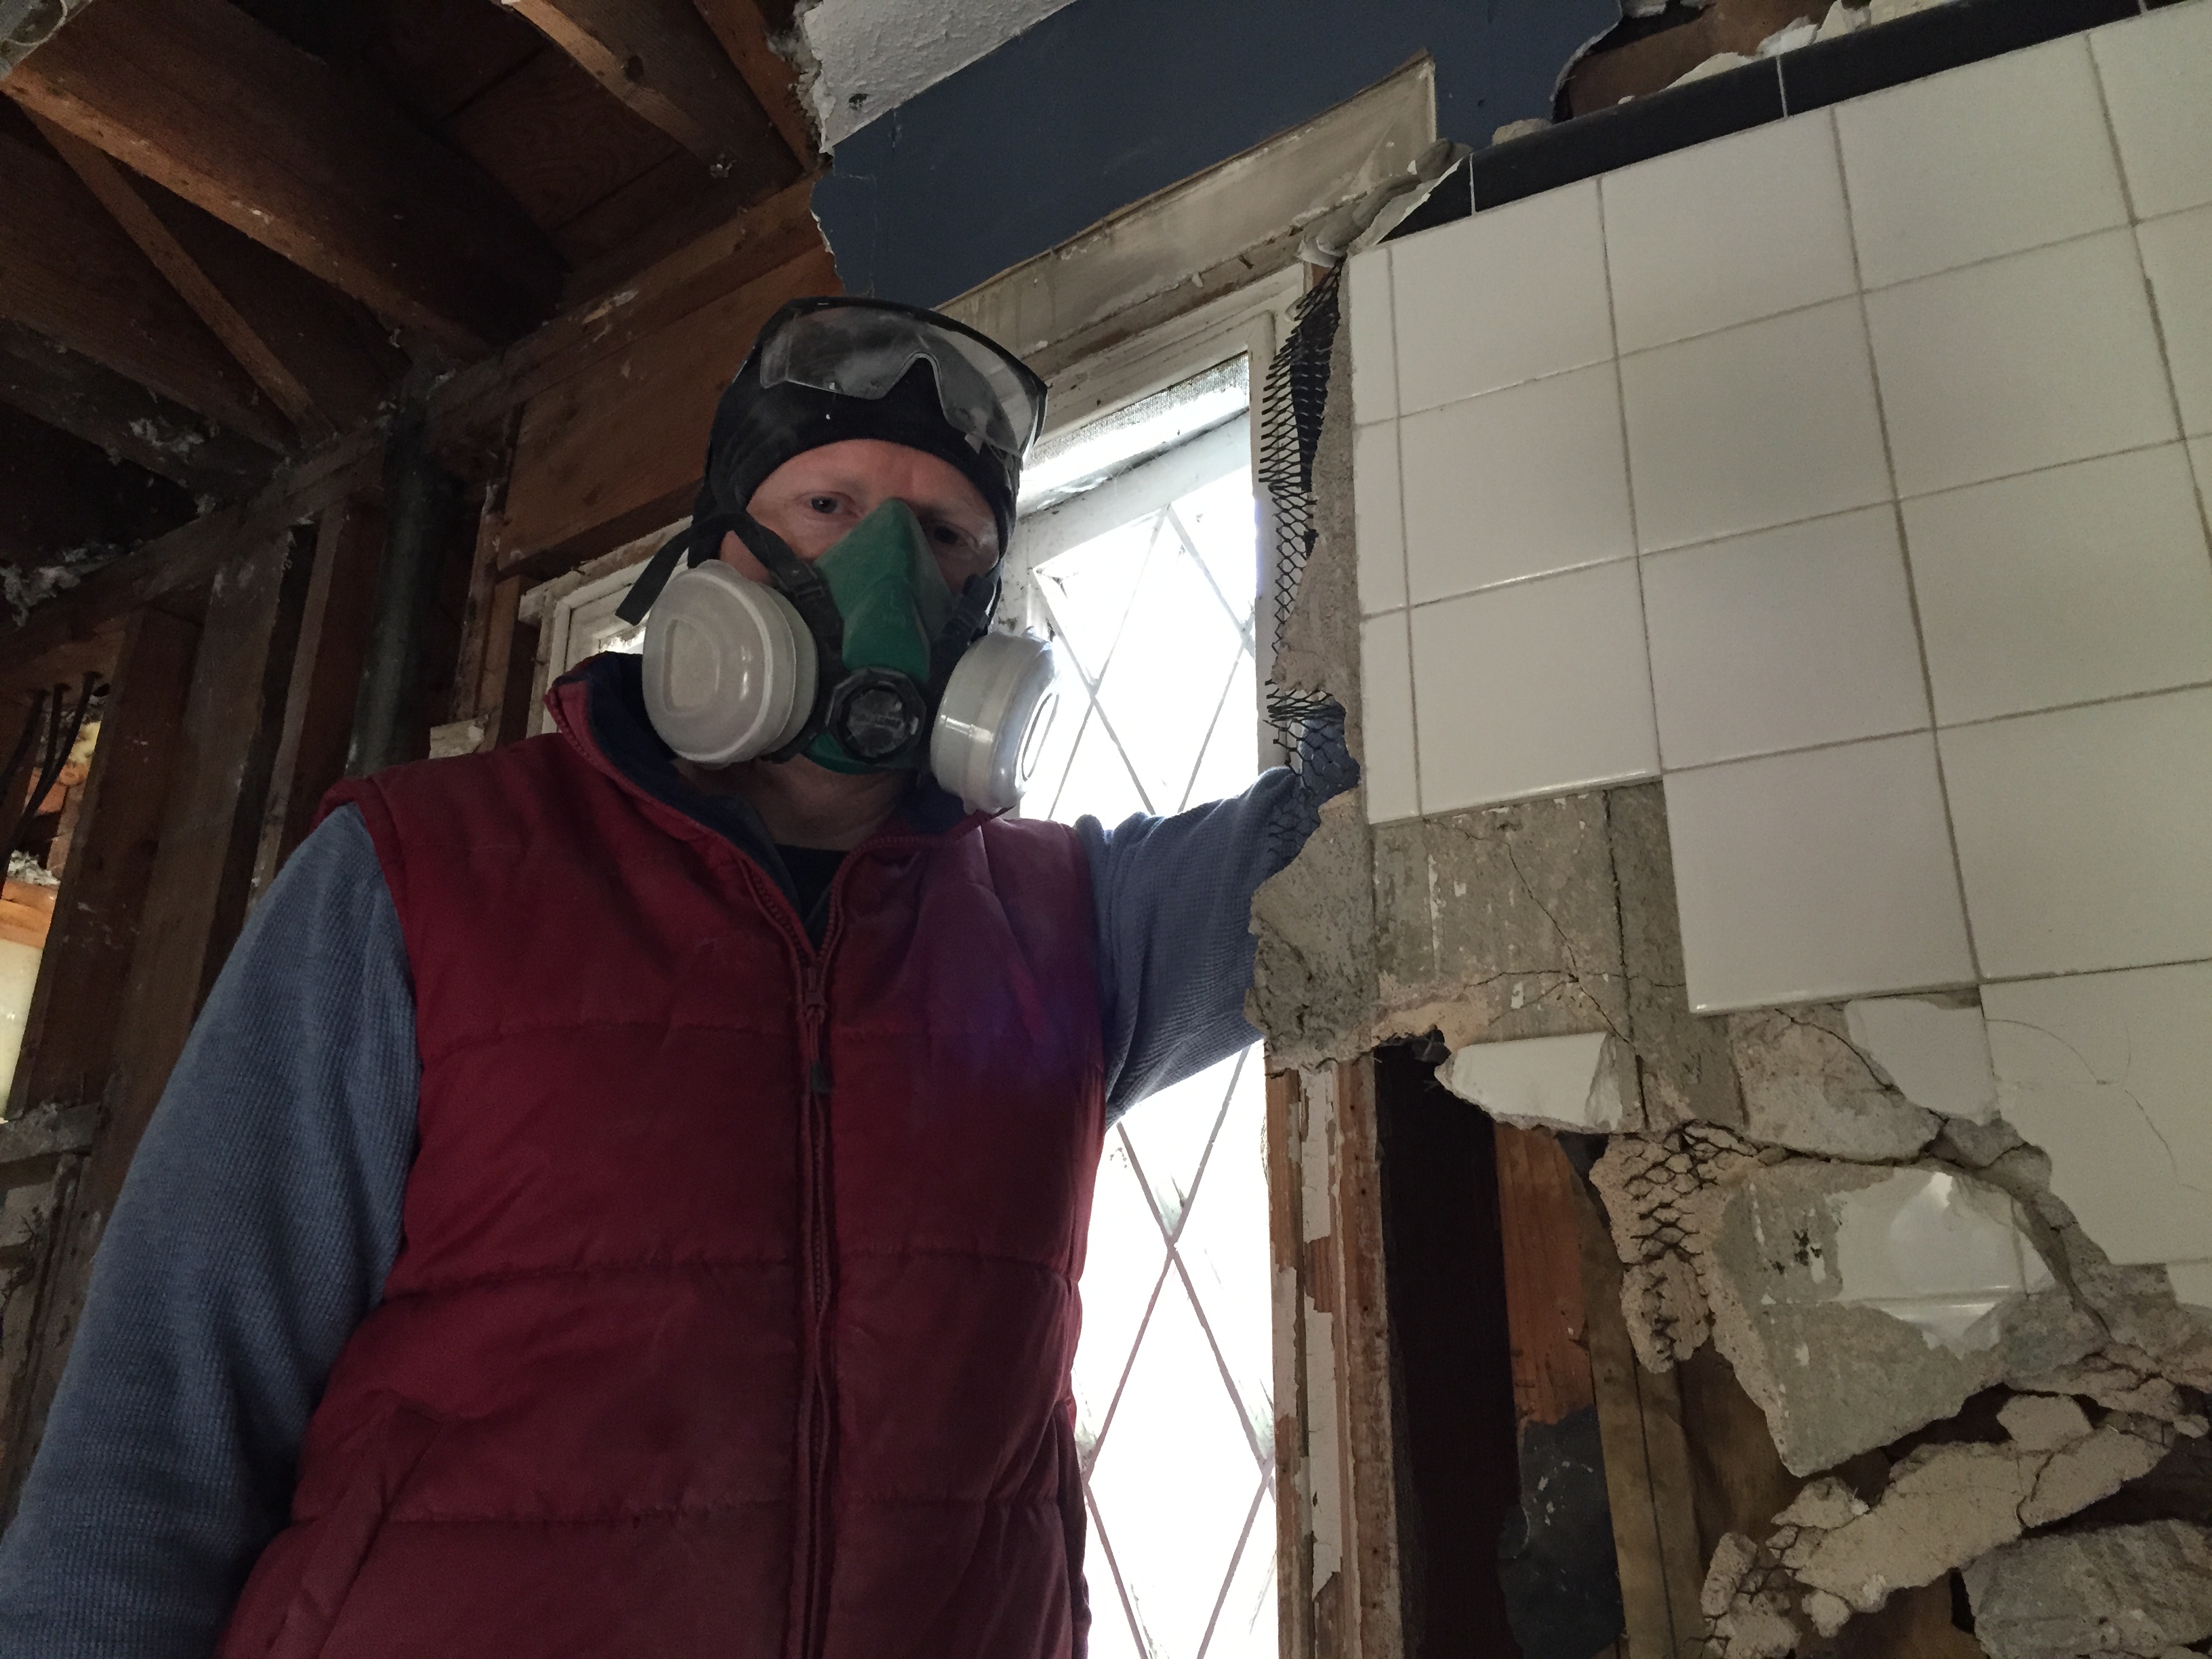
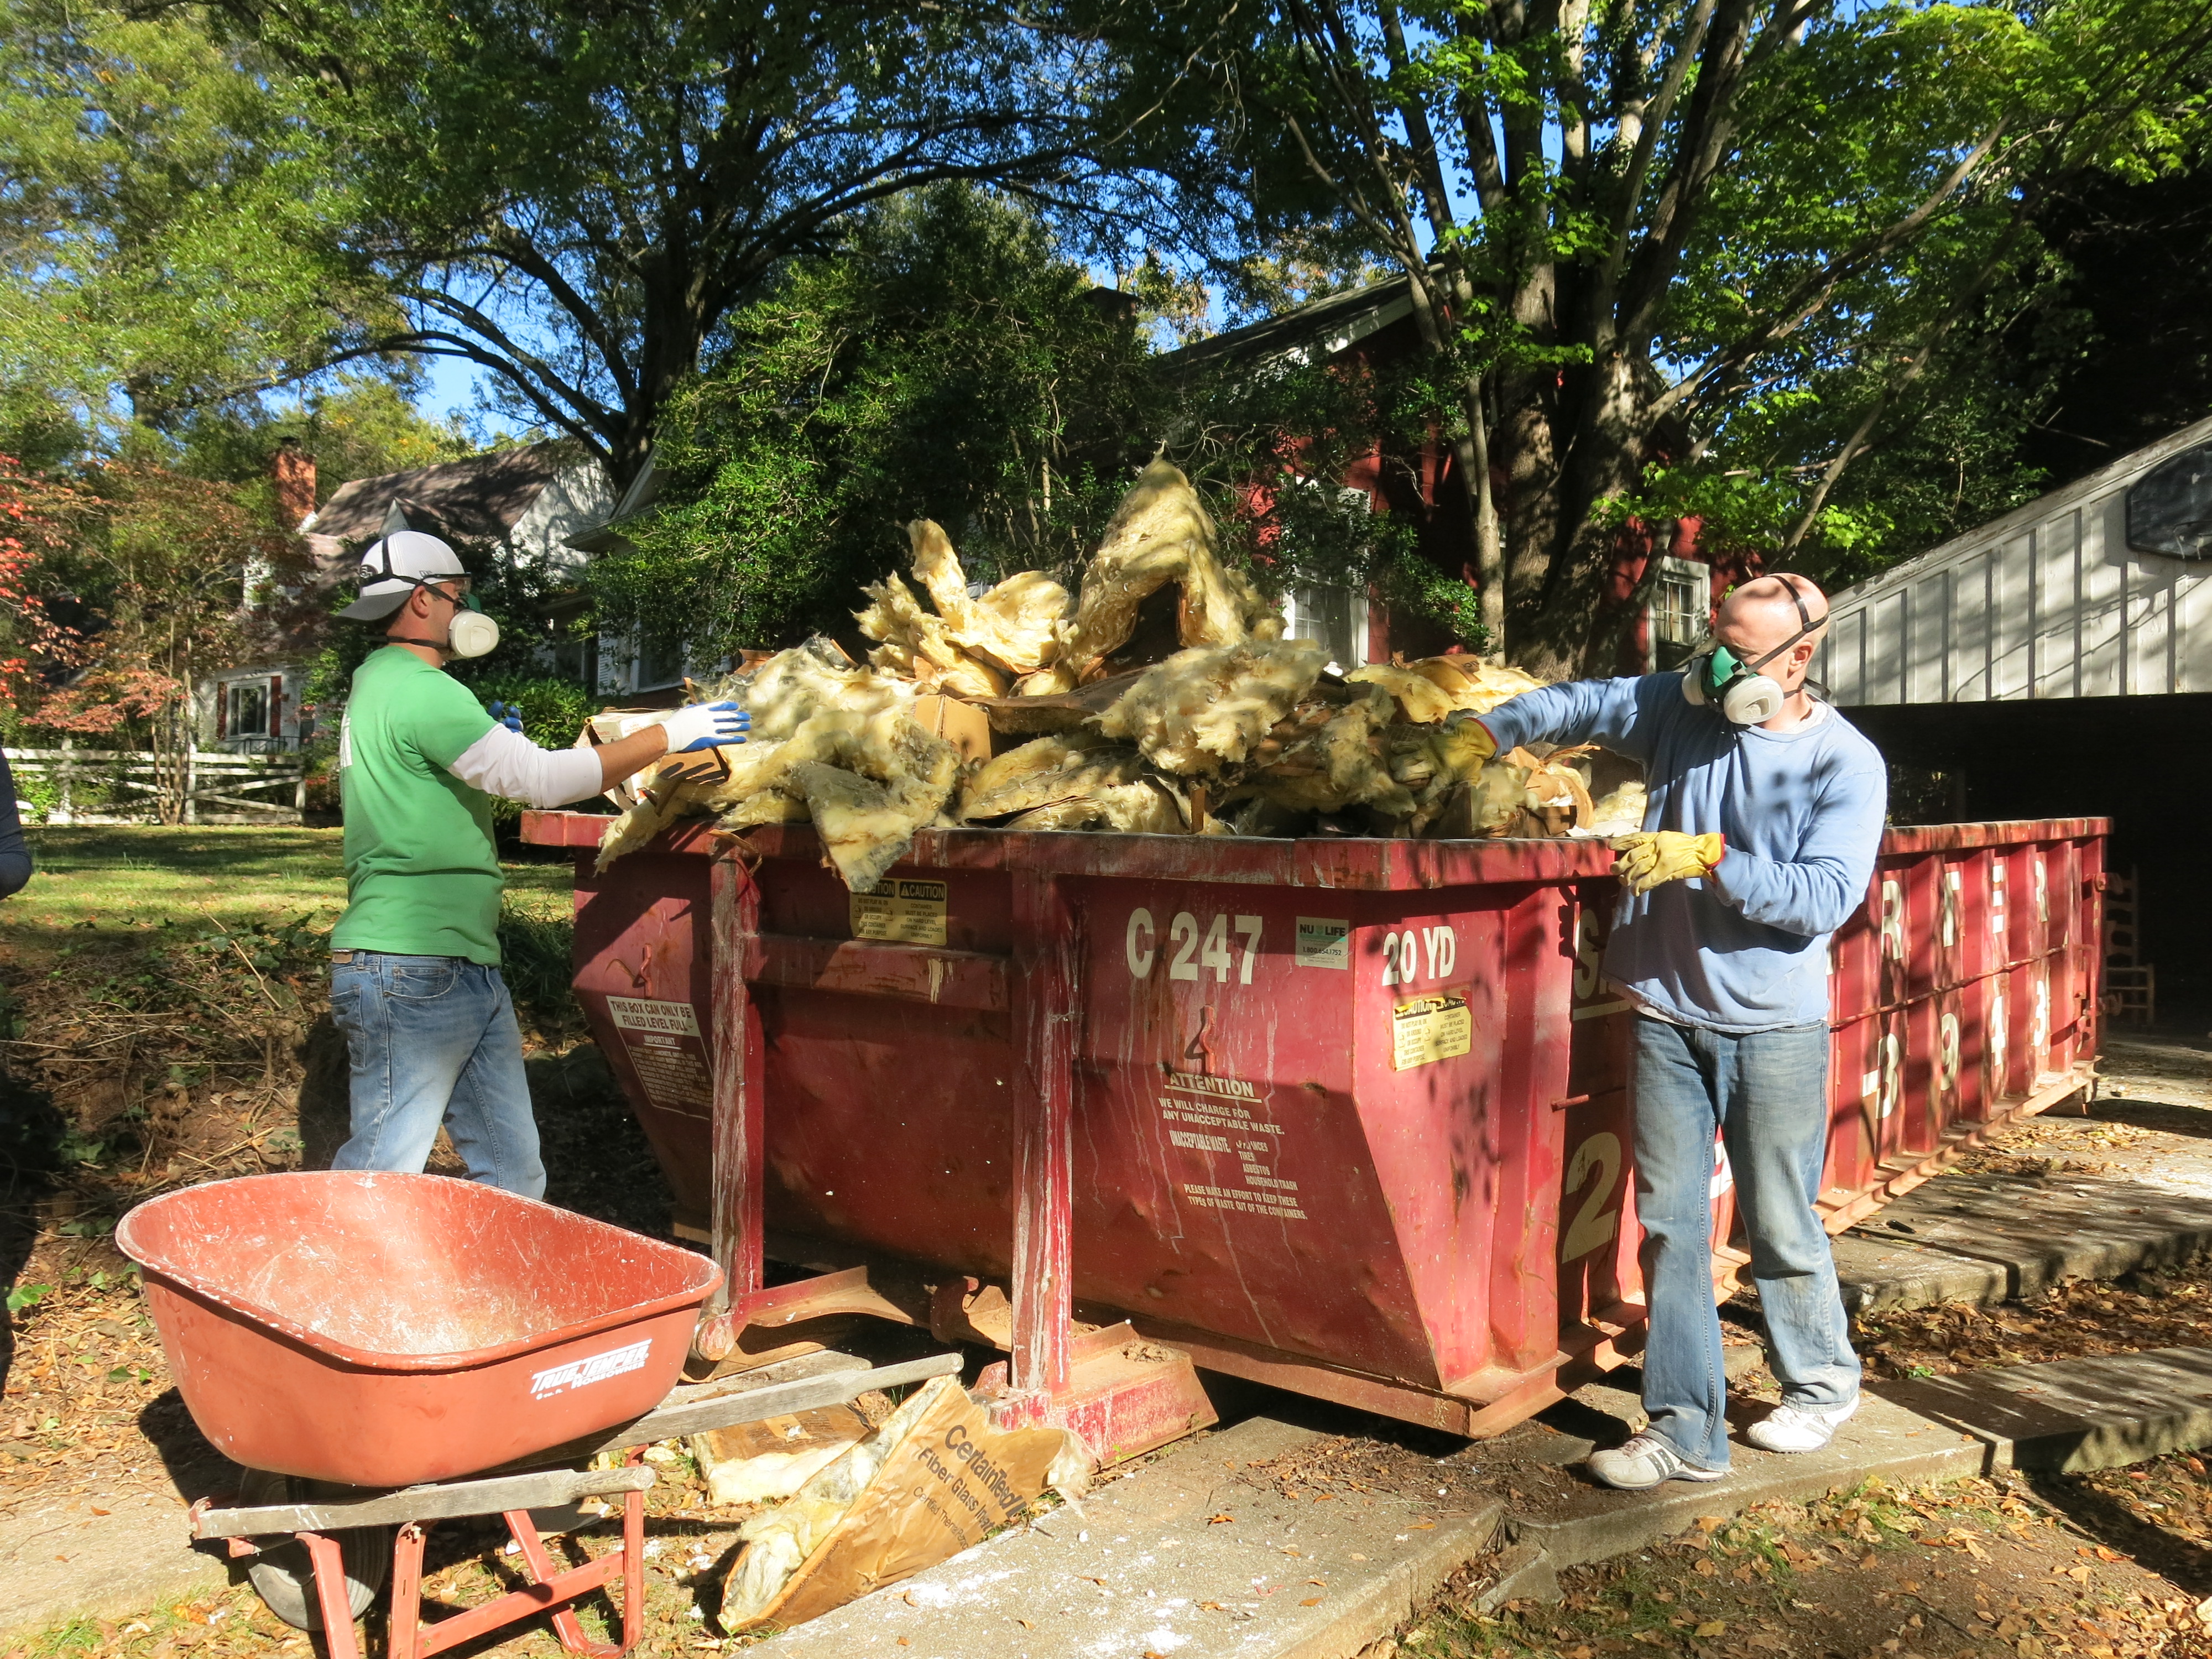
But that stove didn’t stop him from demo-ing the old brick surround. (The bricks were literally crumbling and disintegrating from the long-term dampness – ick!)

The Newton Nest_Fireplace Reno_IMG_7319

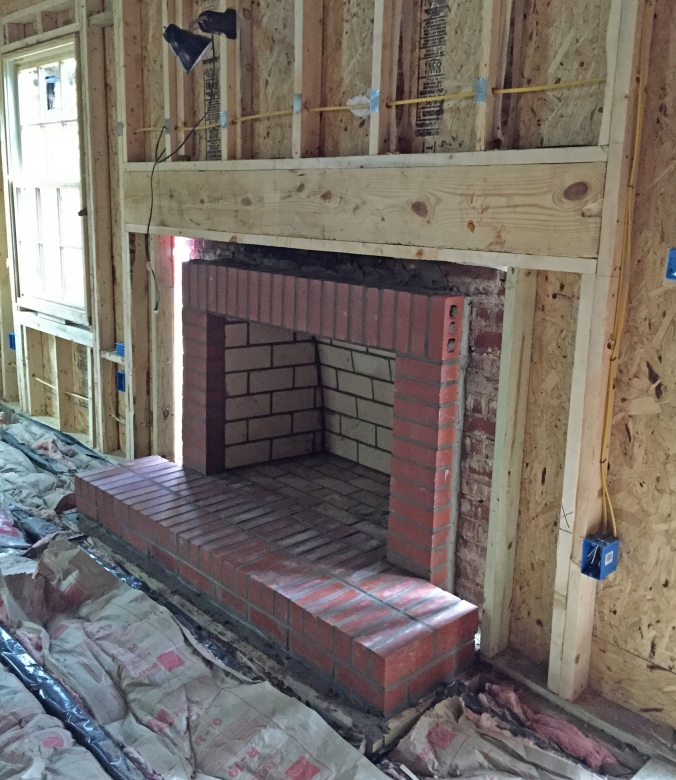
New firebox, flue, surround and hearth!

The Newton Nest_Fireplace Reno_IMG_7635

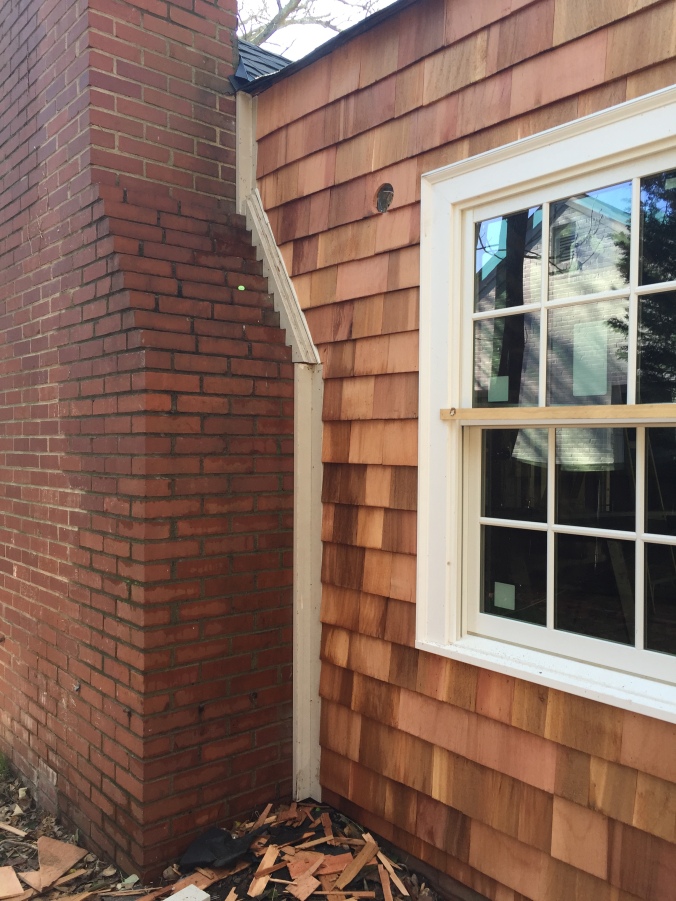
View from the outside; no more leaking!

The Newton Nest_Fireplace Reno_IMG_9362

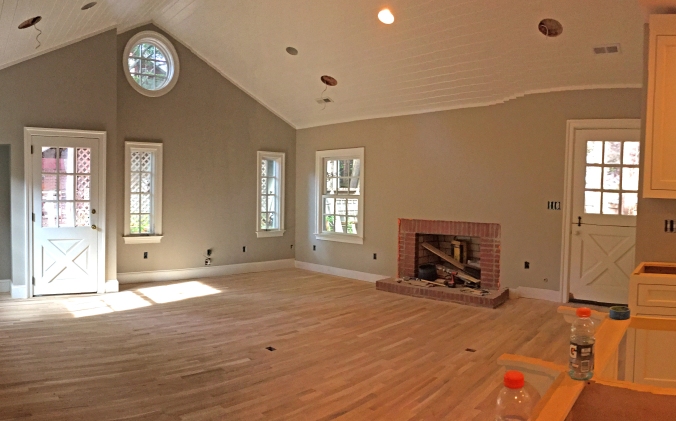
Ready for her mantel to arrive!

The Newton Nest_Fireplace Reno_IMG_9390

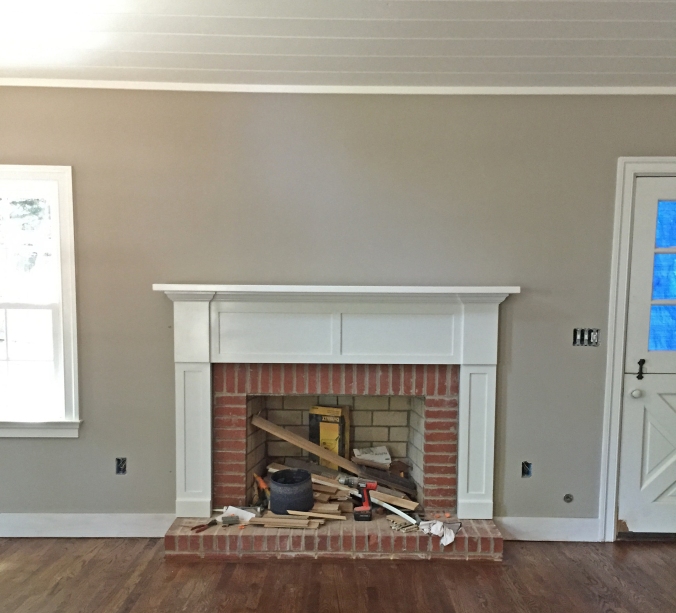
Ta-daaaaa! She’s back and better than ever!

The Newton Nest_Fireplace Reno_IMG_9393 2

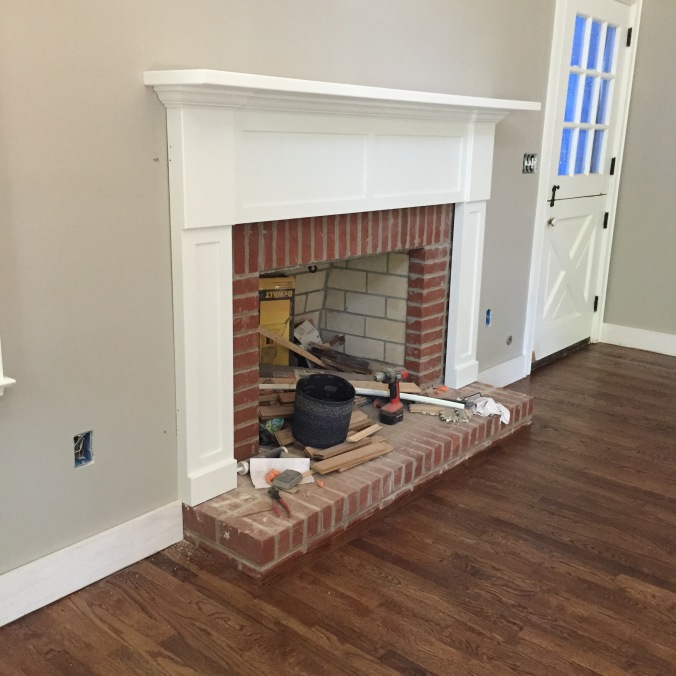
(Sorry about all the junk in the fireplace; I was clearly so taken with our new mantelpiece that I was blind to all the scrap wood and tools! 😂)

Advertisement

Down and Dirty

We’ve had our fair share of dirty jobs so far in this adventure, but this one literally involves shoveling mud.

Welcome to our basement, folks! Or is it a cellar? Not sure…
Anyhoo, we – thankfully – have concrete floors down there, but all the walls are good ol’ South Carolina red clay. I’m not going to lie, it’s pretty creepy and it’s currently home to an orchestra of crickets (…and maybe a few trolls and vampires?? Jury is still out.). Our hot water heater and lots of ductwork also live down there, but we won’t be using it for much more than an extra large crawl space. I will probably make an appearance every once in a while to hang some fresh garlic from the ceiling to ward off evil spirits and call it a day.

Although this isn’t a high-traffic space for us, you know we still want it to look its best and when we arrived on the scene, it was in pretty bad shape. The big culprit here is, yet again, water damage. Since the house was vacant for several years with no power, the sump pumps in our lovely dirt-walled basement were not working…so you can imagine what happened next…yep! Mudslide. In fact, we didn’t even realize the floors were concrete until we started cleaning up because there was about an inch of dirt that had slowly washed down onto the floor over the years. Yuck!

Matthew, my brave, hardworking husband, took on the challenge of basement clean up, which entailed a lot of mud shoveling, removal of a few lovely items like a lawn chair and an old mattress/box spring, and repairing the existing sump pump, so we can avoid any repeat performances.

The Newton Nest_Basement Clean Up_IMG_6893

Rough stuff, right? (And this was after cleanup had already started…I couldn’t get a photo of the true “before!”)

The Newton Nest_Basement Clean Up_IMG_6892

Taking care of business.

But he didn’t stop there, oh no! Matthew washed and sealed the concrete floors, and had the dirt walls covered with a moisture barrier, too.

The Newton Nest_Basement Clean Up_IMG_2525

Me trying to sneak pictures of the floor-sealing progress by going down the outside steps…

The Newton Nest_Basement Clean Up_IMG_2523

The Newton Nest_Basement Clean Up_IMG_2524

Caught.

The Newton Nest_Basement Clean Up_IMG_2530

Miss Pepper checking in on the progress… “looking good, dad!”

The Newton Nest_Basement Clean Up_IMG_2531

Done!

The Newton Nest_Basement Clean Up_IMG_2532

Never thought I’d be so proud of a basement, but this baby has come a looooong way!

Our creepy little basement is looking pretty good these days…but I’m still trying to avoid it, especially after dark. 😉

Subway Style

Q:  What’s shiny and white and mudded all over?
A:  Our bathroom tile!

Honk, Honk! The Nest’s bathrooms just got a little touch of subway flair…tile, that is. We chose a simple white, glossy subway tile for the showers because it suits our style and the era of our home. We punched it up a little by using pewter colored grout and adding a simple accent of “pencil tiles” around the perimeter of the shower walls about ¾ of the way up. We also opted to add little niches in each shower to hold shampoo bottles, etc.

The new stuff is fun and, as it turns out, MUCH easier than repairing and restoring the old… but we knew that already, didn’t we? (Cue my parents saying, “Nothing worth having comes easy.”)

The Saga of the Snaggletooth Tiles

Besides being absolutely filthy, the tile in our nest’s bathrooms was in relatively good shape and because we decided to keep the old cast iron bath tubs, too (taking those monsters out would have destroyed the tile around them), we decided that it was a no-brainer to save the original tile. However, there were a few “snaggletooth” holes to fill where we had relocated doorways and some patching needed around the edges of the rooms where we lost a few tiles during the plaster demo.

The only problem: it was impossible to find replacement tiles that would even come close to matching our original ones [insert “they don’t make things like the used to” comment here]. Our tile professional was too chicken to attempt concerned by the only option left: to “harvest” tiles from parts of the floor that would be covered by a vanity, so Matthew and I were forced to try our hand at chiseling out these precious tiles on our own. Thankfully, it was a DIY success not a disaster…although, it definitely tested our marriage a few times. Whew! Glad that’s over.

IMG_9103

Hard at work harvesting tiles.

IMG_9104

Mid-jigsaw puzzle.

IMG_9223

Grinding away at the space for a new marble threshold in the hall bathroom.

IMG_9386

Threshold installed! Not bad for a couple of newbies, right?? (Not as easy as it looks, though…we broke the first one trying to level it.)

IMG_9078

Finally starting to clean up the old tiles!

IMG_9079

Many hours of elbow grease later…good as new!

IMG_8908

Shower niche installed!

IMG_8907

This orange KERDI backing is a moisture-proof “wallpaper”that goes right over the sheetrock before tile installation.

IMG_8985

Tile selection! Classic white subway tiles and pewter grout (we went with the medium gray at bottom).

IMG_8937

Boxes and boxes of tile… here we go!

IMG_9076

Eeeeeeek! Major progress!

IMG_9389

Master shower’s tile is up!

IMG_9388

Hall bath, too!

Tub Transformation

Once the new tile was installed, that pristine white subway tile only accentuated the sad state of our bathtubs. We knew that refinishing them ourselves was not in our wheelhouse, so we called in the professionals. After some research, Matthew found a company called GlazePro in North Carolina that would travel down and – in just two days – completely transform our beat-up bathtubs by scouring, sanding, stripping, patching, and re-glazing. I don’t know much more about the process, but the results are nothing short of miraculous! Take a look-see for yourself:

IMG_9451

The miracle worker in action – scraping, sanding, and patching all the imperfections.

IMG_9456

Patching complete.

IMG_9453

Reglazing in progress… That orange contraption is a portable exhaust system to vent the paint fumes outside. Impressive!

IMG_9454

Can you believe how good this looks??? We were shocked by the transformation. It’s perfect. I think I heard angels singing when I laid eyes on our BRAND NEW old tubs!!


No sign of our butler yet…

… but we sure do like his pantry!

If Jeeves were here, I’d ask him if he liked the burnt sienna backsplash in his Butler’s Pantry… something tells me that his answer would be an enthusiastic “no ma’am.”

The "before" picture -- check out those lovely tiles ;)

The “before” picture — check out those lovely tiles 😉


Burnt Sienna! A perfect match.

Burnt Sienna! A perfect match.

Once upon a time, this delightful Crayola color may have been a popular choice, but not anymore! So, we had to bid farewell to all those little orange tiles and give the butler’s pantry a well-deserved makeover.

First things first, I easily chipped away the tiles with a hammer and chisel because the adhesive had lost a lot of its strength over time. Unfortunately, the adhesive kept a very strong bond with the plaster wall between the upper cabinets and the counter top. I tried to chip away at it with every tool I could find, but finally had to resort to our orbital sander and heavy grit sandpaper. It was a dusty, tedious, goggle-fogging job, but I finally got it down to the smooth plaster underneath with only a little damage that required simple patching.

No more tiles!

No more tiles!


Close-up of the stubborn glue left behind.

Close-up of the stubborn glue left behind.


I had to stop every few minutes to wipe out my goggles. Yuck!

I had to stop every few minutes to wipe out my goggles. Yuck!

Next, we discussed what to use for the new counter top that would complement and preserve the charm of the original cabinets. We landed on the idea of “up-cycling” some of the original ceiling joists we cut out to vault the ceilings in the family room and master bedroom. We took this idea to my dad, the forester and master craftsman, to request his expertise and ask for his help to bring the new counter top to life.

Naturally, he had an ever better idea! Our joists were certainly thick and sturdy enough to do the job, but they were made of pine. As mentioned in the floor refinishing post, pine does not stain well and our “vision” was of a darker, richer wood counter top, not raw pine. It just so happened that my father (the forester, master craftsman, AND wood hoarder 🙂 ) had a stash of beautiful walnut left over from when my parents built their kitchen island. Glory! It was just the thing. We are so fortunate that the Harpers were willing to part with such special materials and my dad created a handmade walnut counter top for our butler’s pantry by joining two large pieces together and lovingly applying coat after coat of tongue oil and polyurethane.

Special Delivery!

Special Delivery!


Cutting it down to size.

Cutting it down to size.


Daddy's favorite cutting stance. I believe we have seen this move before ;)

Daddy’s favorite cutting stance. I believe we have seen this move before 😉


Ready to install this beauty!

Ready to install this beauty!


Wrangling it into place.

Wrangling it into place.


Fastening it from underneath, so we don't mar the wood.

Fastening it from underneath, so we don’t mar the wood.


My guys admiring their work...

My guys admiring their work…


My dad also made a matching cove molding to give it the perfect finishing touch!

My dad also made a matching cove molding to give it the perfect finishing touch!

It came out better than I ever expected. In fact, it may just be my favorite part of our nest…

Ta-daaaaahhh! The finished product. Absolutely fantastic.

Ta-daaaaahhh! The finished product. Absolutely fantastic.


...and a very special message hidden on the underside. ;)

…and a very special message hidden on the underside. 😉

We’ve got the power!

It took a signed easement from one of our neighbors, a lot of underground boring, and a crew of Duke Power dudes with a bulldozer squeezing into the smallest part of our yard, but permanent power is ours! Hooray!

Whoa, Dozer!

Whoa, Dozer!

We see the light!

Our first glimpse of light at The Newton Nest!

This is the first time we have ever seen the inside of the Nest with the lights on and it’s an incredible feeling!

Removing a Relic

We think our Nest has lots of special features, but one of these is a certain type of wood paneling that has my dad – the master forester – seeing hearts. It’s called Wormy Chestnut… or as Richard Harper calls it, “a true relic.” Apparently, this woodland artifact is basically extinct and wormy chestnut lumber is an extremely rare find these days…and Matthew and I  [GASP]  wanted to paint it. So, in swooped the mighty mustachioed forester to rescue the Chestnut lumber in all its wormy glory from those who seek to whitewash its beauty beyond recognition!

The room we call our office was paneled floor-to-ceiling with the “good stuff,” so in lieu of covering up something so special with paint, we decided we would rather share the Wormy Chestnut with someone who really appreciates it! It took a few tries to discover a method of removing the tongue and groove boards with little damage (because they are so old, they’ve become fairly brittle), but the forester finally landed on a crude-but-effective system of prying each board away from the wall about an inch and then using a saws-all to cut through the nails holding it to the wall. Then his trusty nail puller (me) dutifully pried out the remaining nails.

What will the forester do with his loot? Well, he’s not sure yet, but Matthew and I have a feeling it will be something very special and maybe a little piece of it will make it’s way back to the Nest one day  🙂

Close-up of the grain and pattern of American Wormy Chestnut.

Close-up of the grain and pattern of American Wormy Chestnut.

In case you would like to know more about why Chestnut lumber, especially Wormy Chestnut, is so rare, here’s a little explanation from the Nest’s very first guest blogger:

So… what’s so special about the American chestnut?

Before the turn of the 20th Century, American chestnut was a dominant hardwood tree in the eastern United States occurring mostly in the Appalachians from Maine to Mississippi. Some of the largest trees reached heights almost 100 feet with diameters over 9 feet occurred right here in the Southern Appalachians which occupied 25 to 40 percent of the lower cove forests. Large crops of its sweet nut were enjoyed by humans and were a major contributor to wildlife forage.

Unfortunately, an Asian chestnut tree imported to the U.S. around 1900 carried a bark fungus commonly called the chestnut blight. The American chestnut had little resistance and the blight virtually girdles the tree killing it. By the 1930s, an estimated 3 billion trees had died.

The wood is somewhat rot resistant and many trees lay on the forest floor for years before being salvaged, hence the “wormy” effect of the lumber where insects bored throughout the tree; a.k.a. wormy chestnut.

The wood was strong, light, and was widely used for construction, furniture, and decorative trim. It has a true brown patina – not too light, not too dark… just right to warm a room – chestnut! My favorite is a room paneled with variable width boards that have been left to age to its natural brown patina.

Small shoots of American chestnut are still living throughout the Appalachians, but are soon attacked by the chestnut blight before reaching a few feet tall. Hybrids are being developed to resist the blight. One live chestnut hybrid in the Clemson area is almost 18 inches in diameter and about 60 feet tall – there is still hope!

So, what really is so special – it is a relic of a once great tree important to the forest, and… well… I just like it!

Richard Harper
Professional Forester, Retired

There you have it, folks! Straight from the Forester’s mouth.

Here are a few photos of the removal process:

A "before" picture of the Wormy Chestnut walls.

A “before” picture of the Wormy Chestnut walls.

Getting started!

Getting started!

Saws-alling with a smile!  :)

Saws-alling with a smile! 🙂

Pulling off the last few boards.

Pulling off the last few boards.

The loot!

The loot!

Here's a little Forester Flashback of Richard in his early forestry days. He's on the cover of Westvaco CFM News magazine, November 1983.

Here’s a little Forester Flashback of Richard in his early forestry days. He’s on the cover of Westvaco CFM News magazine, November 1983.

Plumbing Rough-In: Check!

Our H2O is ready to go!

That’s right. Our old pipes are gone and they’ve been replaced with all new plumbing. We made quite a few changes to the original plumbing layout, so here’s the run down:

  • We added a tiny powder room tucked into the corner of the office, located just off the formal living room and kitchen. This addition will give us a bathroom that is convenient to the most high-traffic living spaces. Adding the waste pipe for the toilet was a little tricky because the office/powder room was once a porch (closed in by a previous owner) and it has a concrete floor that is nearly six inches thick! Needless to say, drilling a hole through that baby required a little extra brawn. Our plumber might not agree, but we think it was worth the additional effort. 🙂
  • We added a shower head to the hall bath which was only a tub with a hand-held spray attachment.
  • We said goodbye to the two old, rusty water heaters in the basement and replaced them with a tankless system. Energy efficiency and an endless supply of hot water? Yes, please!
  • We added plumbing for his-and-hers dual sinks in the master bathroom.
  • We relocated the laundry room. (To make way for a large master closet, oh yeah!)
  • And, lastly, we had our plumber stub-in hot/cold water and a waste pipe upstairs to give us the option to add a half bath to the bonus space upstairs should we decide we want to do that down the road.
Hello, new toilet hole!

Hello, new toilet hookup!

Our itsy-bitsy powder room! (You can see the toilet rough-in on the floor in the far left corner.)

Our itsy-bitsy powder room! (You can see the toilet rough-in on the floor in the far left corner.)

Kitchen sink rough in.

Kitchen sink rough-in.

Hall bathroom shower is in!

Hall bathroom shower is in!

Master bathroom plumbing.

Master bathroom plumbing.

Laundry!

Laundry!

Upstairs "maybe" bathroom. :)

Pipes for our upstairs “maybe one day” bathroom. 🙂

So, as you can see, we have replaced everything! Well, almost everything… the only plumbing items being spared are the original cast-iron tubs. They need a good cleaning and to be reglazed, but we think they’re pretty special. (And they’re also pretty heavy, so leaving them in place is easier on everyone! ha!)

Master Bath  |  Hall Bath

Master Bath   |   Hall Bath

Replacing the water line from the street to the house was always in the plan, but the biggest “question mark” during this whole re-plumbing process was whether or not the waste/sewer pipes leading from the house to the street (which are buried underground) were in good shape. Many times with old houses like ours the underground pipes have cracks, debris, roots that have grown into them, and all kinds of other problems that can be an expensive fix. So, we had a professional come use a nifty little camera scope tool to take a gander at our pipes… miraculously, we passed muster and did NOT have to dig up and replace our waste line! Hallelujah!!

Water line trench... thank goodness we didn't have to dig up the waste line, too!

Water line trench… thank goodness we didn’t have to dig up the waste line, too!

Now, all this pipe talk is a little boring, but as part of this exercise, we got to make our plumbing fixture choices, too. Finally! We get to pick out some “pretties” for the house! Here’s a glimpse of what we chose:

Plumbing pretties!!

Plumbing pretties!!


As a fitting finish to the plumbing update…… let’s all wave goodbye to the Nest’s old, nasty hot water heaters!

A couple of local scrappers took these beauties off our hands.

A couple of local scrappers took these beauties off our hands.

Hooray for new pipes!

The devil really is in the details.

It’s a tedious job, but somebody’s gotta do it!

The sledgehammer swingin’ is over and now we are left with the nitty gritty detail work around “the edges” of each room. This is the last of the demo work that must be done before our builder can bring in the framer and really get the renovation phase going.

I suppose we brought this headache on ourselves by attempting to save the trim work, but we think it will be worth it to keep a few of the original details intact.

All the demo is done except the plaster left around the "edges" of each room.

All the demo is done except the plaster left around the “edges” of each room.

Close up of the left over plaster around the trim.

Close up of the left over plaster around the trim.

Chipping away along the baseboards.

Chipping away along the baseboards.

If we're not chipping away at plaster remnants, we are pulling nails out of the studs. Details, details, details.

If we’re not chipping away at plaster remnants, we are pulling nails out of the studs. Details, details, details.

Clean edges!

Clean edges!

We were able to carefully remove the plaster around the archway from the foyer into the formal living room -- one of the many details we love about our house!

We were able to carefully remove the plaster around the archway from the foyer into the formal living room — one of the many details we love about our house!

While tackling the detail work, Matthew took on one of our toughest “muscle” projects – master bathroom tile removal! Oh sure, those little square subway tiles look like they’ll chip right off, but what you can’t see is the two and a half inches of concrete behind them! Wowzer! This project – by far – took the most muscle power. Good thing Matthew’s got the guns for the job!

Master bathroom tile pre-demo. (Notice how the window goes halfway into the shower and there's also an air vent inside the shower!) We plan to remedy both of these little quirks.

Master bathroom tile pre-demo. (Notice how the window goes halfway into the shower and there’s also an air vent inside the shower!) We plan to remedy both of these little quirks.

Lauren's sad attempt at demo-ing tile!

Lauren’s sad attempt at demo-ing tile!

Matthew "Muscles" Newton makes some real progress.

Matthew “Muscles” Newton takes over and makes some real progress. (If you look closely, you can see he’s pried a huge chunk away from the wall — his arm is behind it!)

Pretty thick stuff! It's apparent that this tile was laid to last.

Pretty thick stuff! It’s apparent that this tile was laid to last.

SUCCESS! Believe it or not, it took three wheelbarrow loads to get all that tile rubble out of the tub.

SUCCESS! Believe it or not, it took four wheelbarrow loads to get all that tile rubble out of the tub.

Next step is getting electricity to the house so we can use power tools to speed up this detail work and run a shop vac to help with clean up. We have been waiting for more than two weeks now, so wish us luck…and if you happen to know someone at Duke Power who can bump us up on the list, we wouldn’t be upset if you made a call 😉

The sky is falling!

Chicken Little:  “Oh, help! The sky is falling!”
Henny Penny:   “How do you know?”
Chicken Little:  “I saw it with  my own eyes, and heard it with my own ears, and part of it fell on my head!”

If Chicken Little thought the world was coming to an end after a little acorn landed on his head, he and Henny Penny would have lost their minds in our house this weekend! Saturday’s major task was knocking the plaster off the ceilings. And yes, a lot of it fell on our heads.

It’s bad enough to have the plaster falling in your face, but we got the added surprise of loose insulation raining down upon us. There’s no way to spin it, this was a dirty, itchy, no good, very bad job. However, unlike Chicken Little, we know this isn’t a sign that the world is coming to an end, but more like a beacon of hope to know this dirtiest of jobs done and behind us!

We were again lucky to have lots of volunteers for demo day number two—Matthew’s sister Rebecca, my parents, my sister Emily, and our friend Skyler all came to help. Plus, we hired a local handyman named Doug to help with the really tough stuff.

Here’s a recap of all our dusty, dirty fun:

Matthew makin' it rain.

Matthew makin’ it rain.

IMG_0021

Loose insulation everywhere!

It's a dirty, dusty job, but somebody's gotta do it!

It’s a dirty, dusty job, but somebody’s gotta do it!

demo pics

Wheelbarrow load after wheelbarrow load to fill up Big Red…again!

We haven't scared Rebecca away yet!

We haven’t scared Rebecca away yet!

Even though my mom was down a hand, she went to town pulling nails out of the studs. A broken arm can't slow her down!

Even though my mom was down a hand, she went to town pulling nails out of the studs. A broken arm can’t slow her down!

My dad, the forester, came to help with a special wood project. ;)

My dad, the forester, came to help with a special wood project. 😉

My sister, Emily, is stylish as always with purple earplugs that perfectly matched her sweatshirt.

My sister, Emily, is stylish as always with sassy purple earplugs to coordinate with her sweatshirt.

Sisters that demo together, stay together.

Sisters that demo together, stay together. (We missed you, Rebecca!!)

Sledgehammer Sisters. #thoseharperwomen

Sledgehammer Sisters. #thoseharperwomen

Skyler joins the demo party!

Skyler joins the demo party!

Making progress!

Making progress!

Hammer down! (This actually happened twice!!!)

Hammer down! (This actually happened twice!!!)

Finished!

Finished!

IMG_0077

Another busy day... another full dumpster.

Another busy day… another full dumpster.