No sign of our butler yet…

… but we sure do like his pantry!

If Jeeves were here, I’d ask him if he liked the burnt sienna backsplash in his Butler’s Pantry… something tells me that his answer would be an enthusiastic “no ma’am.”

The "before" picture -- check out those lovely tiles ;)

The “before” picture — check out those lovely tiles 😉


Burnt Sienna! A perfect match.

Burnt Sienna! A perfect match.

Once upon a time, this delightful Crayola color may have been a popular choice, but not anymore! So, we had to bid farewell to all those little orange tiles and give the butler’s pantry a well-deserved makeover.

First things first, I easily chipped away the tiles with a hammer and chisel because the adhesive had lost a lot of its strength over time. Unfortunately, the adhesive kept a very strong bond with the plaster wall between the upper cabinets and the counter top. I tried to chip away at it with every tool I could find, but finally had to resort to our orbital sander and heavy grit sandpaper. It was a dusty, tedious, goggle-fogging job, but I finally got it down to the smooth plaster underneath with only a little damage that required simple patching.

No more tiles!

No more tiles!


Close-up of the stubborn glue left behind.

Close-up of the stubborn glue left behind.


I had to stop every few minutes to wipe out my goggles. Yuck!

I had to stop every few minutes to wipe out my goggles. Yuck!

Next, we discussed what to use for the new counter top that would complement and preserve the charm of the original cabinets. We landed on the idea of “up-cycling” some of the original ceiling joists we cut out to vault the ceilings in the family room and master bedroom. We took this idea to my dad, the forester and master craftsman, to request his expertise and ask for his help to bring the new counter top to life.

Naturally, he had an ever better idea! Our joists were certainly thick and sturdy enough to do the job, but they were made of pine. As mentioned in the floor refinishing post, pine does not stain well and our “vision” was of a darker, richer wood counter top, not raw pine. It just so happened that my father (the forester, master craftsman, AND wood hoarder 🙂 ) had a stash of beautiful walnut left over from when my parents built their kitchen island. Glory! It was just the thing. We are so fortunate that the Harpers were willing to part with such special materials and my dad created a handmade walnut counter top for our butler’s pantry by joining two large pieces together and lovingly applying coat after coat of tongue oil and polyurethane.

Special Delivery!

Special Delivery!


Cutting it down to size.

Cutting it down to size.


Daddy's favorite cutting stance. I believe we have seen this move before ;)

Daddy’s favorite cutting stance. I believe we have seen this move before 😉


Ready to install this beauty!

Ready to install this beauty!


Wrangling it into place.

Wrangling it into place.


Fastening it from underneath, so we don't mar the wood.

Fastening it from underneath, so we don’t mar the wood.


My guys admiring their work...

My guys admiring their work…


My dad also made a matching cove molding to give it the perfect finishing touch!

My dad also made a matching cove molding to give it the perfect finishing touch!

It came out better than I ever expected. In fact, it may just be my favorite part of our nest…

Ta-daaaaahhh! The finished product. Absolutely fantastic.

Ta-daaaaahhh! The finished product. Absolutely fantastic.


...and a very special message hidden on the underside. ;)

…and a very special message hidden on the underside. 😉

Advertisement

A Home for our Dishes…

That’s right! Our dishes now have a cozy little place to call home, because…our cabinets are in! In addition to outfitting our kitchen with a special set of custom cabinets, we also designed built-in storage for the laundry room and our master bathroom. So, our laundry detergent, dirty clothes, and toiletries also have places to call home in our little nest 😉 Our cabinet maker took in lots of questions, sketches, and patiently listened to us jabber on about “our vision” for getting the most out of our space, then he brought our sketches and plans to life with the most beautiful cabinets we’ve ever seen!

We decided on a traditional shaker-style cabinet (with a little added “bead” detail in the door panels) painted Sherwin Williams‘ Pure White to match our trim. For a traditional house like ours, keeping things simple just felt right. And once it all came together, our new cabinets seemed to blend right in with those in the butler’s pantry that are original to the house.

While we have done what we can to maximize the floor plan of our nest, we are still working with – by today’s standards – small spaces, so we put a lot of thought into our designs to use every square inch of space! Here’s what we came up with:
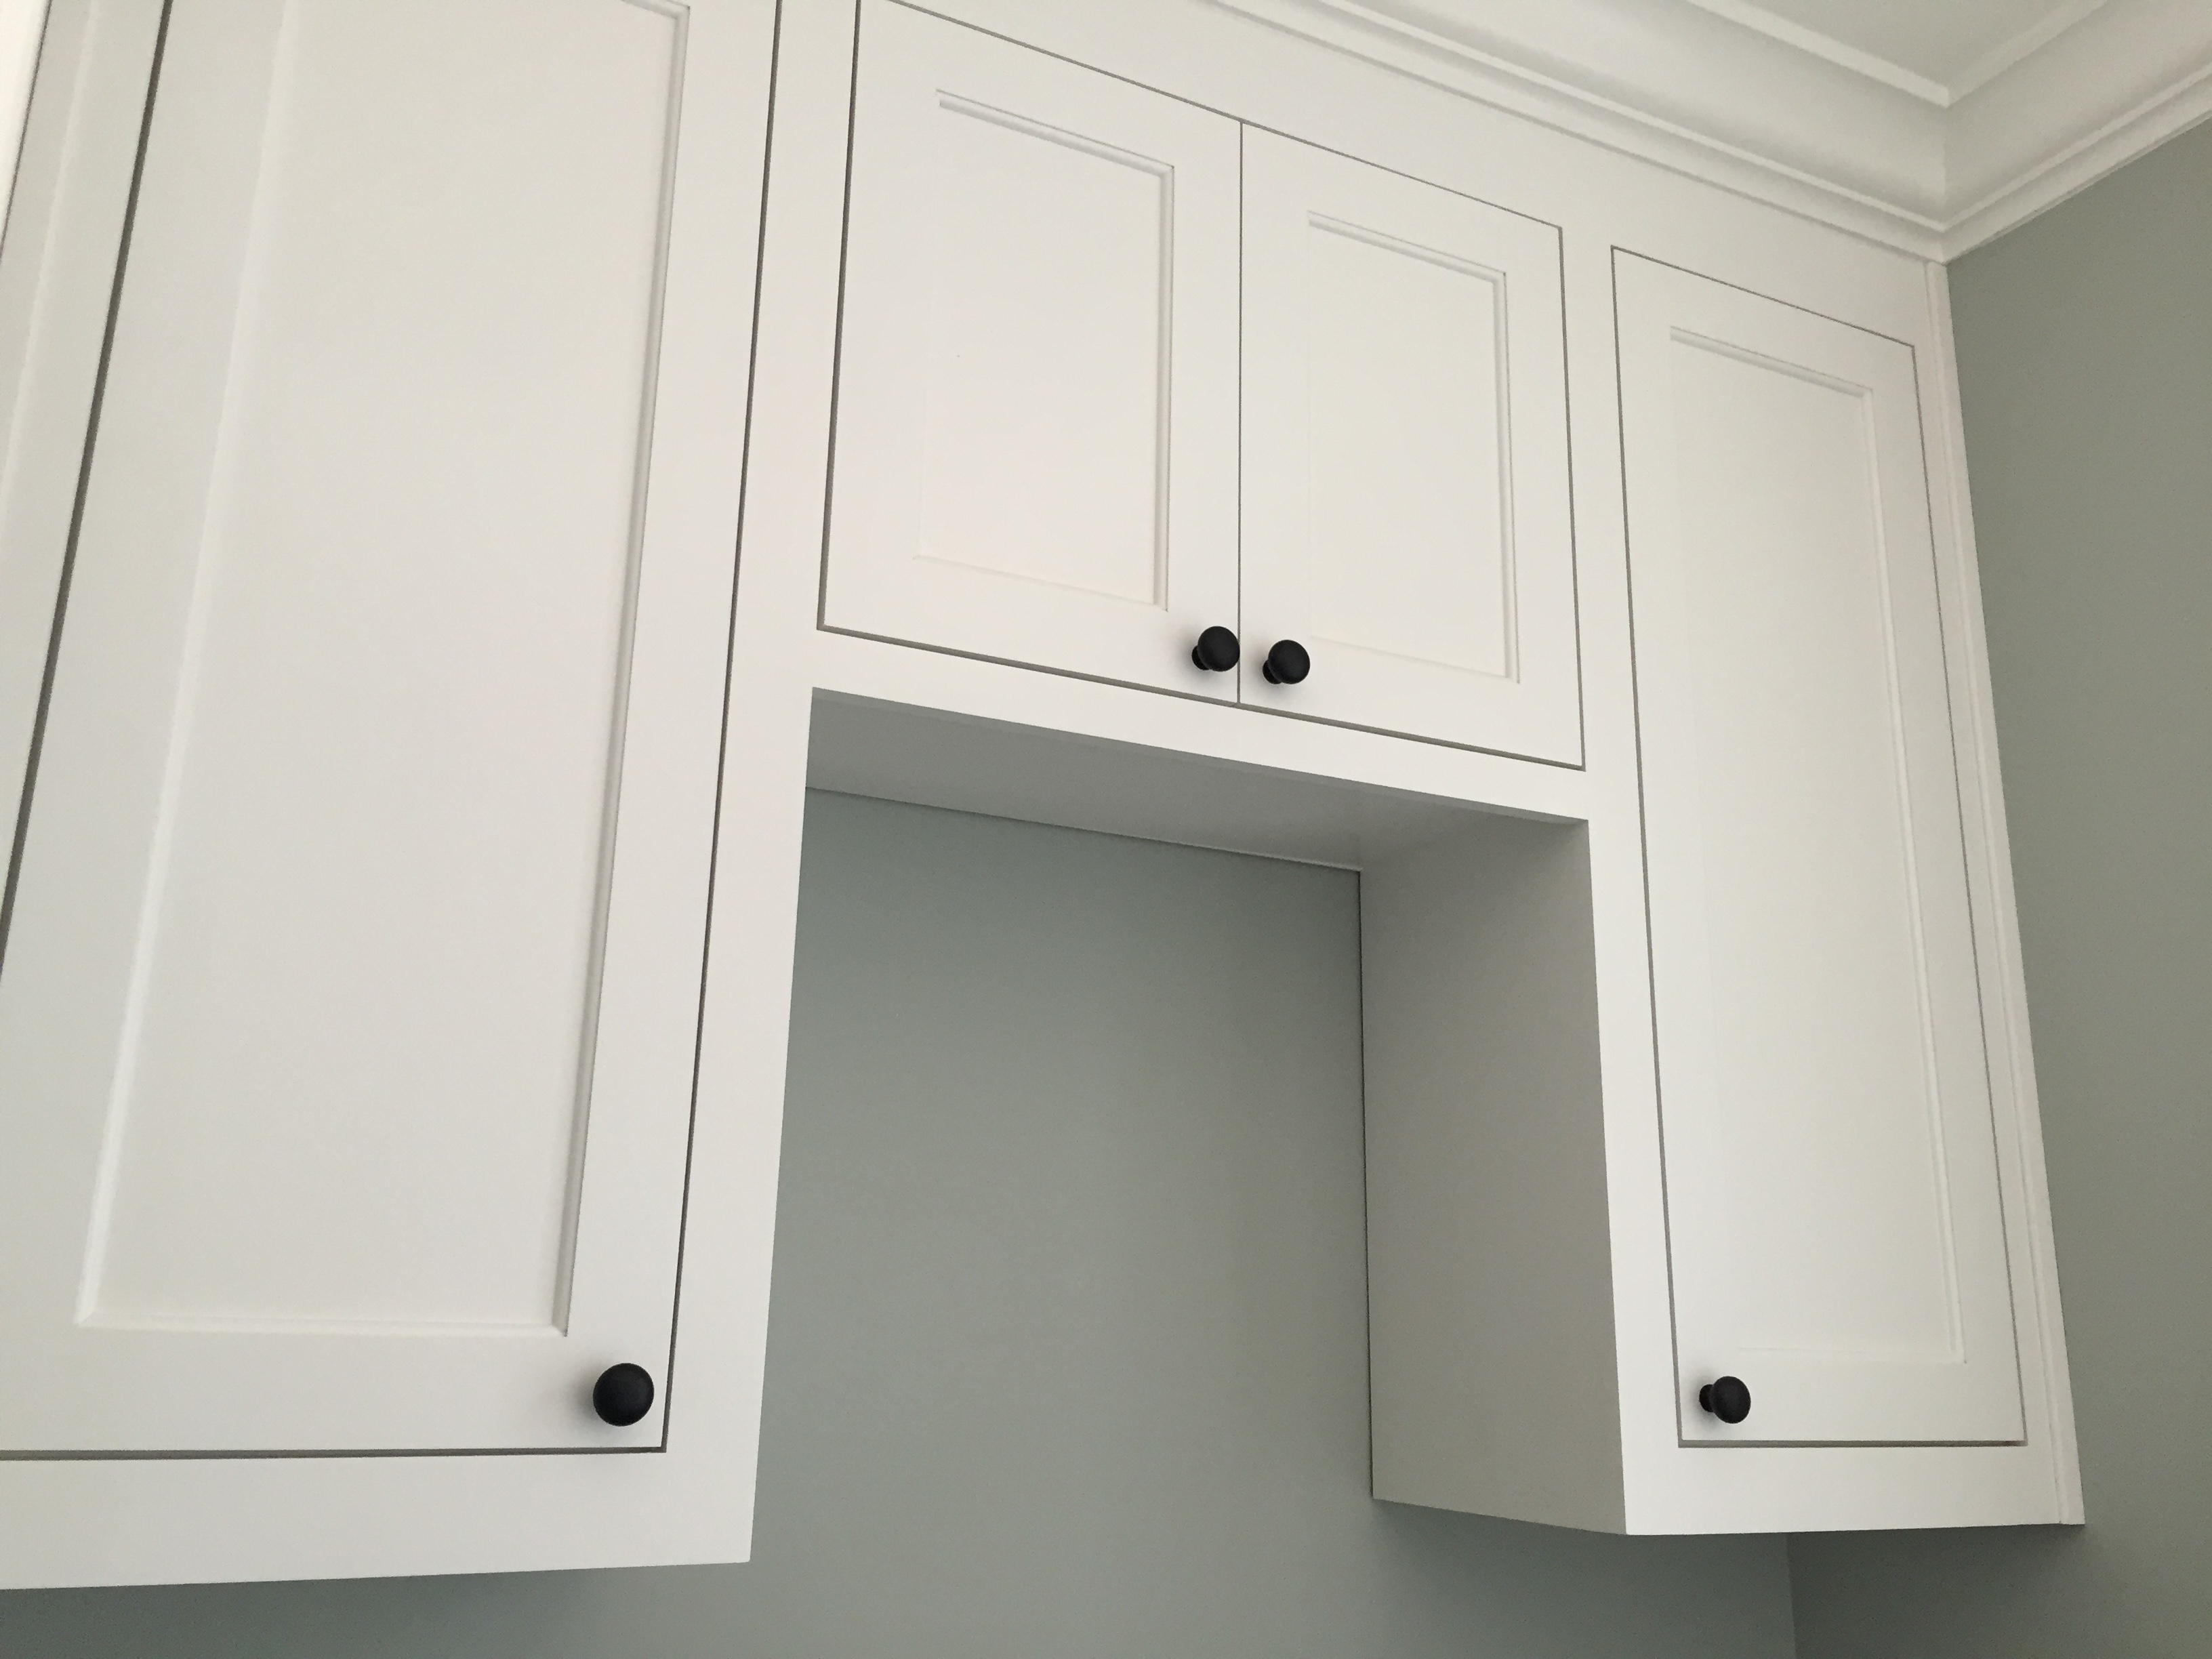
Kitchen Cabinets

This sketch was our first pass at a layout for our kitchen cabinets... and it's pretty much what we went with!

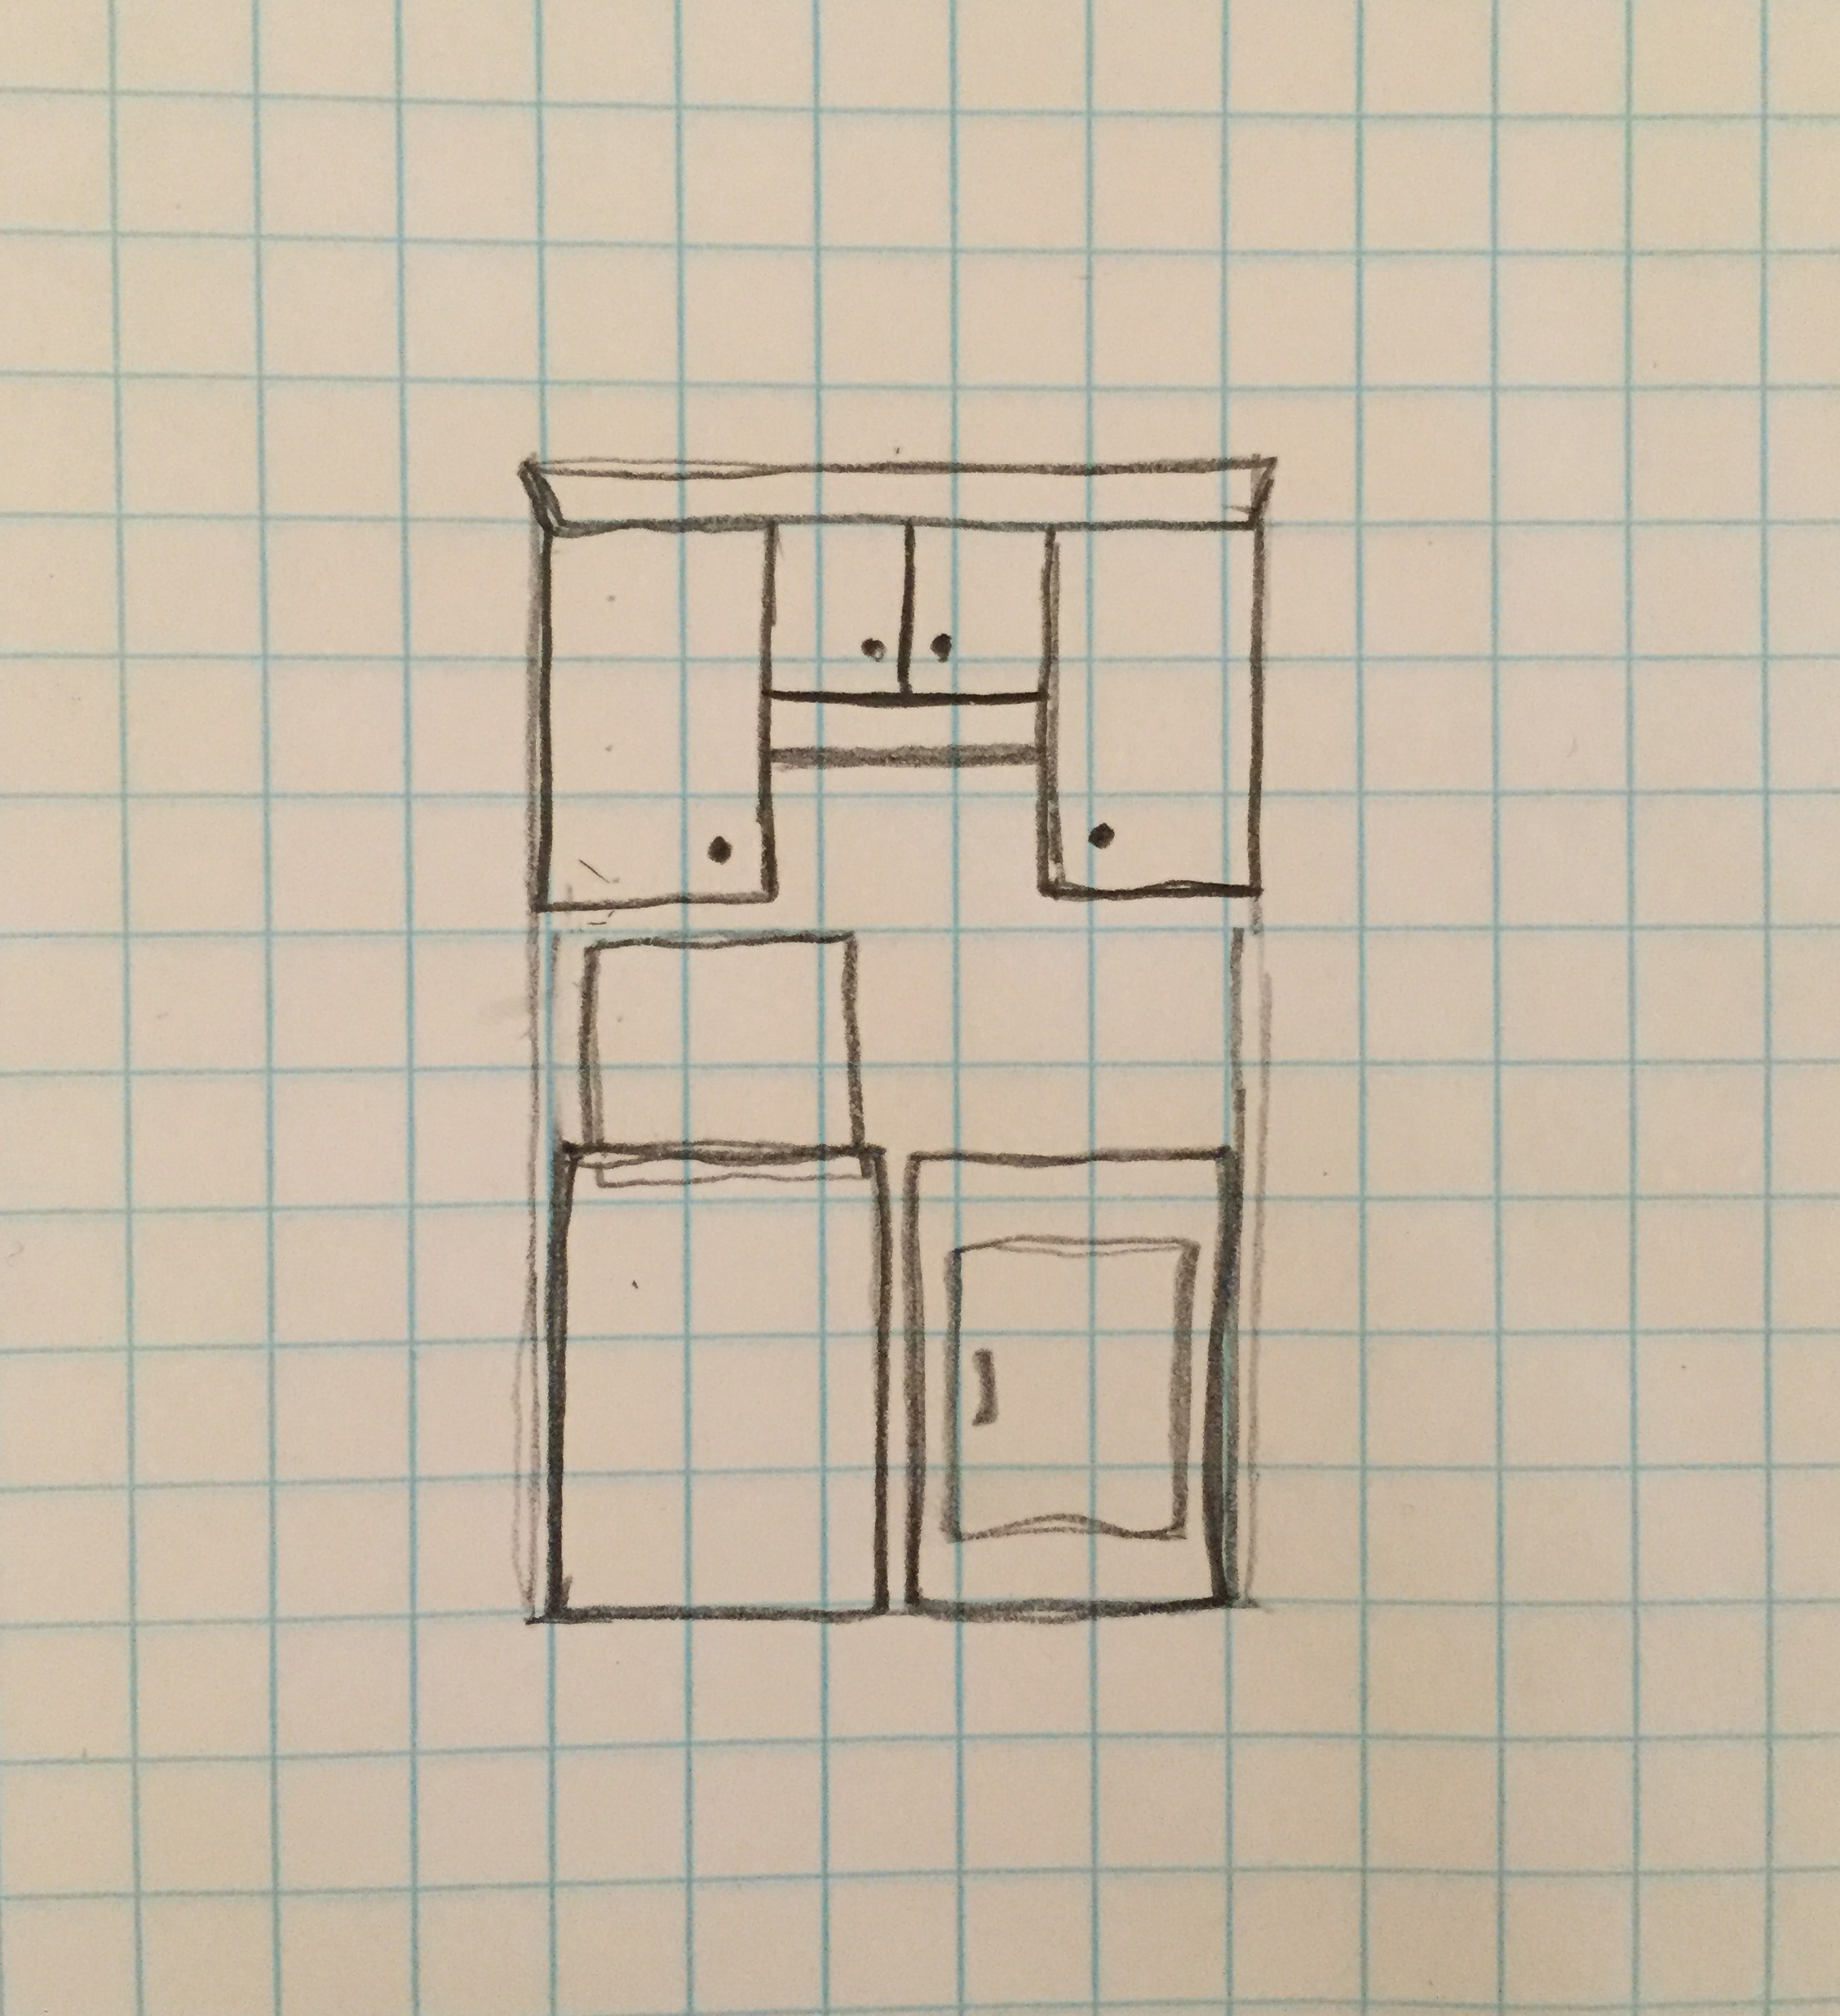
This sketch was our first pass at a layout for our kitchen cabinets… and it’s pretty close to the final design!

Cabinets going in... no island yet!

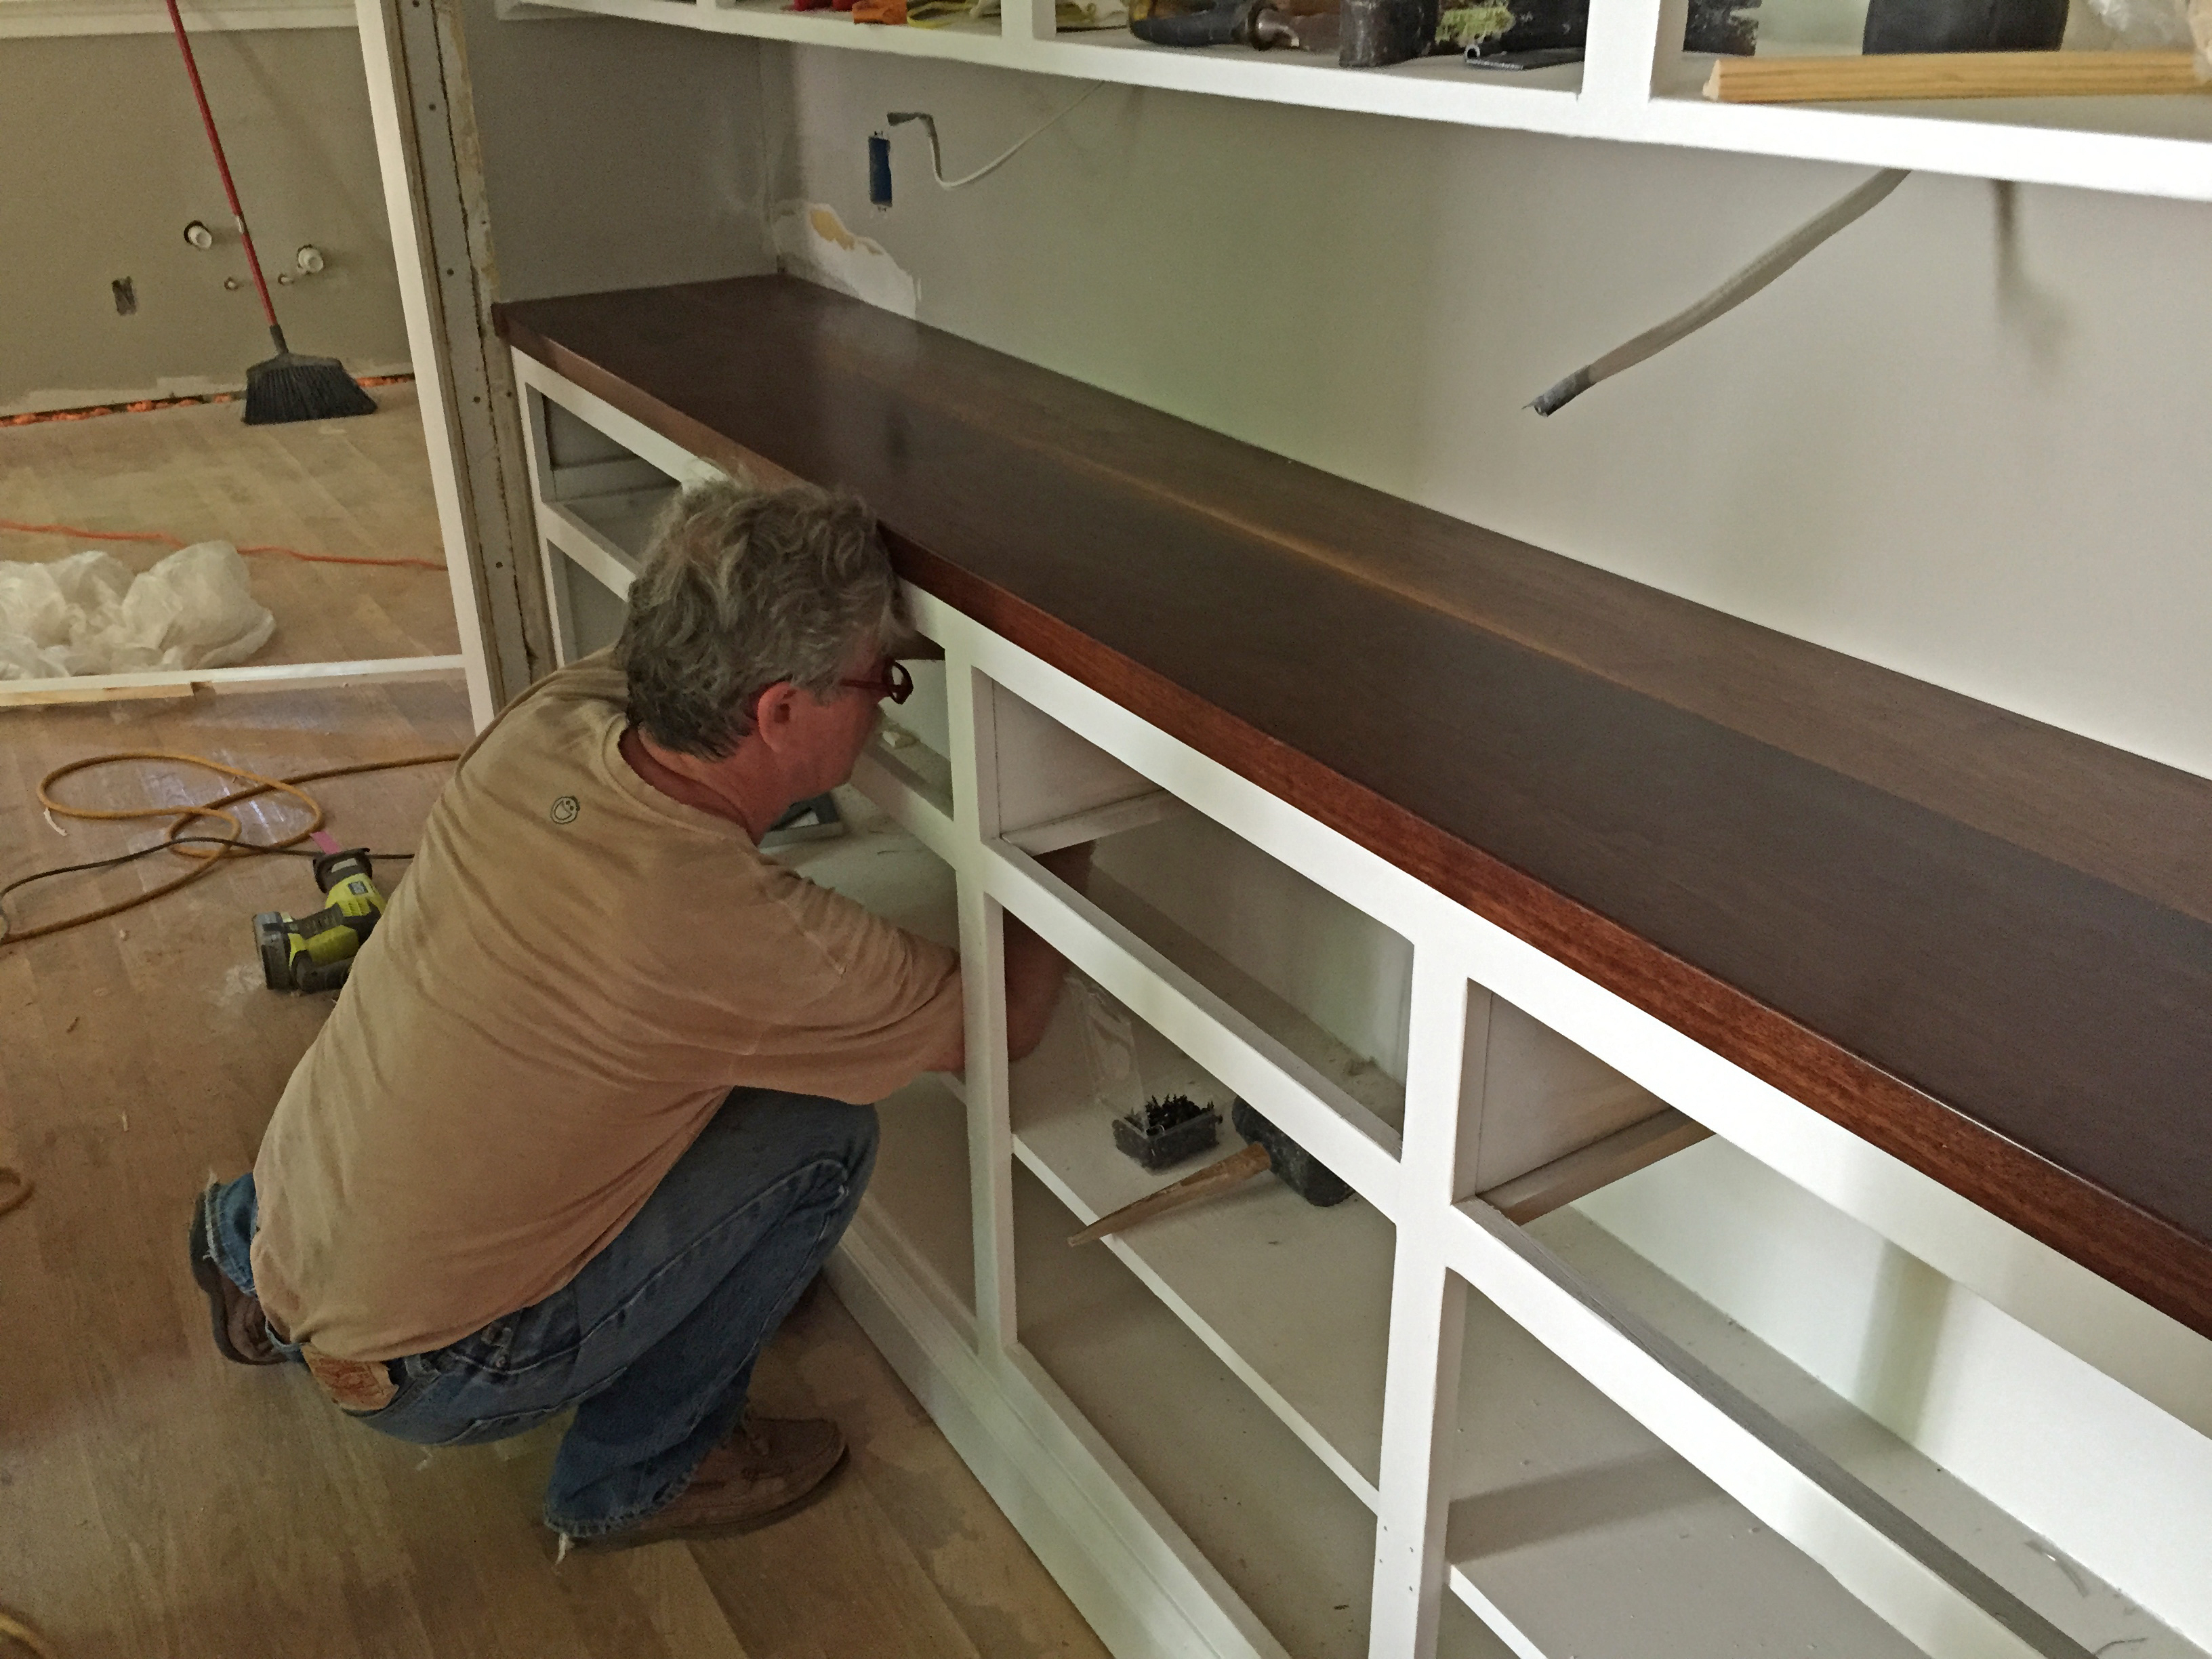
Cabinets going in… no island yet.

Hello, Kitchen!!

Hello, Kitchen!!

The Newton Nest DIY Kitchen Renovation IMG_9118

The Newton Nest DIY Kitchen Renovation IMG_9117

Putting on the trim.

Putting on the trim.

Prepping for paint... again.

Prepping for paint… again.  (Working late into the night; Matthew’s halo is shining bright! 😉 )

Trim painted and hardware on. It's starting to look pretty good around here :)

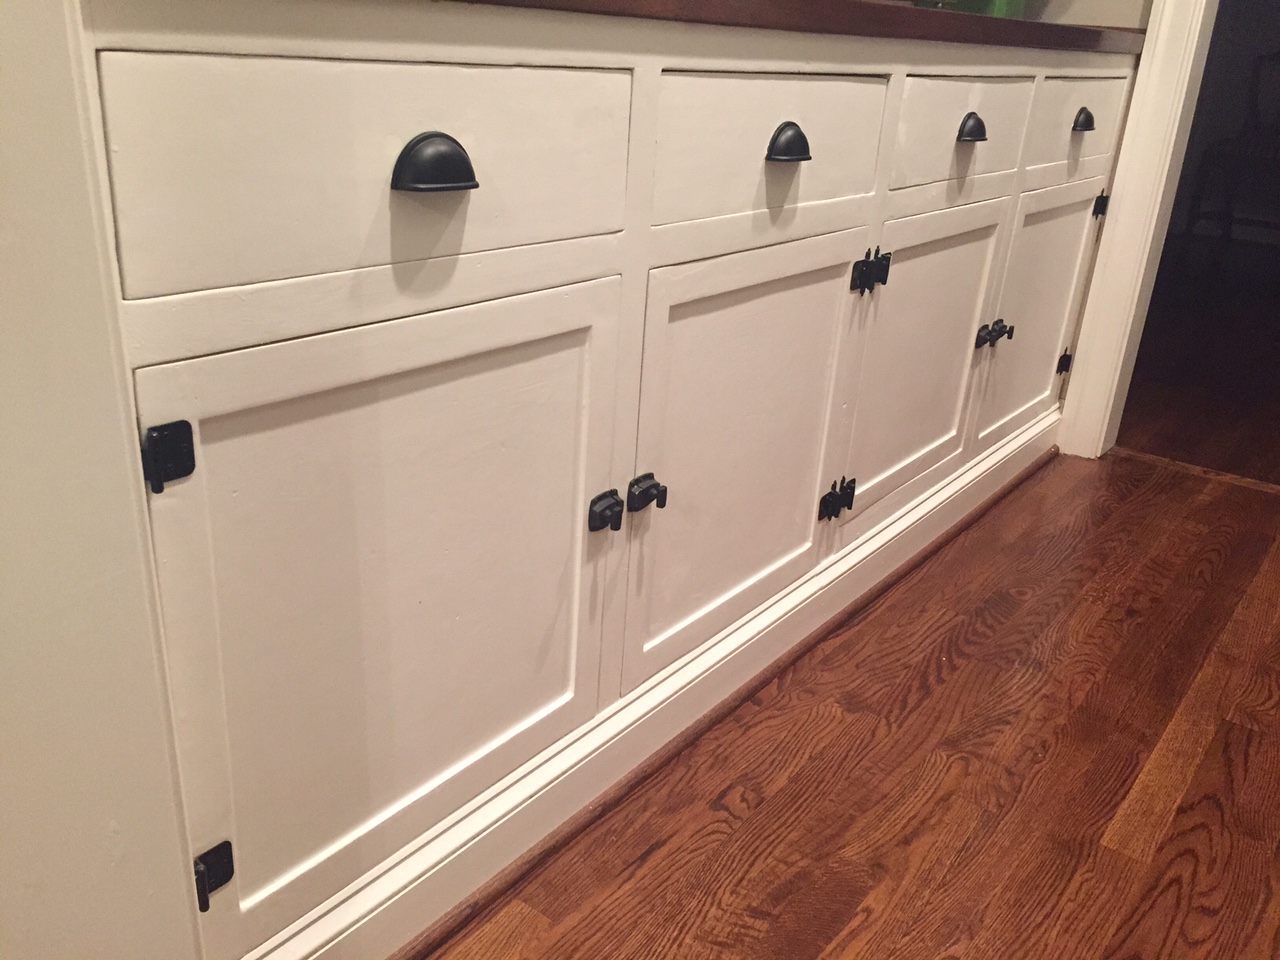
Trim painted and hardware on. It’s starting to look pretty good around here 🙂

Door Details

Door Details

Drawer Details

Drawer Details

Special thanks to my Aunt Julie who researched the cabinet hardware for us and found great quality knobs and pulls for a really good price!

Sneak peek at the Butler's Pantry cabinets (I'll do a full post on this soon!) With a fresh coat of paint and new hardware, they blend right in with the new cabinets!

Sneak peek at the Butler’s Pantry cabinets (I’ll do a full post on this transformation soon!) With a fresh coat of paint and new hardware, they blend right in with the new cabinets!

One of my favorite things we did in the kitchen was turning the old ironing board cabinet into a place to keep all our spices. The cabinet maker removed the old built-in ironing board (and relocated it into our laundry room cabinets) and added small shelves just the right size for spice jars. I had our cabinet maker restore the little "trap door" used to store the iron and keep that as part of the cabinet -- so cute!

One of my favorite things we did in the kitchen was repurposing the old ironing board cabinet into the perfect place to keep all our spices. The cabinet maker removed the old fold-down ironing board (and relocated it into our laundry room cabinets), then added small shelves just the right size for spice jars. I had our cabinet maker restore the little “trap door” at the bottom that was used to store the iron. It felt right to keep this little piece of history as part of the cabinet — so cute!

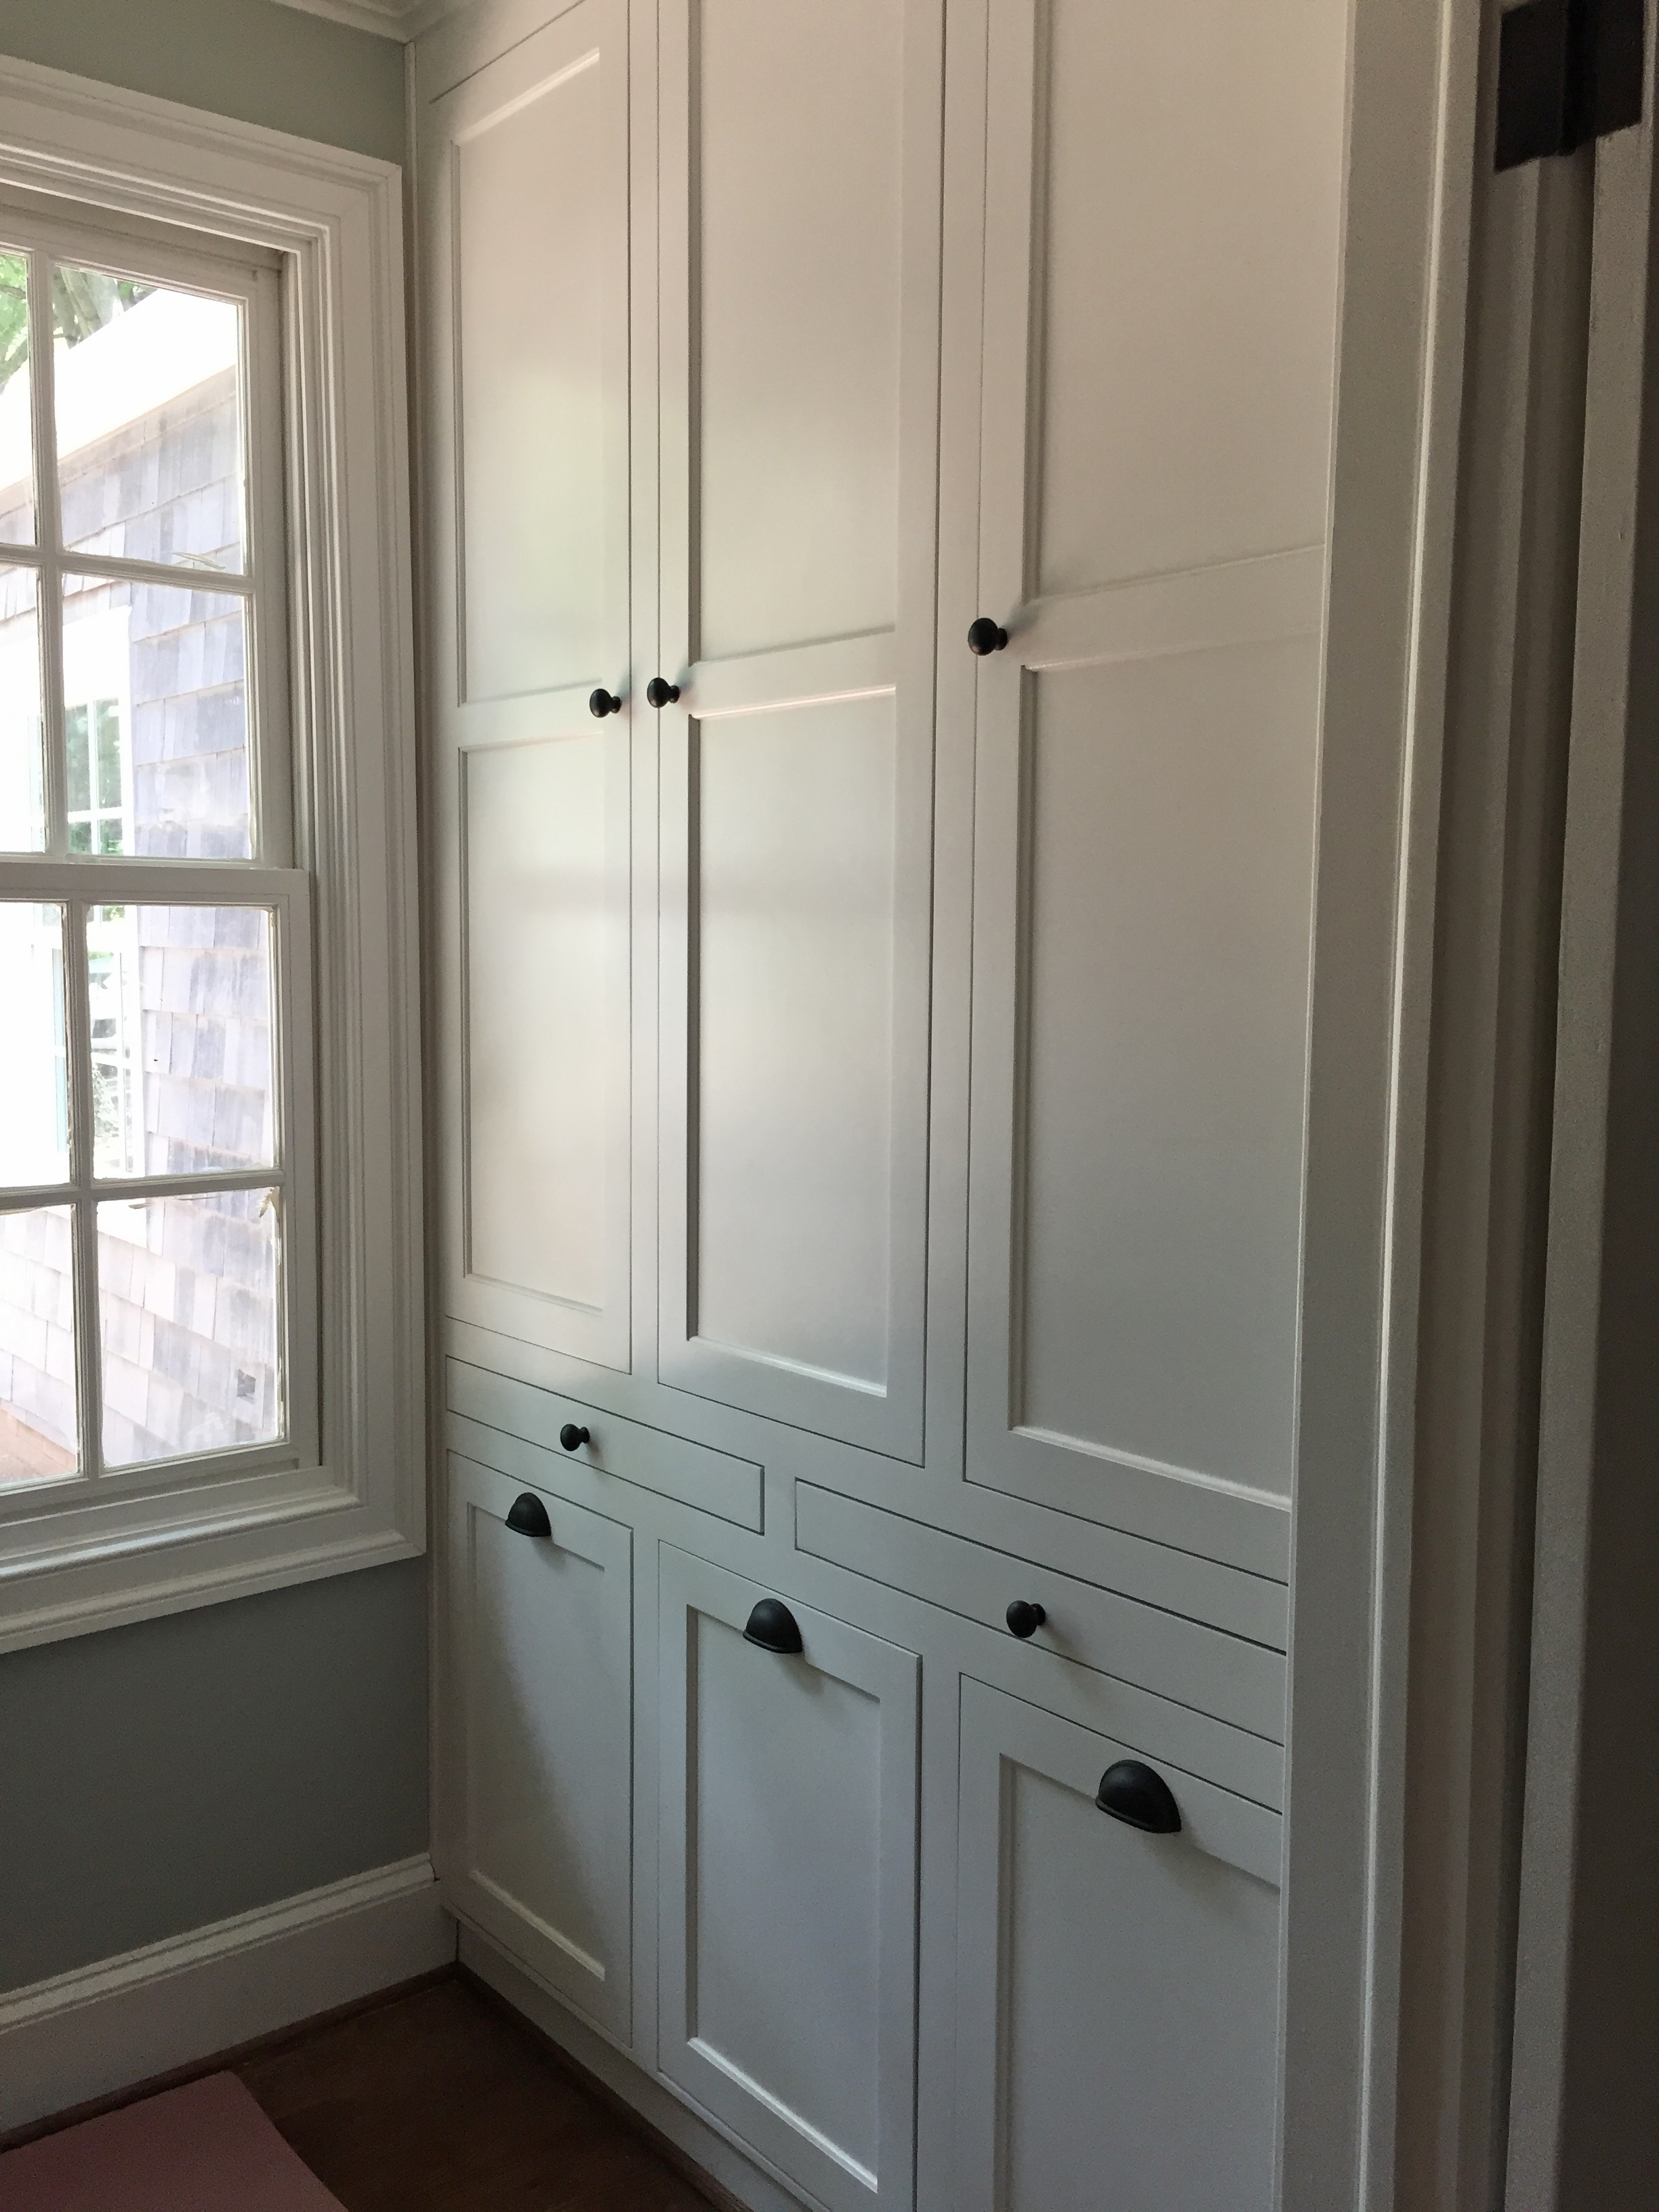
Laundry Room Cabinets

Our sketches:

The Newton Nest DIY Kitchen/Laundry Room Renovation IMG_7622

The Newton Nest DIY Kitchen/Laundry Room Renovation IMG_7615 (1)

The Newton Nest DIY Kitchen/Laundry Room Renovation IMG_7614

The finished product:

Cabinets over the Washer/Dryer.

Cabinets over the Washer/Dryer.

Floor-to-ceiling cabinets for all kinds of laundry things...

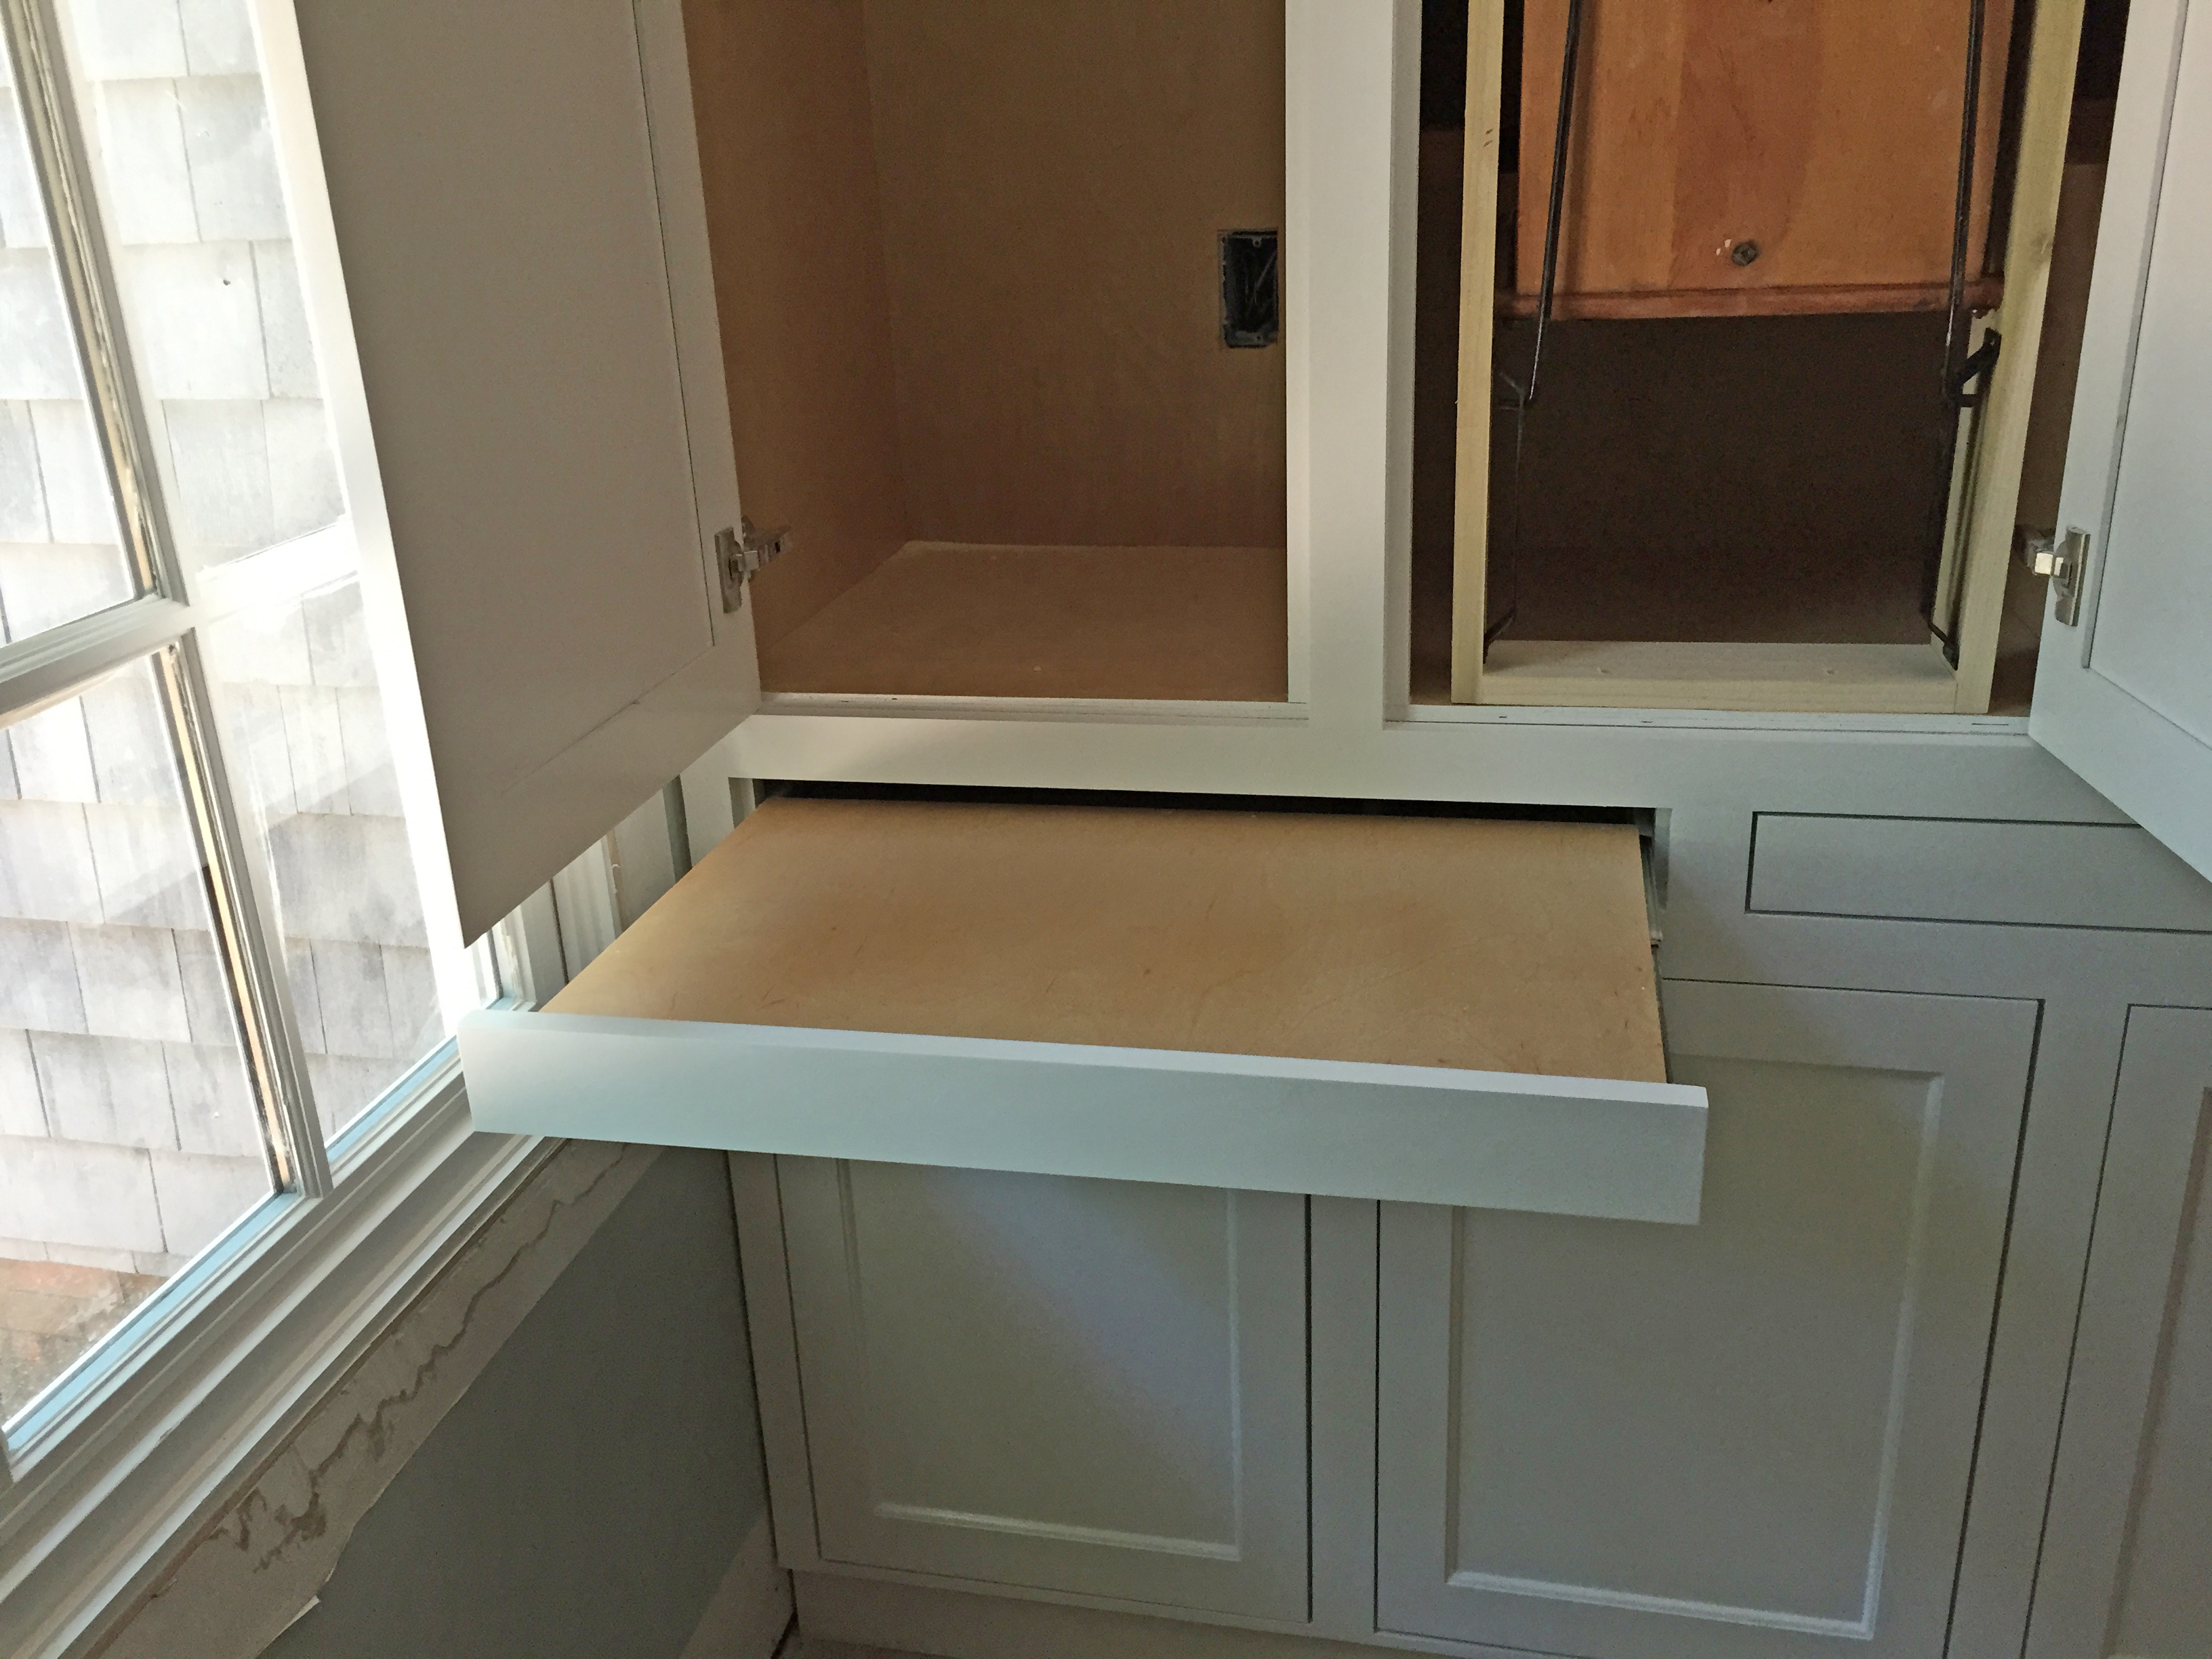
Floor-to-ceiling cabinets for all kinds of laundry things…

Like... storage and ironing...

Like… storage and ironing…

...pull-out folding surfaces...

…pull-out folding surfaces…

...and pull-out hampers!

…and laundry hampers!

Master Bathroom Vanity Cabinet

Installed!

Installed!

Hardware on!

Hardware on!

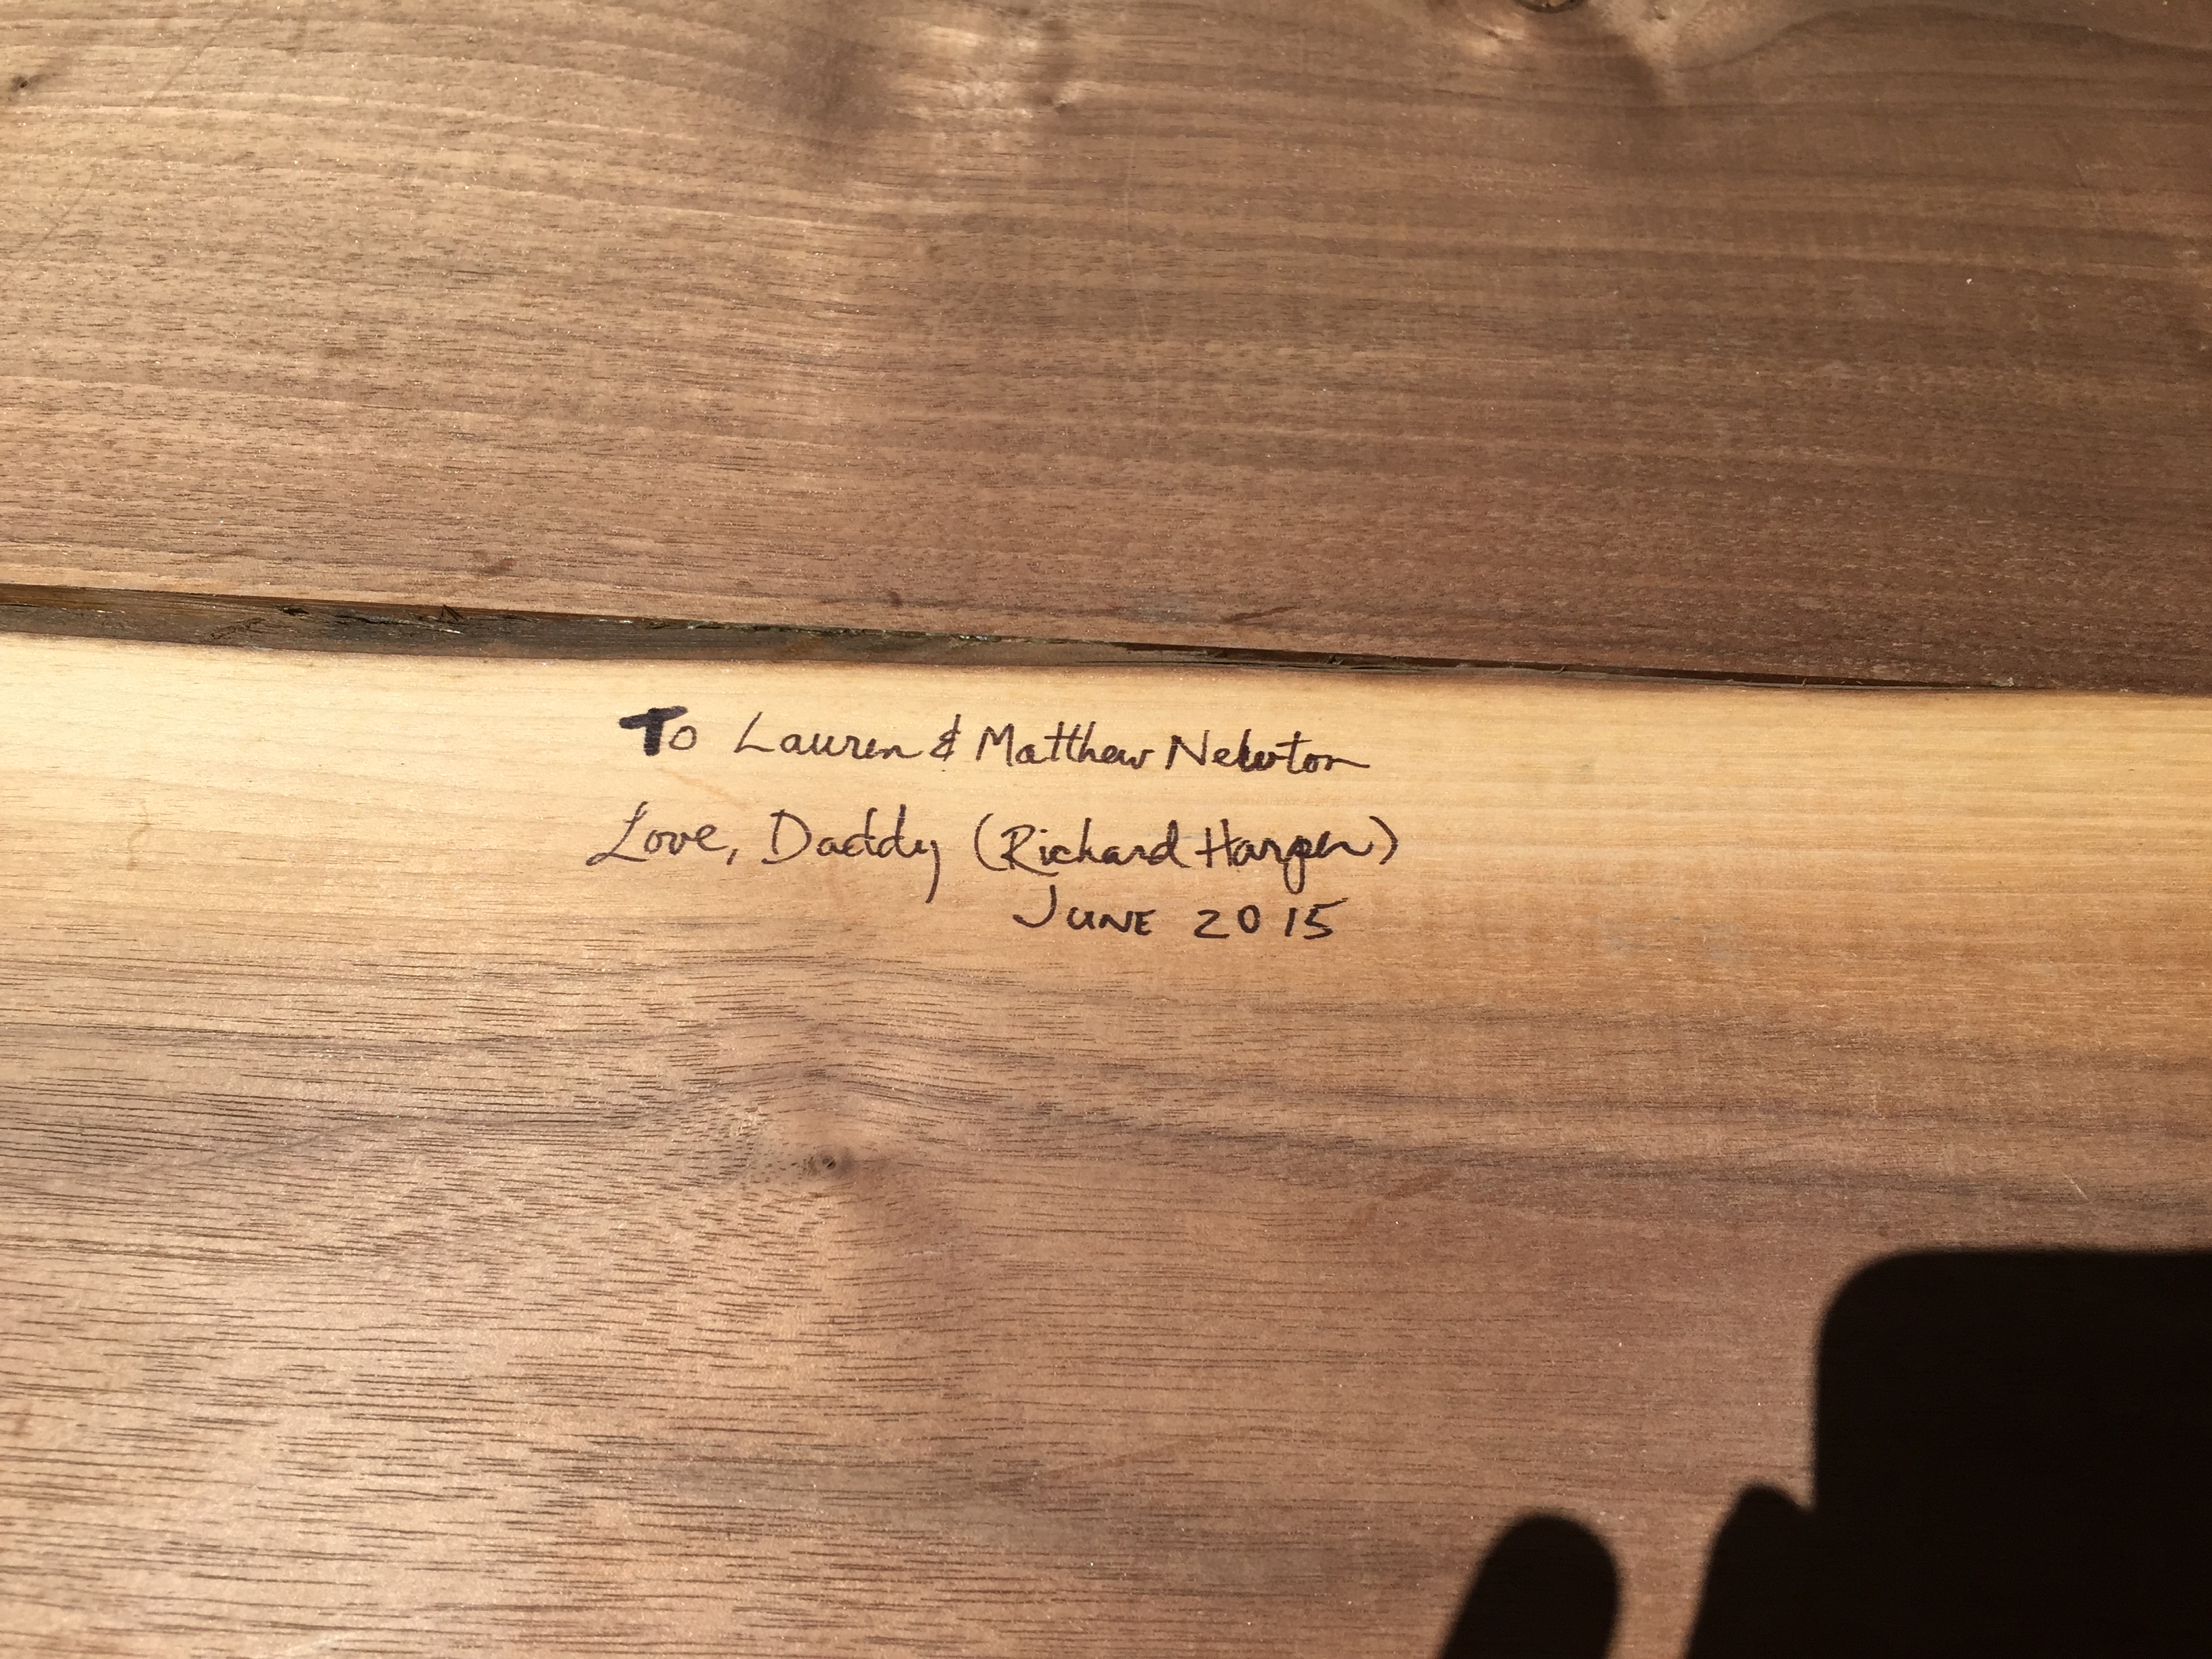
It wouldn’t be The Newton Nest without a couple of older pieces mixed in with the new…

While we’re talking about cabinets, I’d be remiss not to point out two pretty special ones that aren’t custom, but fit pretty seamlessly into our space – if we do say so ourselves! 😉 Both of these found pieces made themselves at home in our hall bathroom, giving it a lot of character and extra storage space!

1.  The Hall Bathroom Vanity

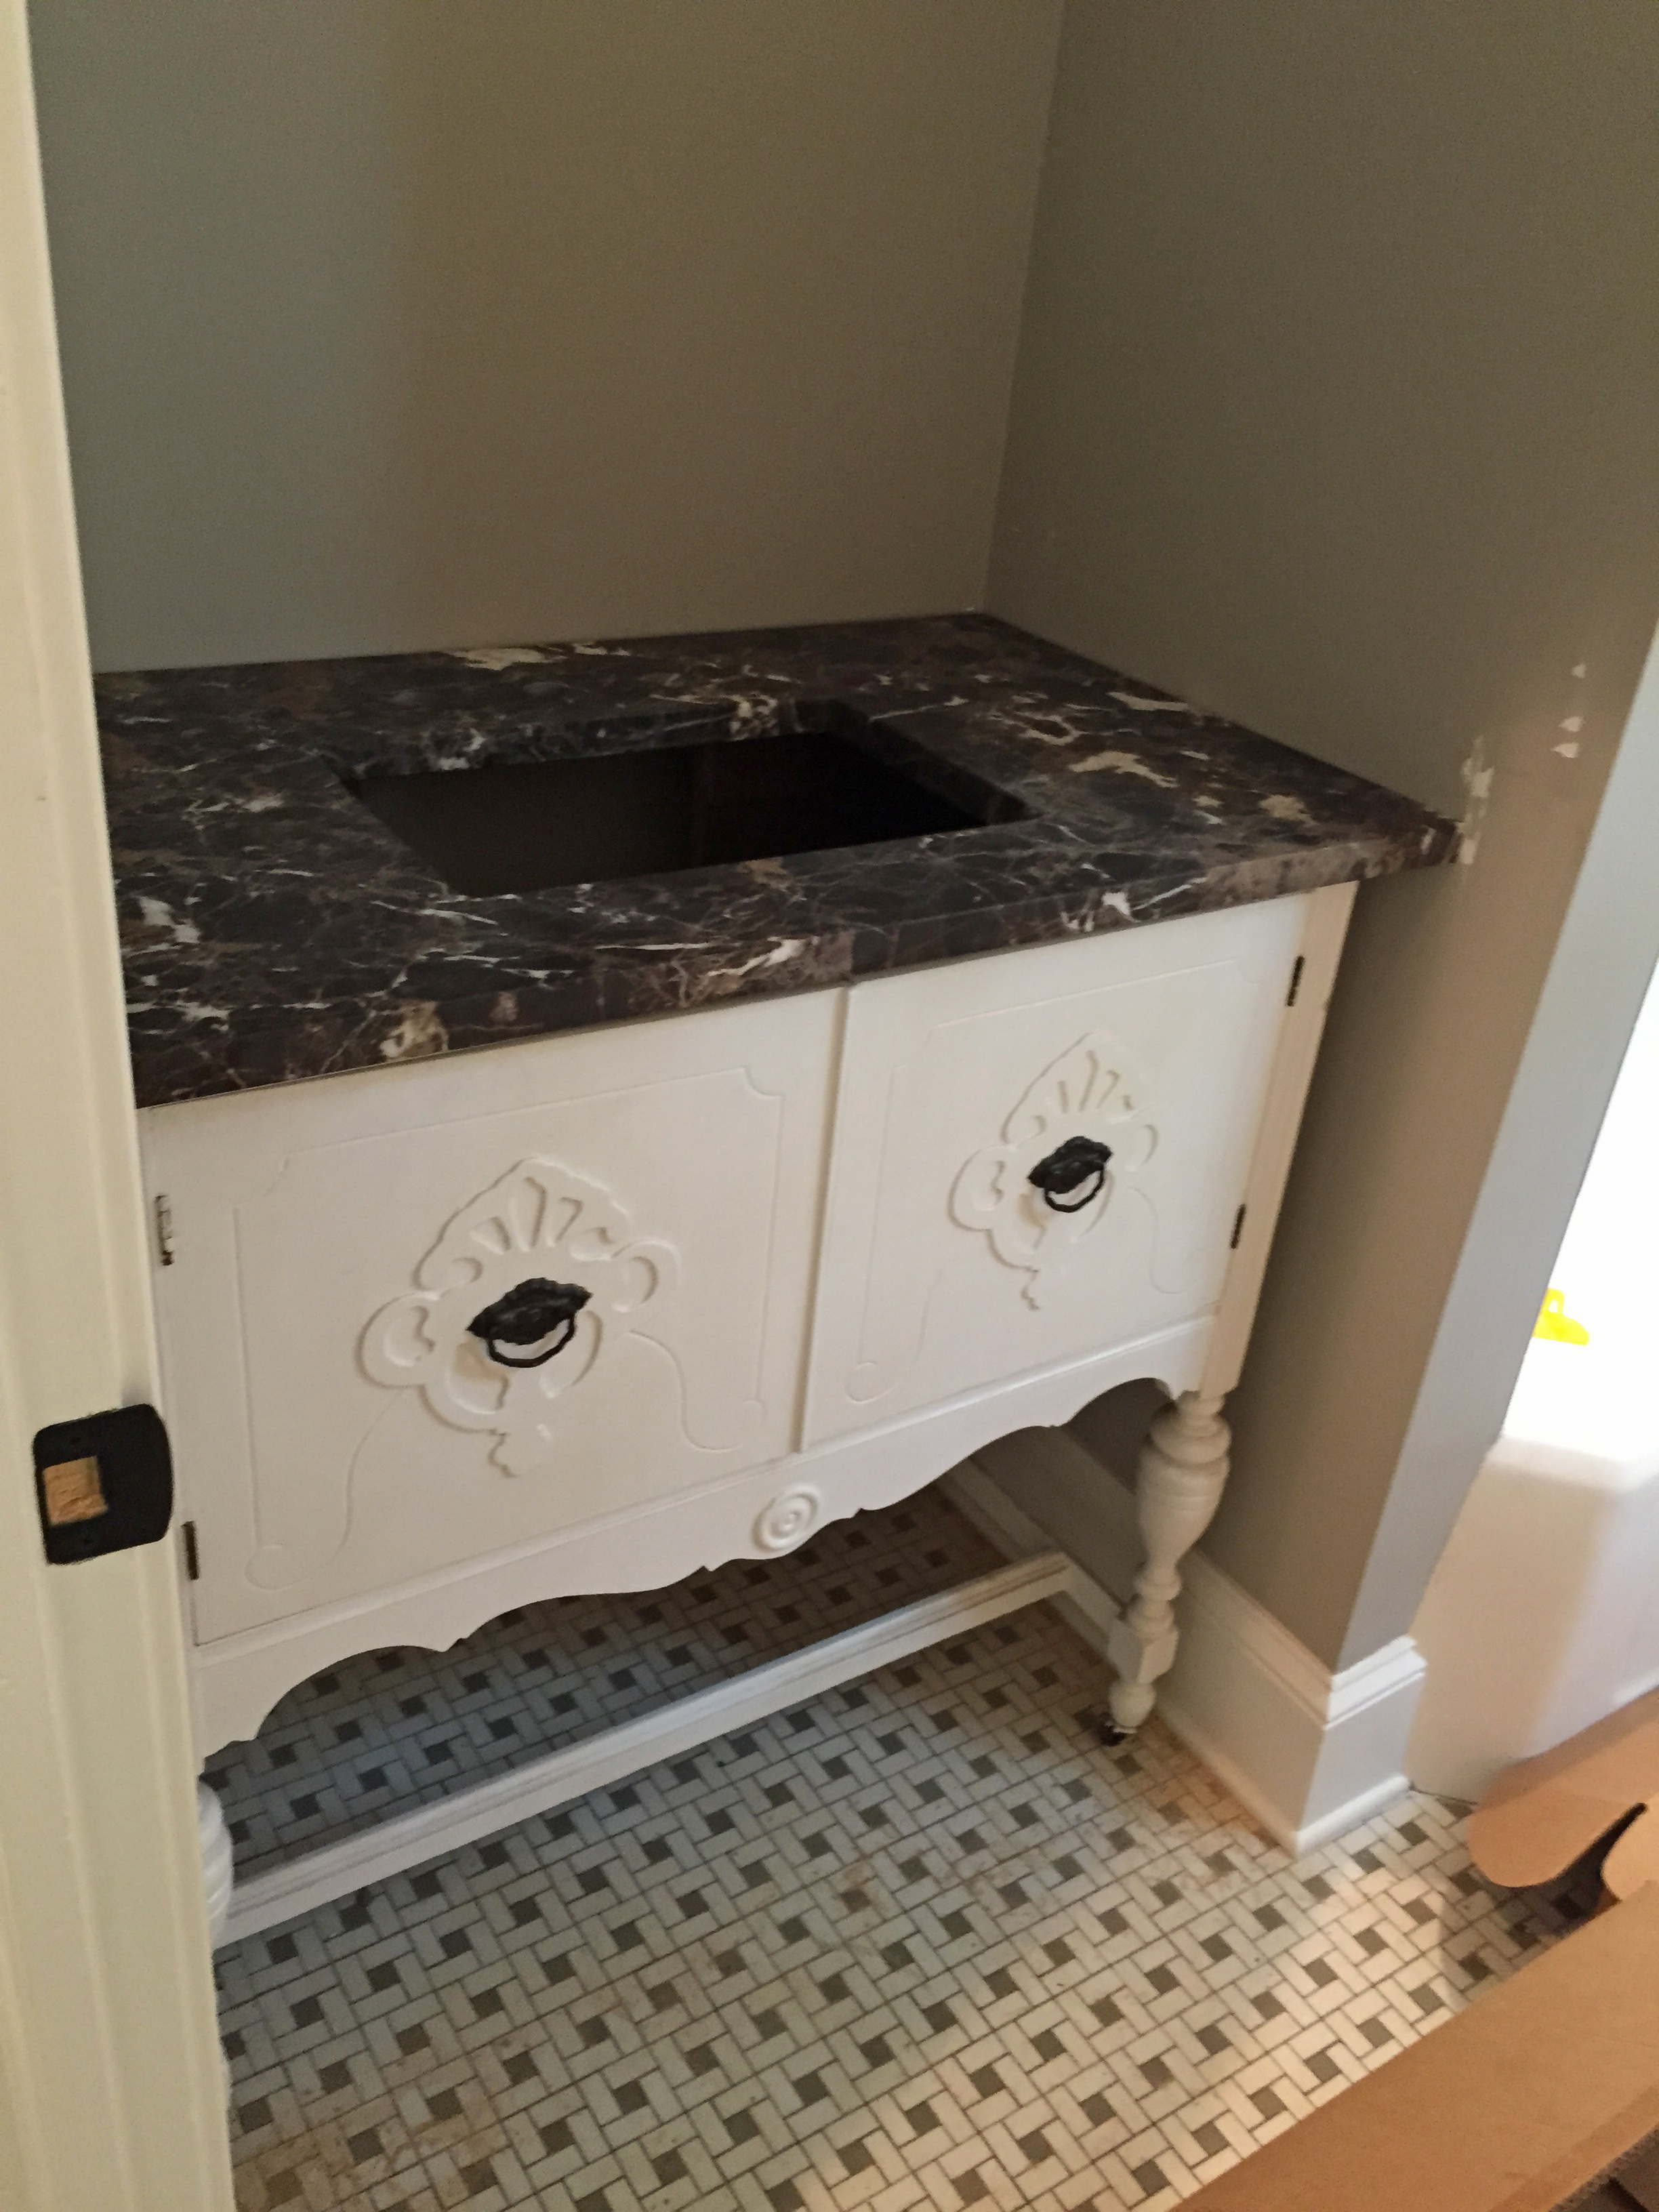
The hall bathroom vanity was just a pedestal sink before we began our renovation. We worked hard to create a more functional space there by moving the doorway and creating an “end cap” wall at the foot of the tub to close in the shower and form a definitive vanity space. This little nook is the perfect spot for a petite vanity, so Matthew and I searched for months for a piece of furniture we could repurpose in this space. After trips all over Greenville and nearby Asheville, and lots of Craigslist surfing, we found ourselves at a little salvage place in Powdersville, SC and stumbled upon a small server that was just the thing! Cute, isn’t she?

The Newton Nest DIY Renovation IMG_9642

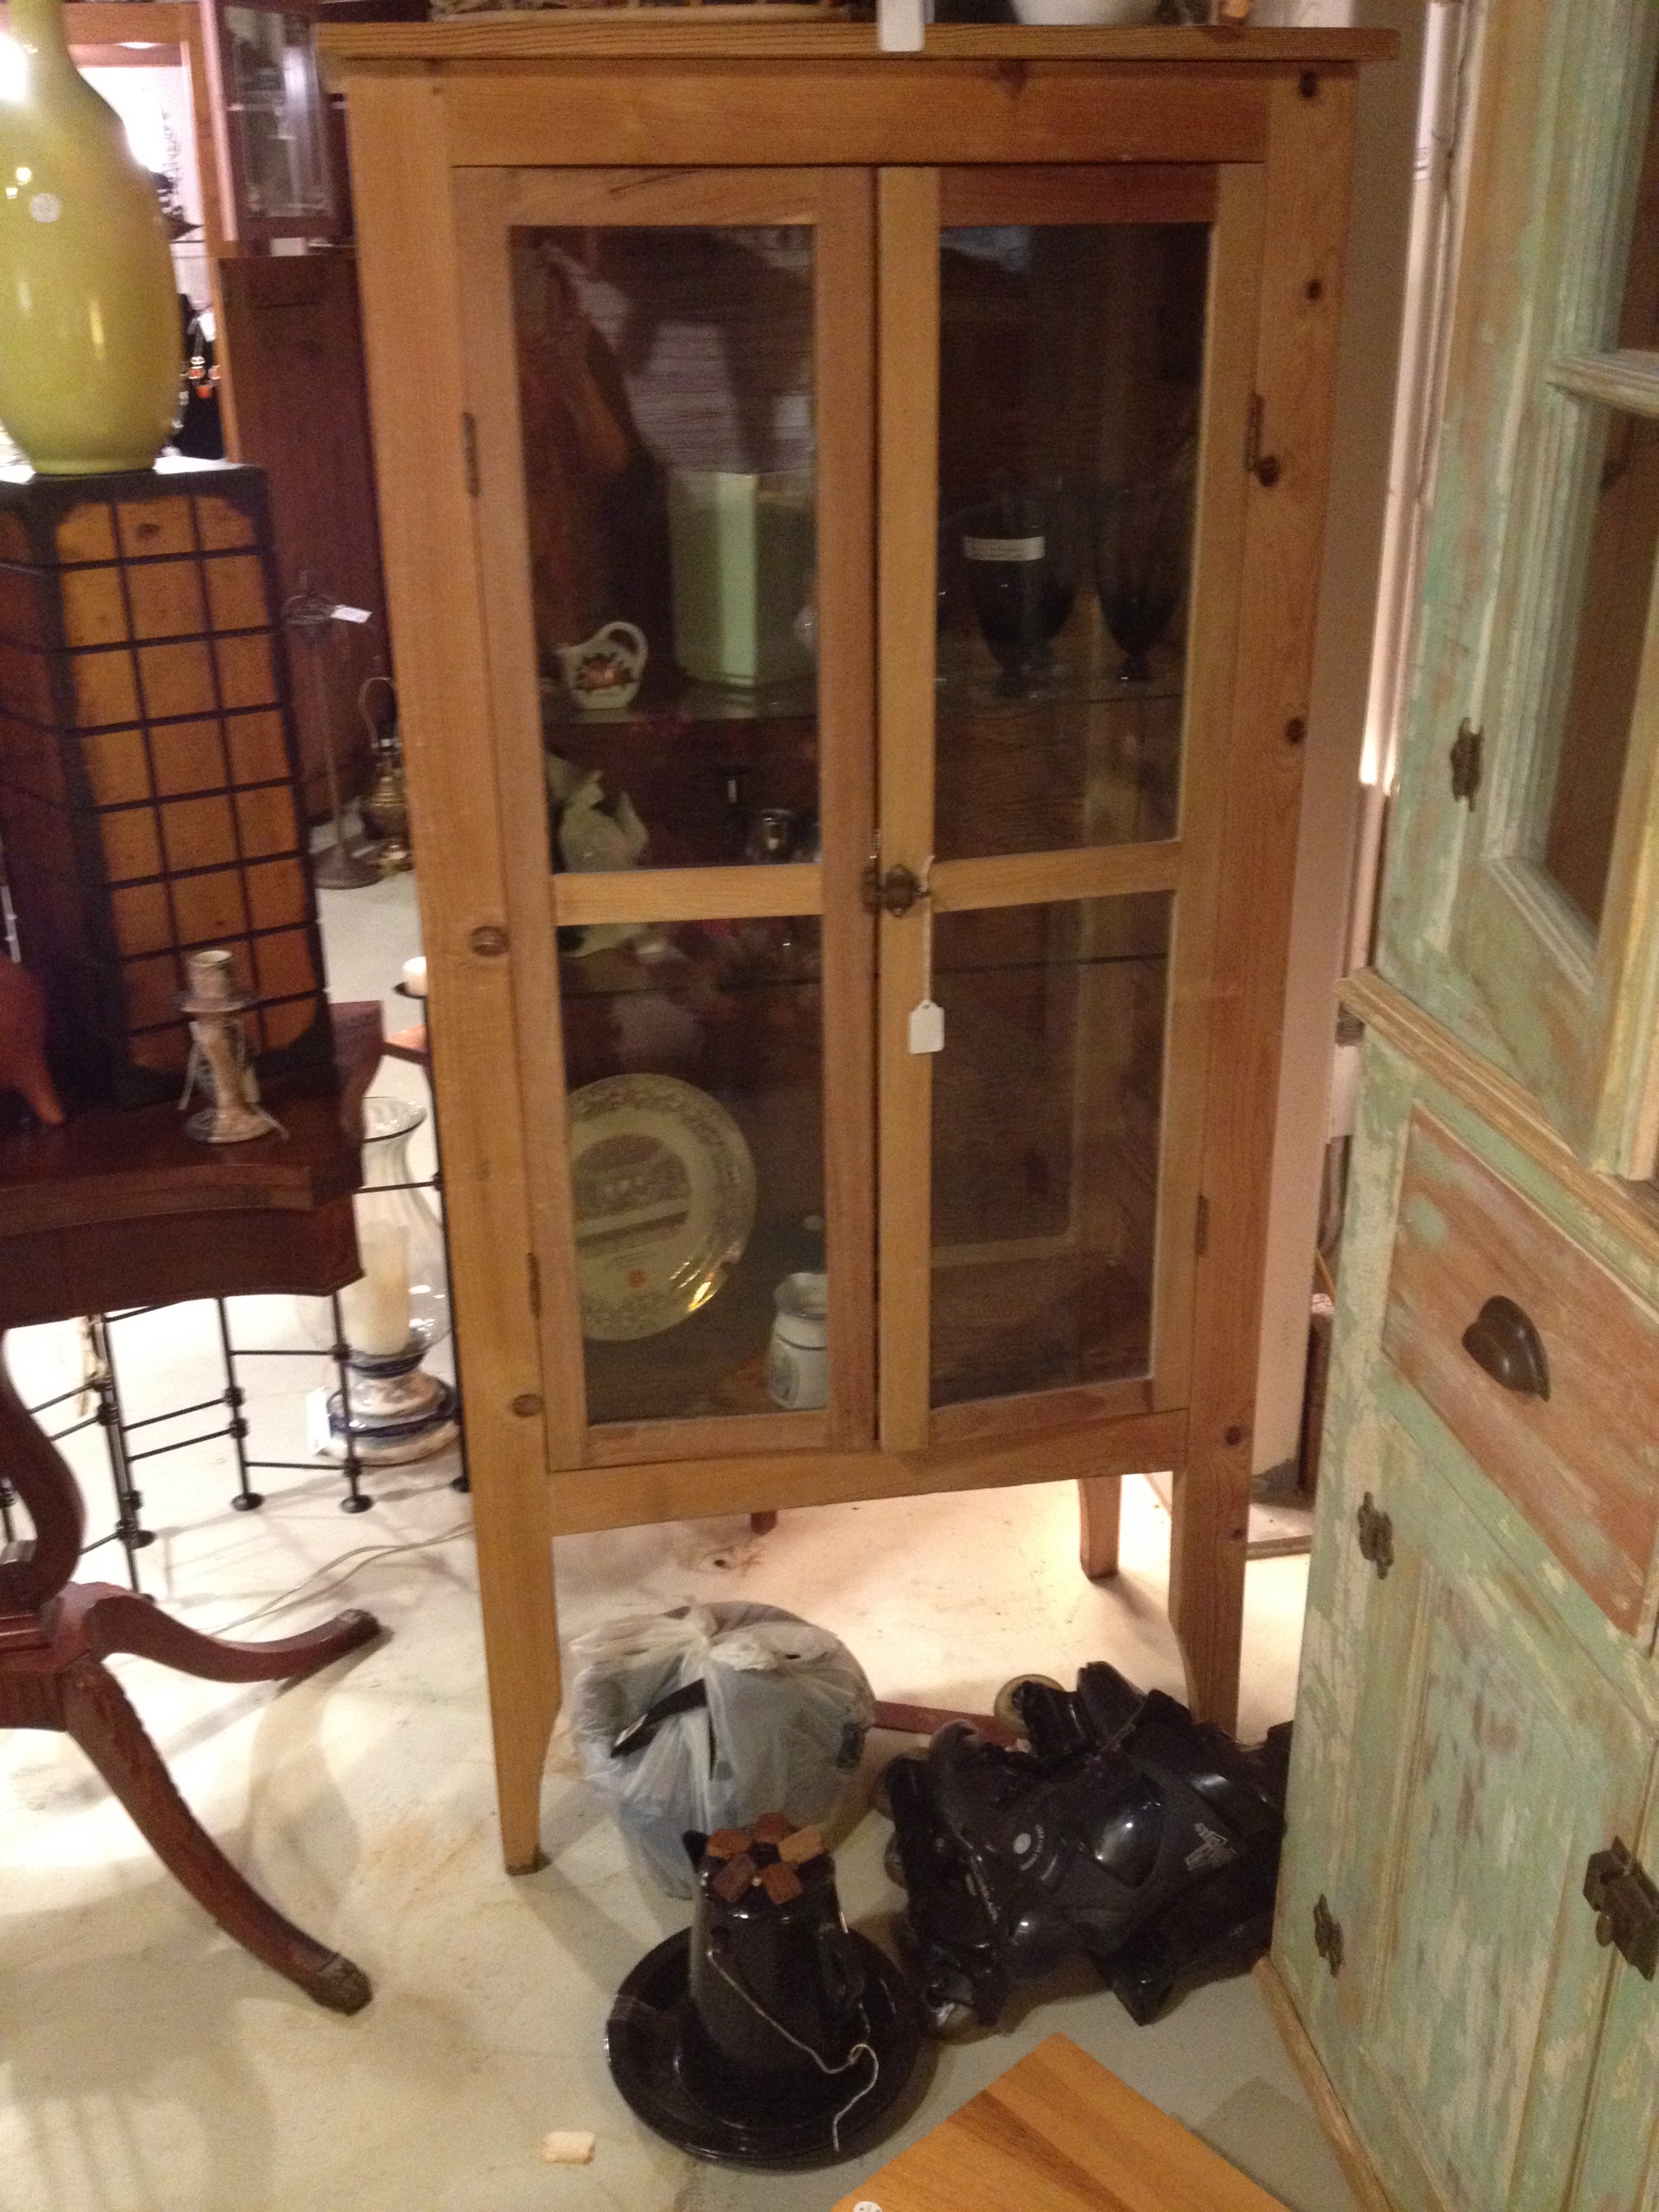
2.  The Hall Bathroom Built-in Cabinet

The hall bathroom “built in” was a completely different story. We weren’t looking for something like this at all. In fact, my mom stumbled upon this cute little antique cabinet and had the idea for us to build it into the wall (like a giant medicine cabinet) above the toilet in the hall bath. It took her about a month to convince me to buy this from a little antique store in Seneca, SC, but I’m SO glad she did! It has become an adorable focal point as you enter the hall bath and an essential storage space for toiletry items and guest towels.

Here's the cabinet! This is the picture my mom sent me from the antique store. It's the only one I have showing the cabinet with the legs still attached.

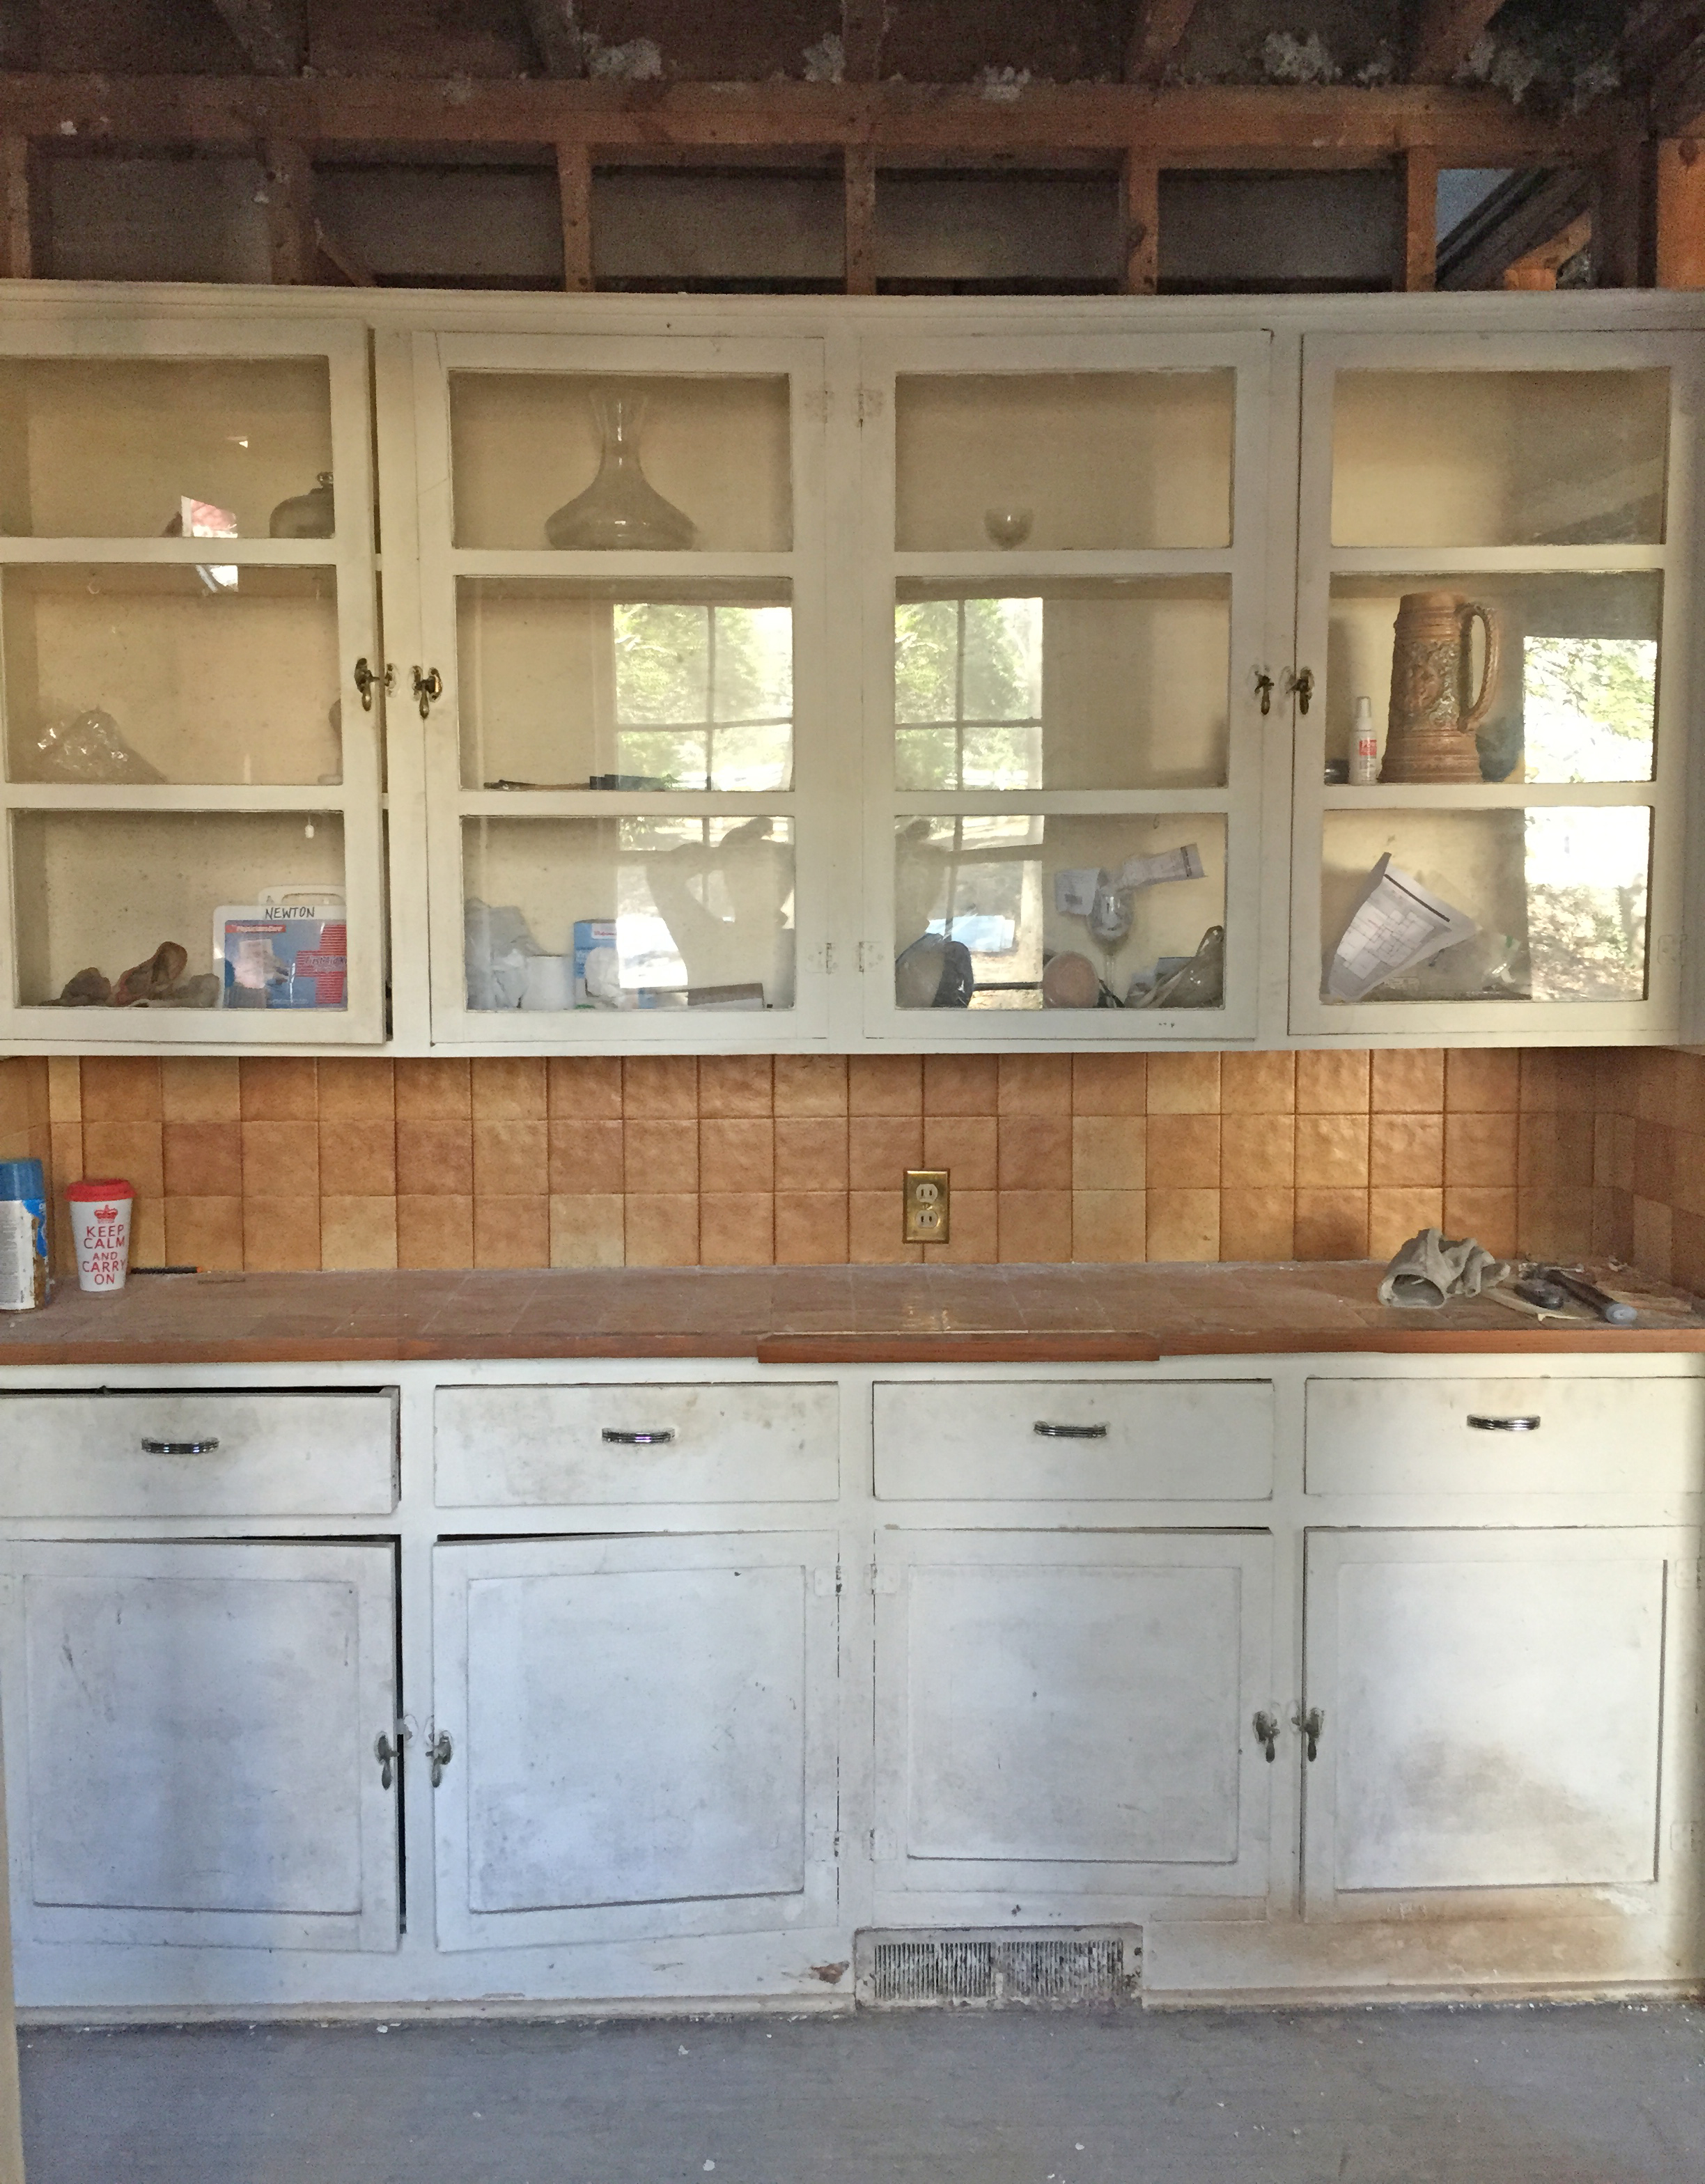
Here’s the cabinet! This is the picture my mom sent me from the antique store. It’s the only one I have showing the cabinet with the legs still attached.

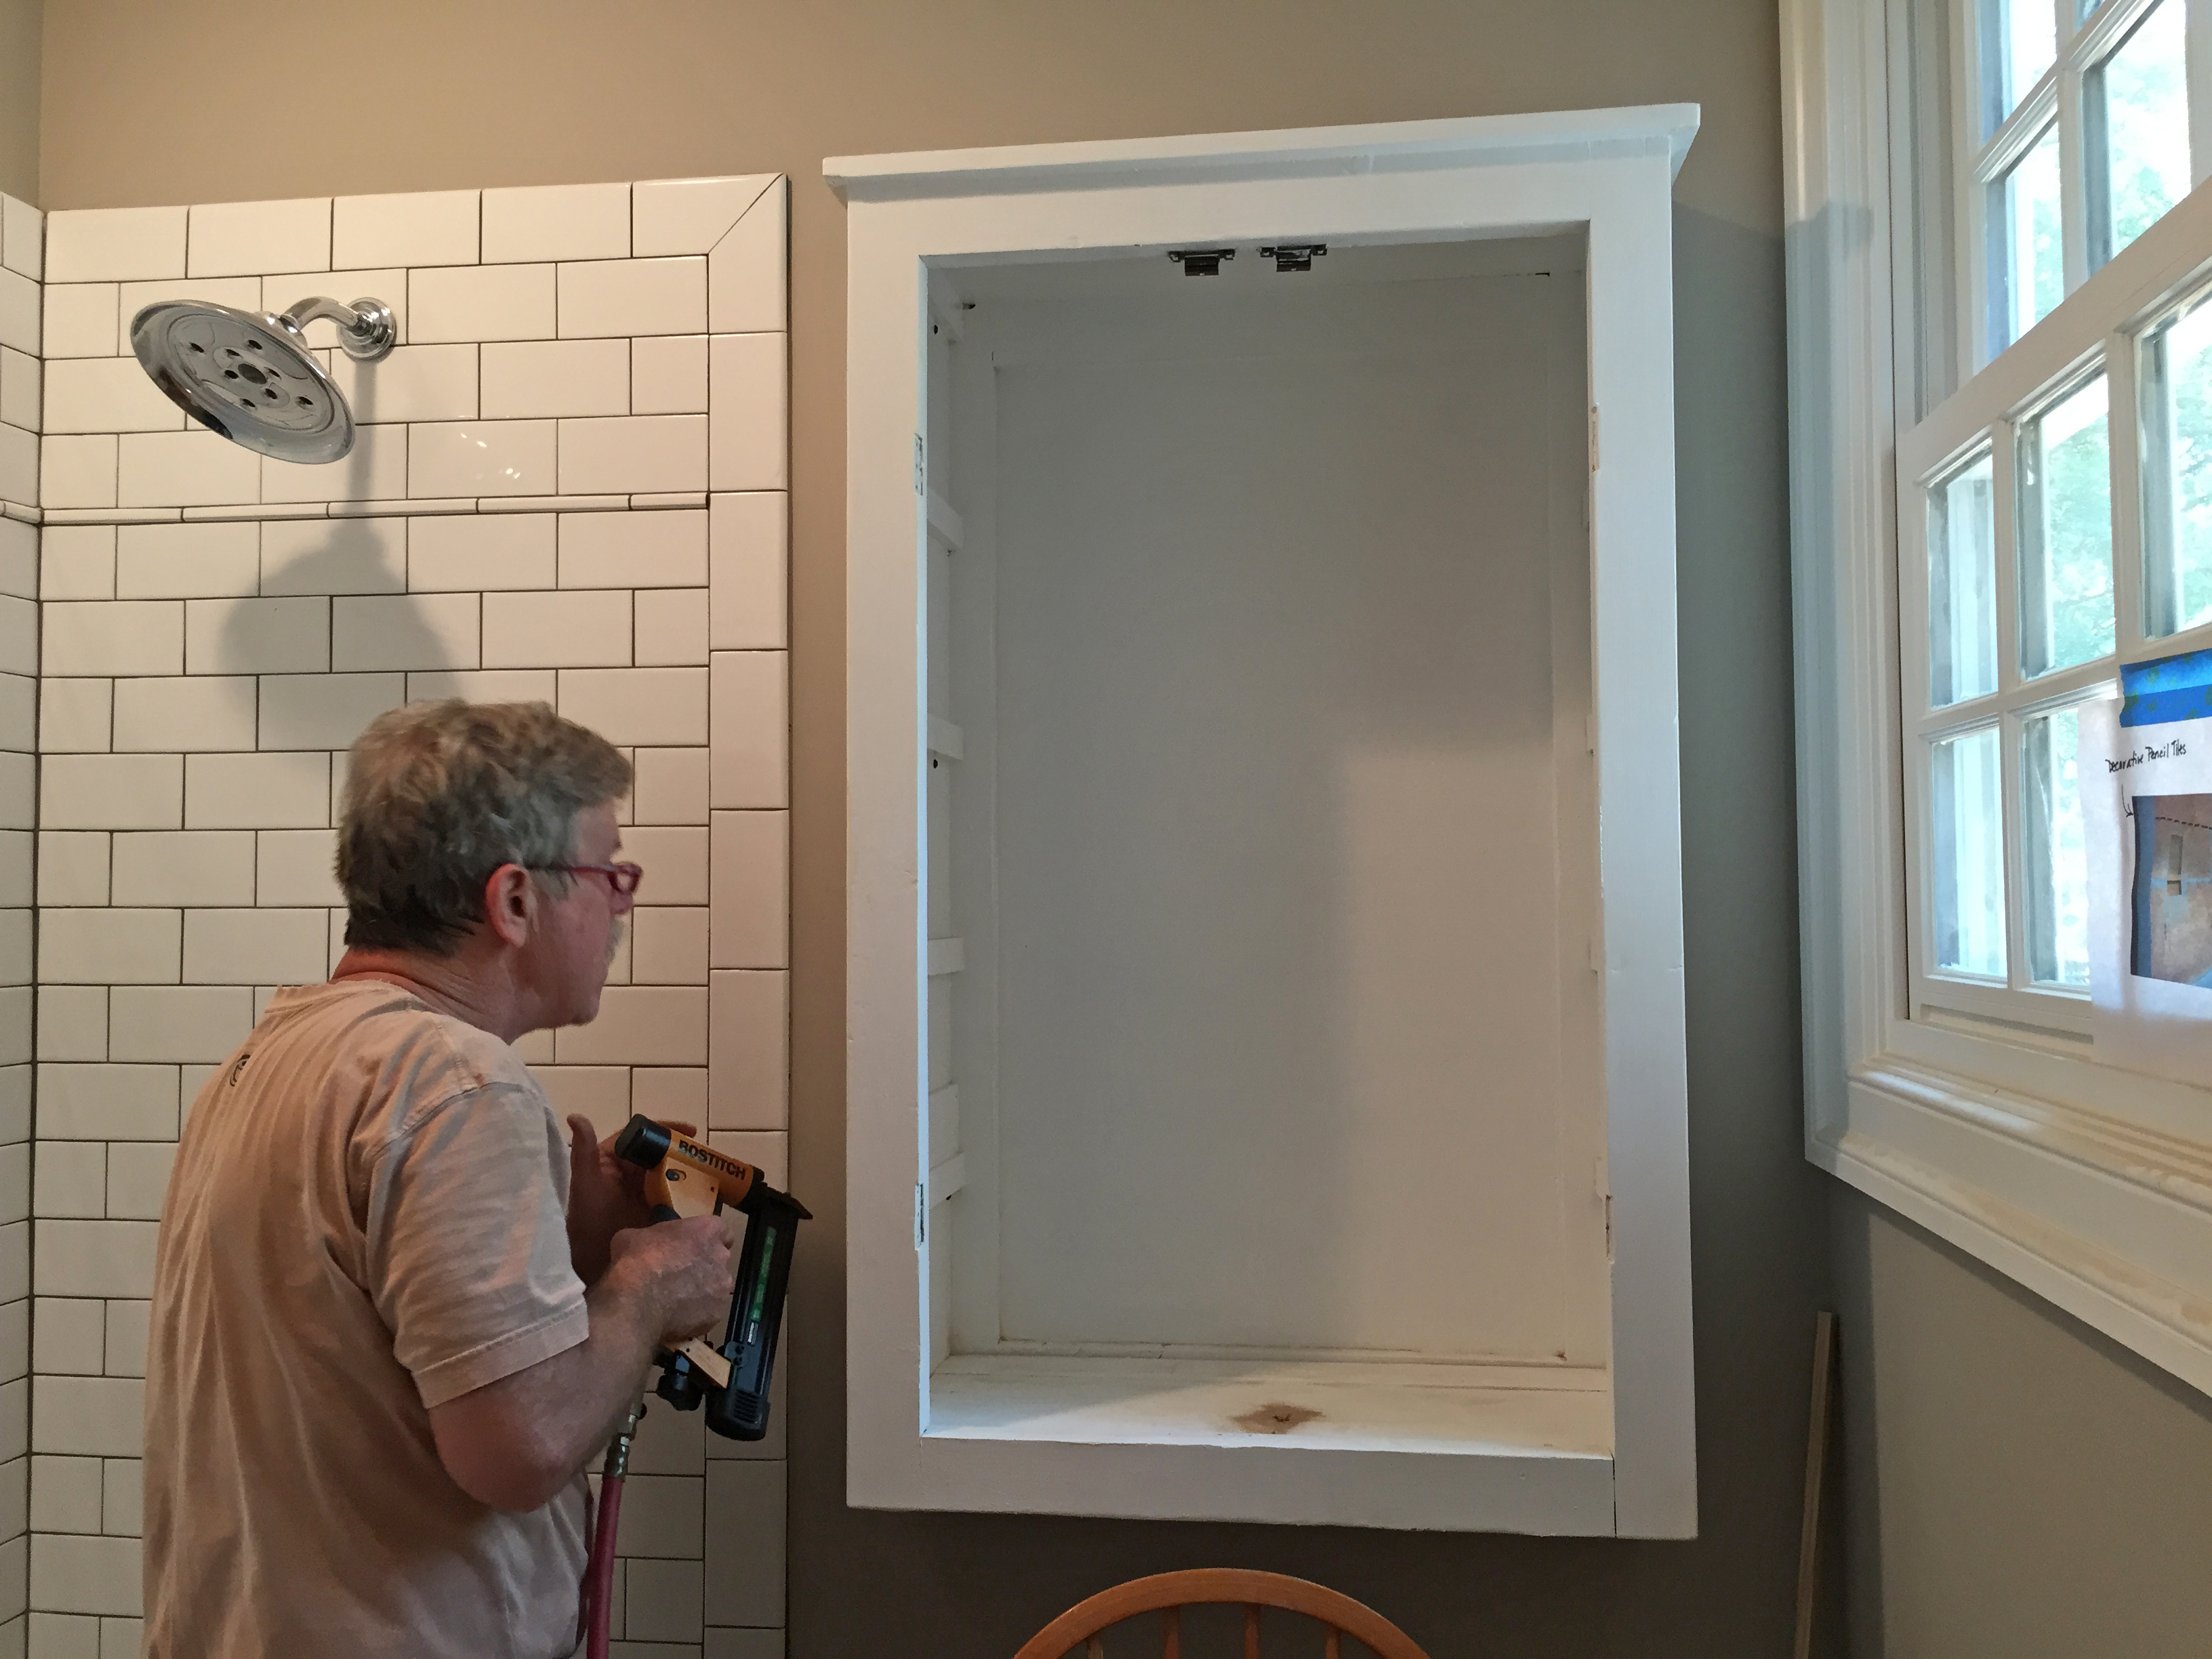
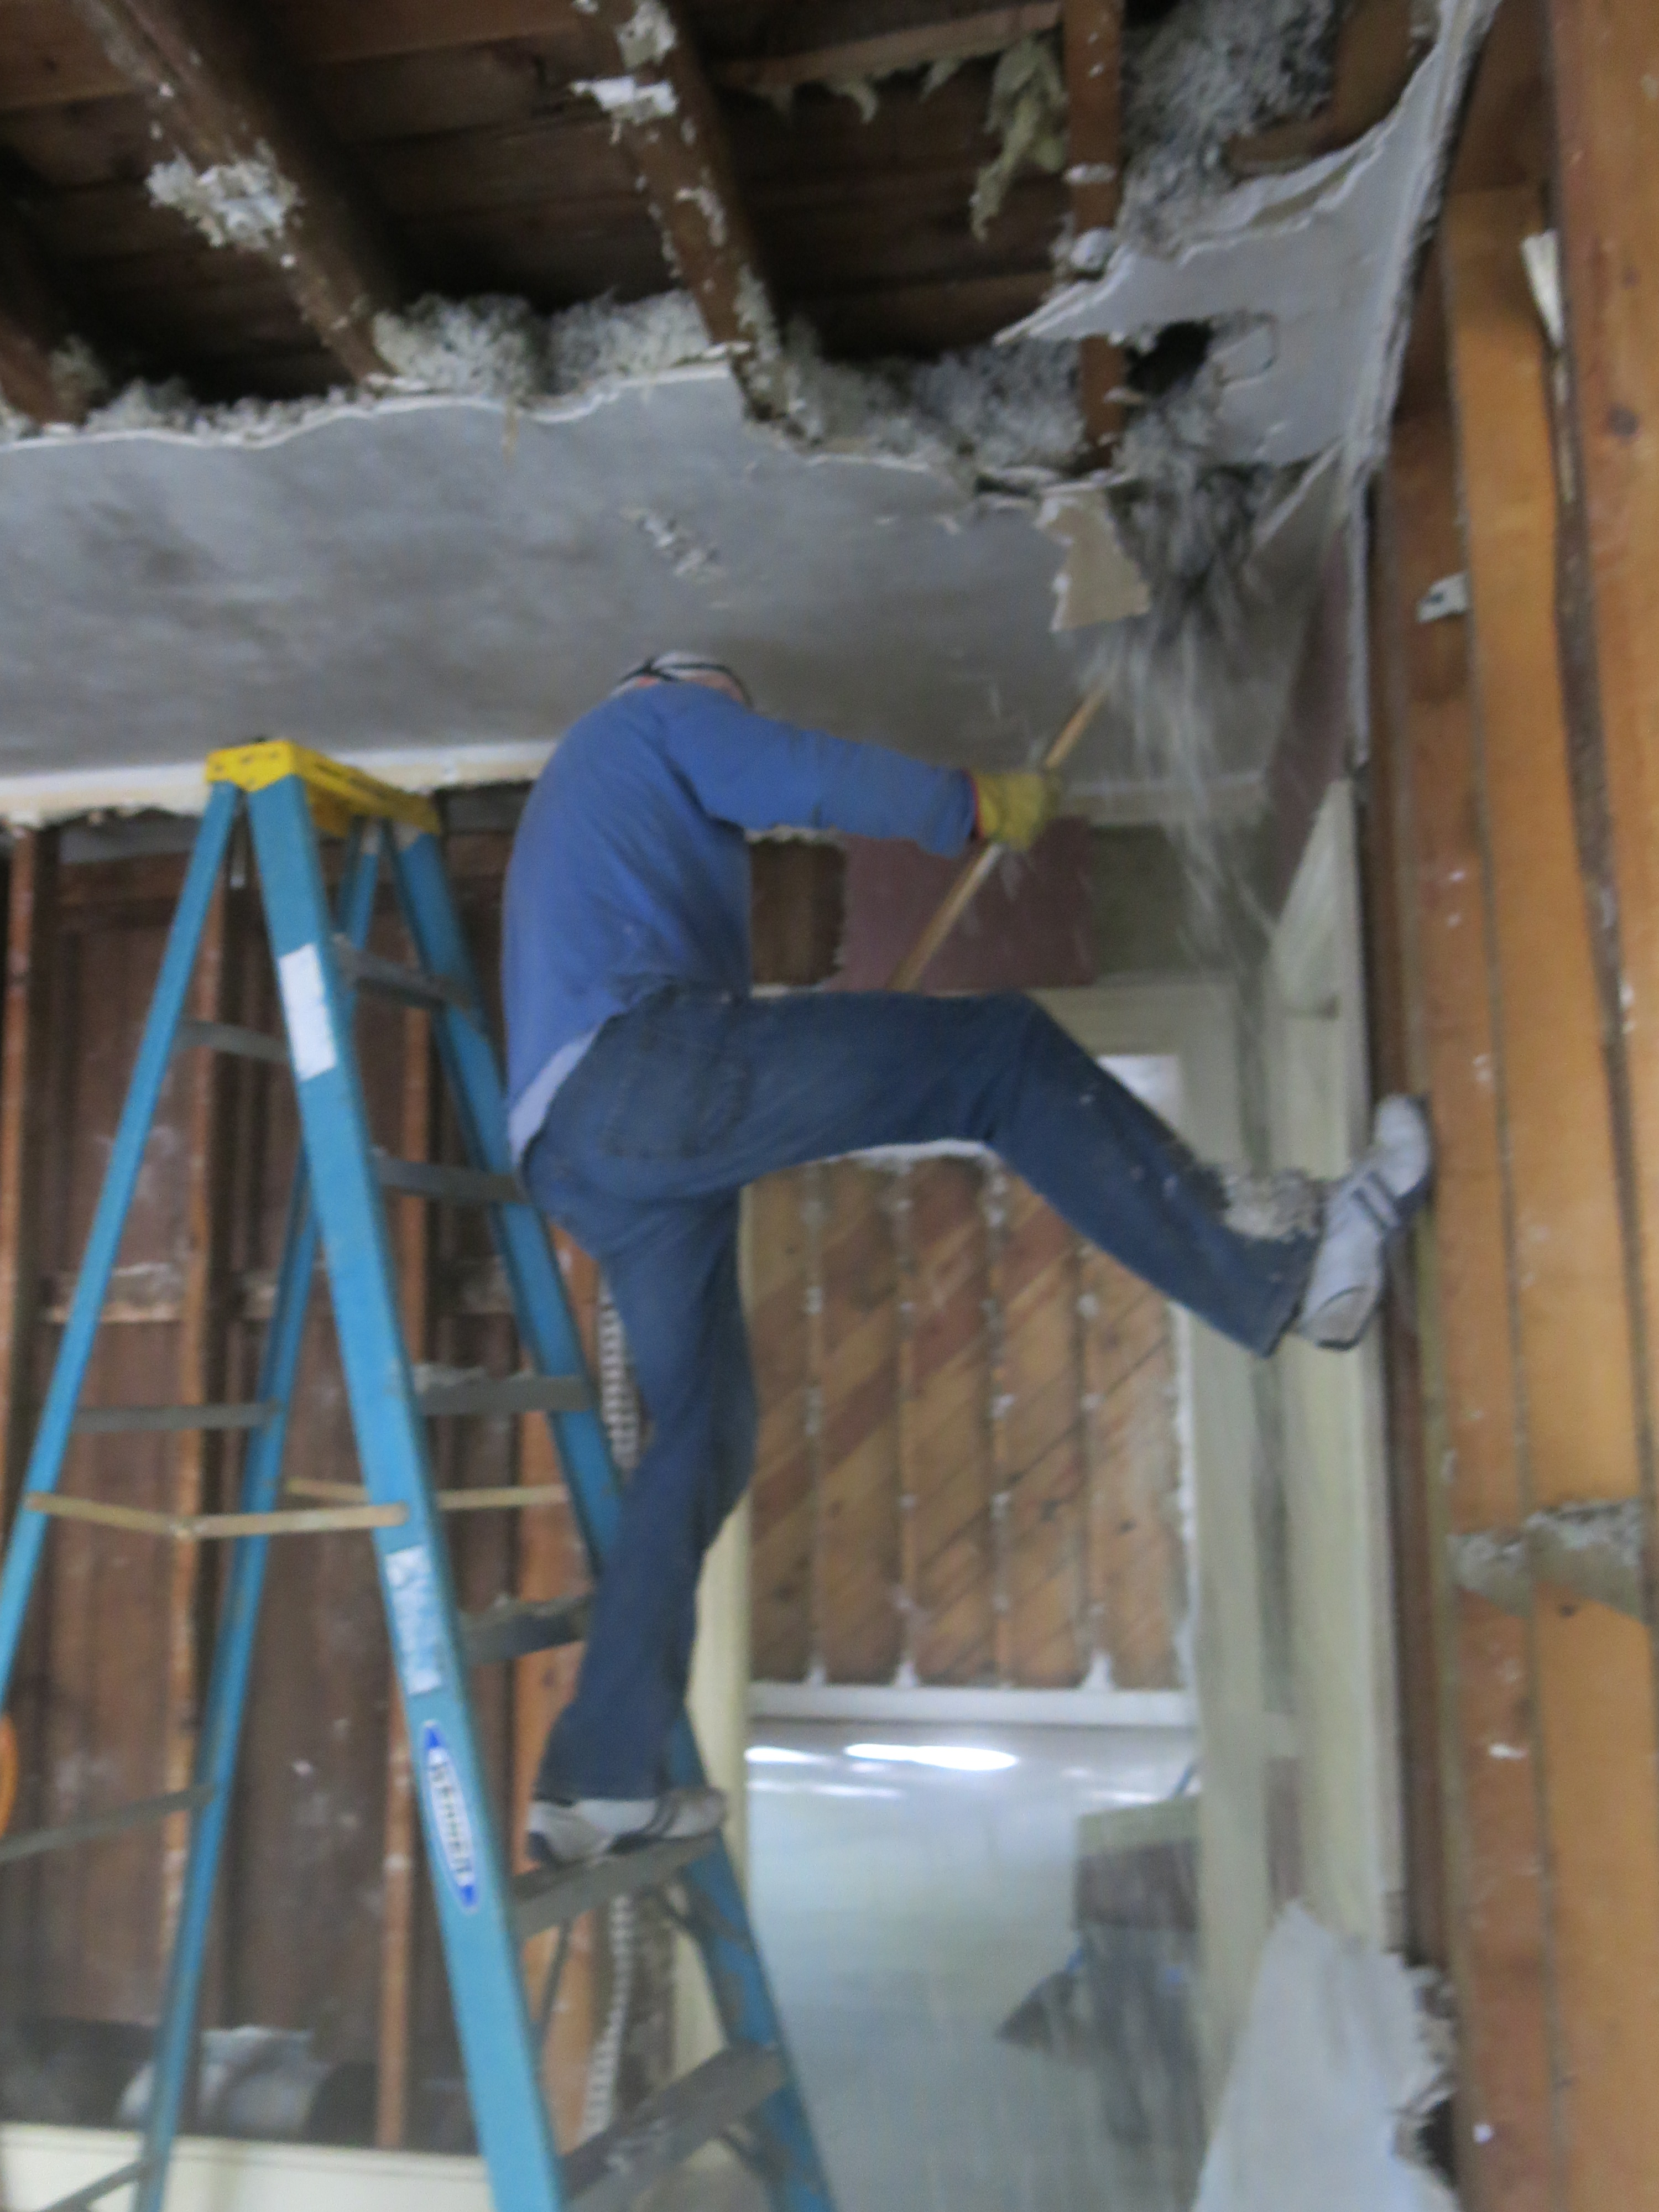
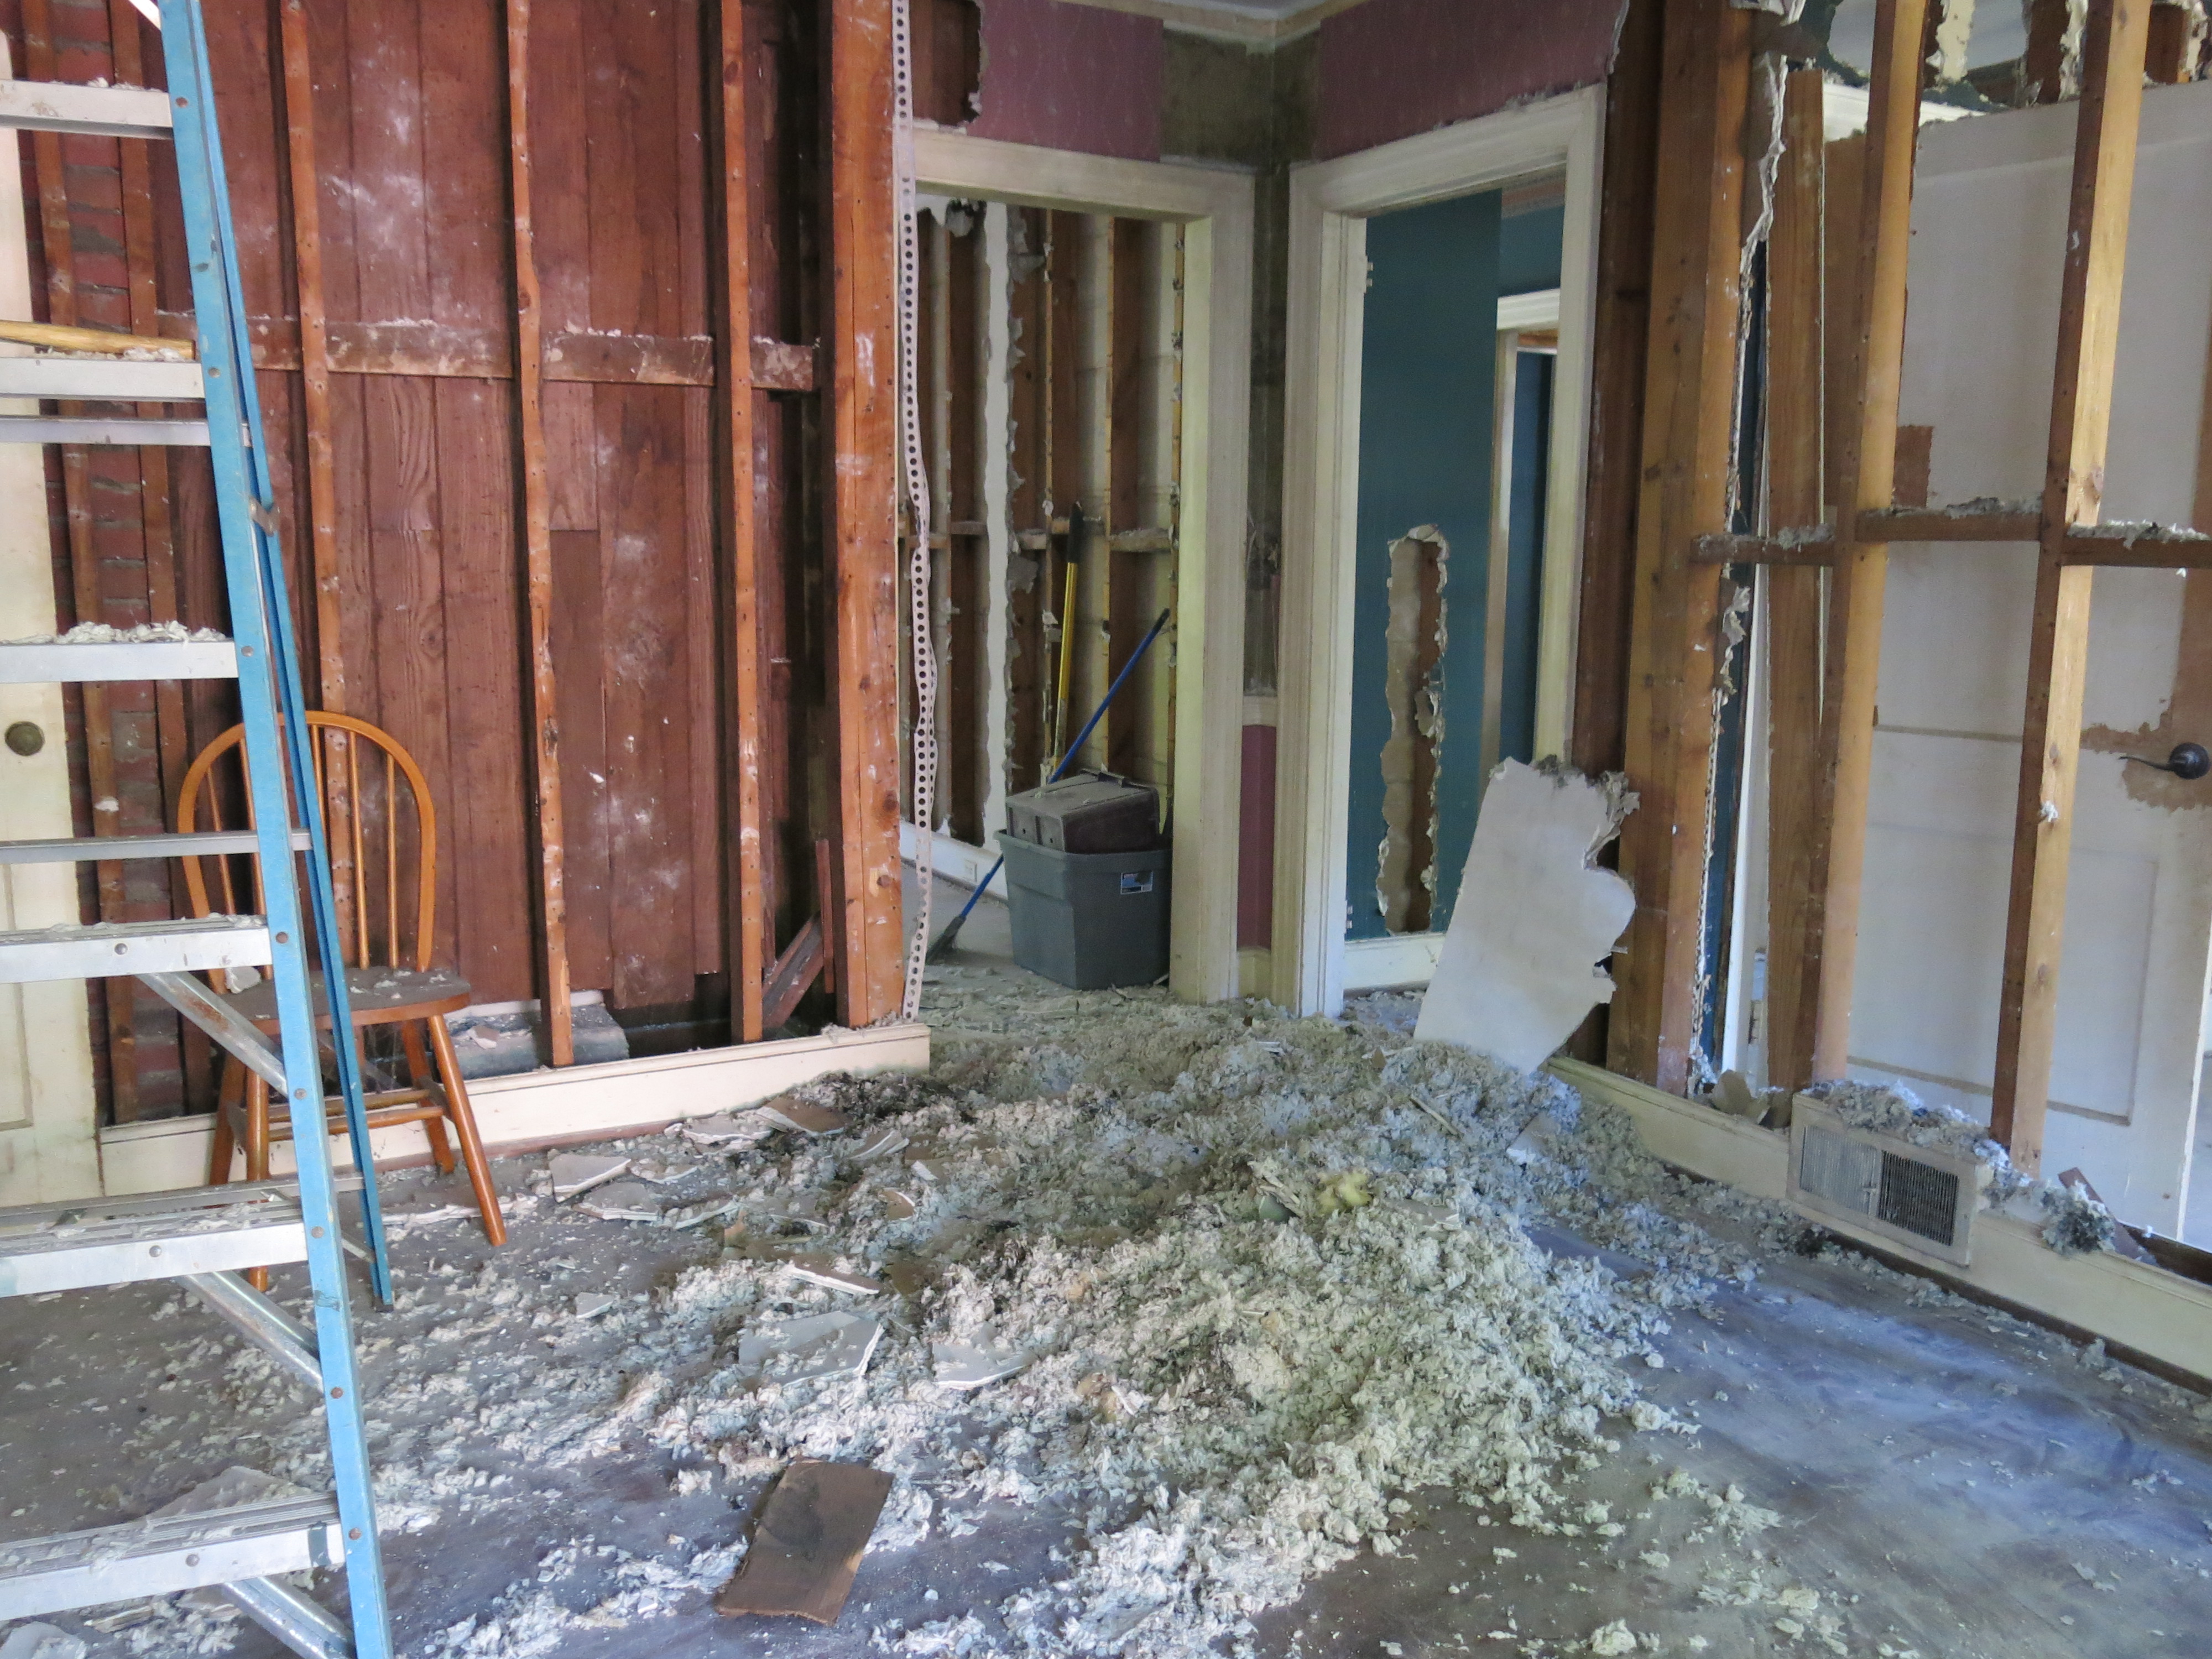
Making this little gem a reality was no easy task though (what else is new??).  Since my mom came across the cabinet back when we were still doing the framing, my dad was able to frame a hole in which the cabinet could be set. Acting like an oversized medicine cabinet, this idea would allow us to use the full depth of the cabinet without having it stick out into the room more than a few inches. Genius! Well, until we realized there was an old iron sewer vent pipe right where the cabinet would go… Luckily, our plumber had planned to shatter all the old sewer pipes and replace them with new ones as part of our plumbing scope. We just made sure to have him route the new pipe in a different location clearing the way for our special cabinet.

See the giant black pipe right where we want to put the cabinet?

See the giant black pipe right where we want to put the cabinet?

Not any more! ;)

Not any more! 😉

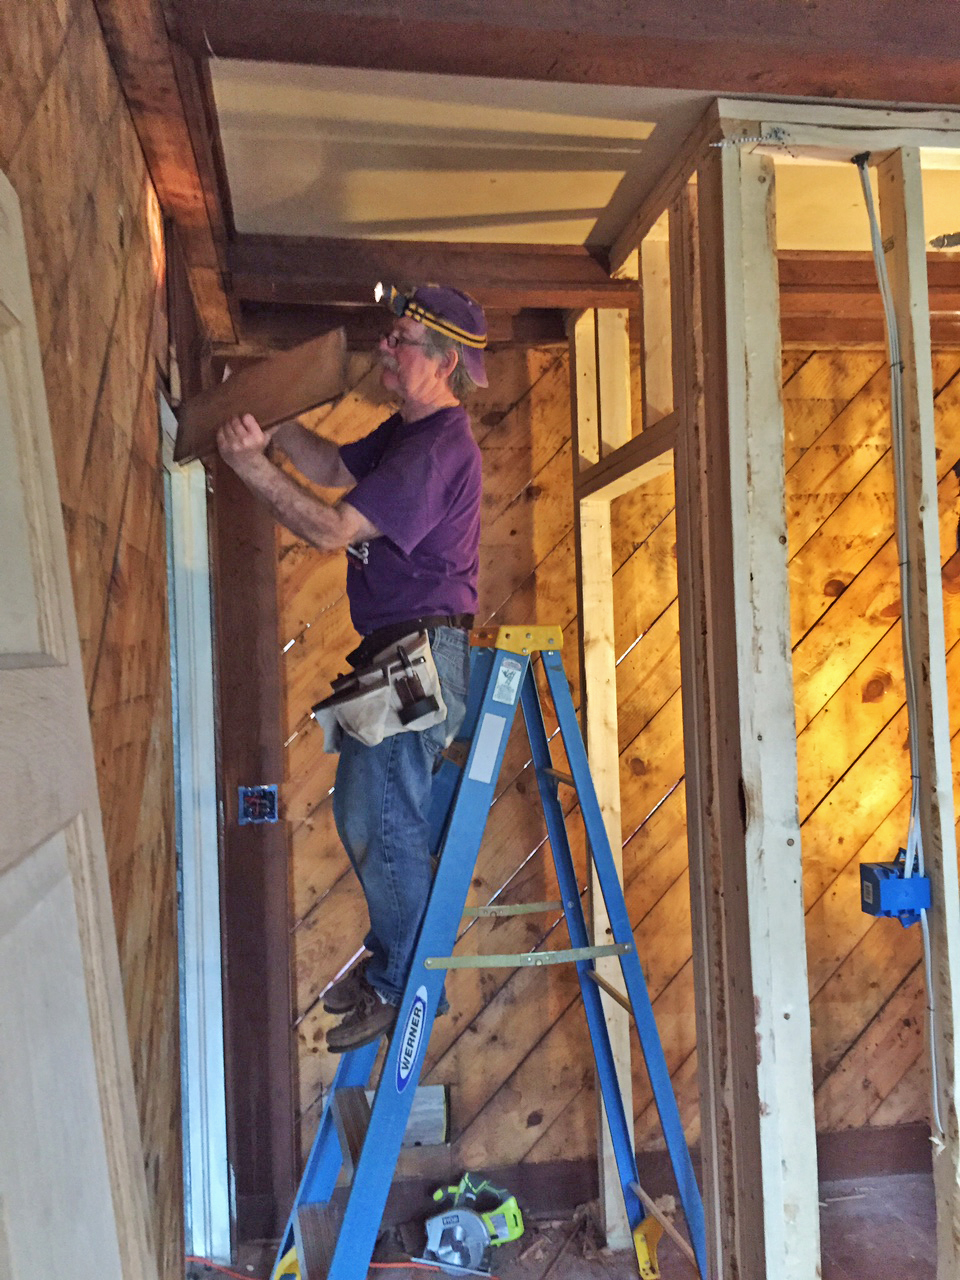
Next, the cabinet itself had to be modified. My dad helped us by cutting off the cabinet’s legs. A delicate job that almost came off without a hitch… until one of the glass panes broke. 😦 This turned out to be a blessing in disguise because we replaced the lower panes with bead board which now allows us to use the lower storage space for toiletries that are better kept out of sight. We also had to trim the trim. Yes, we had to cut down the trim at the top of the cabinet, but just the part that would interfere with recessing it into the wall. Make sense?

Holding it up to make sure we like it :)

Holding it up to make sure we like it.  “A little higher, Dad!”  😉 😉

Trimming the trim!

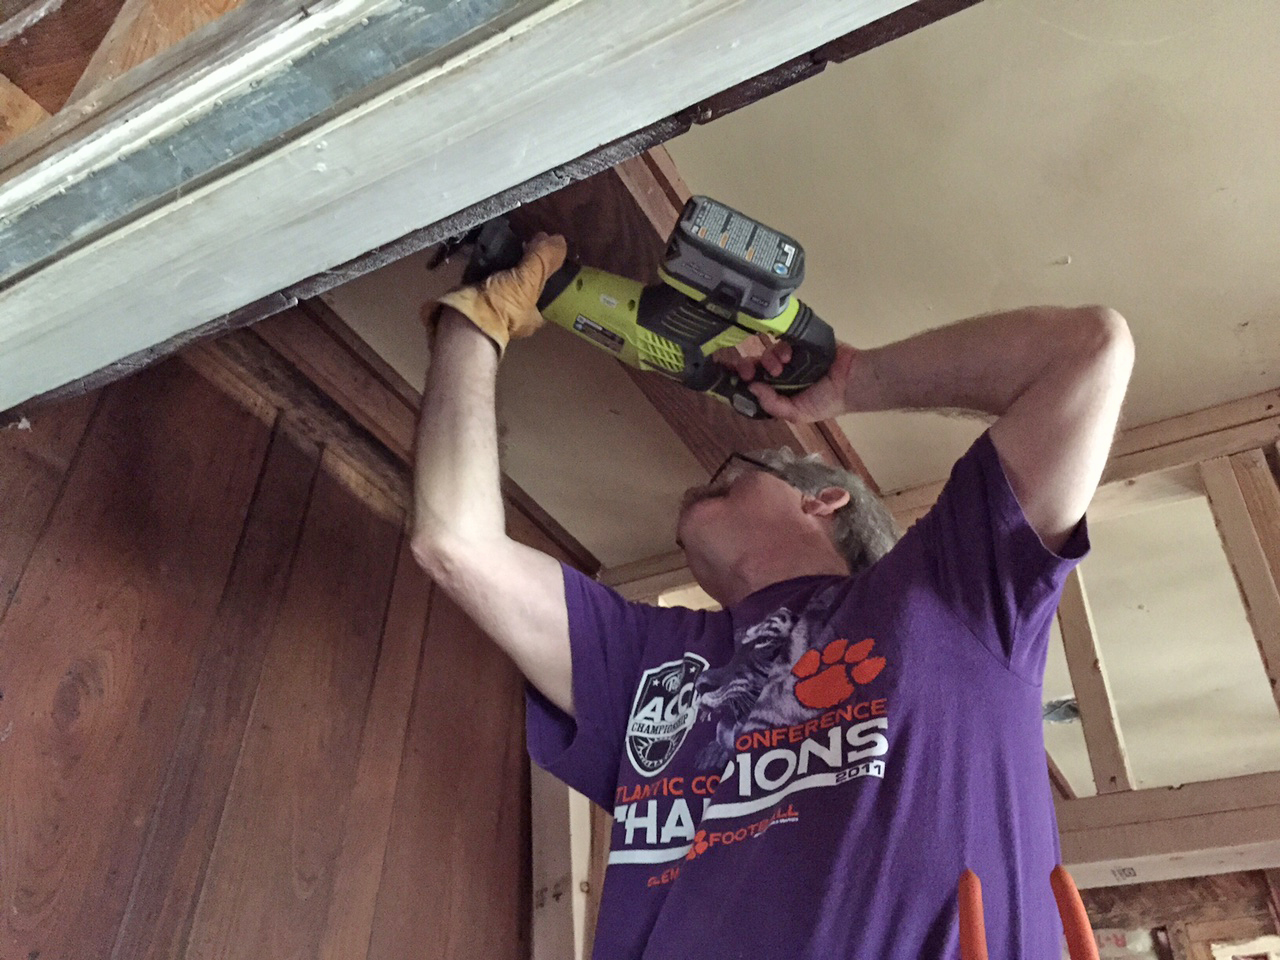
The perfect vantage point for trimming the trim!

Look at that concentration!

Look at that concentration!

Lastly, my mom swooped in to put on a few coats of paint before installation. And, voila! 

Mom carefully painting both hall bathroom cabinets -- what a life saver!

Mom carefully painting both hall bathroom cabinets — what a life saver!

Finally… time to install!

The Newton Nest IMG_9625

The Newton Nest IMG_9627

Ta-daaaah!

Ta-daaaah!

Removing a Relic

We think our Nest has lots of special features, but one of these is a certain type of wood paneling that has my dad – the master forester – seeing hearts. It’s called Wormy Chestnut… or as Richard Harper calls it, “a true relic.” Apparently, this woodland artifact is basically extinct and wormy chestnut lumber is an extremely rare find these days…and Matthew and I  [GASP]  wanted to paint it. So, in swooped the mighty mustachioed forester to rescue the Chestnut lumber in all its wormy glory from those who seek to whitewash its beauty beyond recognition!

The room we call our office was paneled floor-to-ceiling with the “good stuff,” so in lieu of covering up something so special with paint, we decided we would rather share the Wormy Chestnut with someone who really appreciates it! It took a few tries to discover a method of removing the tongue and groove boards with little damage (because they are so old, they’ve become fairly brittle), but the forester finally landed on a crude-but-effective system of prying each board away from the wall about an inch and then using a saws-all to cut through the nails holding it to the wall. Then his trusty nail puller (me) dutifully pried out the remaining nails.

What will the forester do with his loot? Well, he’s not sure yet, but Matthew and I have a feeling it will be something very special and maybe a little piece of it will make it’s way back to the Nest one day  🙂

Close-up of the grain and pattern of American Wormy Chestnut.

Close-up of the grain and pattern of American Wormy Chestnut.

In case you would like to know more about why Chestnut lumber, especially Wormy Chestnut, is so rare, here’s a little explanation from the Nest’s very first guest blogger:

So… what’s so special about the American chestnut?

Before the turn of the 20th Century, American chestnut was a dominant hardwood tree in the eastern United States occurring mostly in the Appalachians from Maine to Mississippi. Some of the largest trees reached heights almost 100 feet with diameters over 9 feet occurred right here in the Southern Appalachians which occupied 25 to 40 percent of the lower cove forests. Large crops of its sweet nut were enjoyed by humans and were a major contributor to wildlife forage.

Unfortunately, an Asian chestnut tree imported to the U.S. around 1900 carried a bark fungus commonly called the chestnut blight. The American chestnut had little resistance and the blight virtually girdles the tree killing it. By the 1930s, an estimated 3 billion trees had died.

The wood is somewhat rot resistant and many trees lay on the forest floor for years before being salvaged, hence the “wormy” effect of the lumber where insects bored throughout the tree; a.k.a. wormy chestnut.

The wood was strong, light, and was widely used for construction, furniture, and decorative trim. It has a true brown patina – not too light, not too dark… just right to warm a room – chestnut! My favorite is a room paneled with variable width boards that have been left to age to its natural brown patina.

Small shoots of American chestnut are still living throughout the Appalachians, but are soon attacked by the chestnut blight before reaching a few feet tall. Hybrids are being developed to resist the blight. One live chestnut hybrid in the Clemson area is almost 18 inches in diameter and about 60 feet tall – there is still hope!

So, what really is so special – it is a relic of a once great tree important to the forest, and… well… I just like it!

Richard Harper
Professional Forester, Retired

There you have it, folks! Straight from the Forester’s mouth.

Here are a few photos of the removal process:

A "before" picture of the Wormy Chestnut walls.

A “before” picture of the Wormy Chestnut walls.

Getting started!

Getting started!

Saws-alling with a smile!  :)

Saws-alling with a smile! 🙂

Pulling off the last few boards.

Pulling off the last few boards.

The loot!

The loot!

Here's a little Forester Flashback of Richard in his early forestry days. He's on the cover of Westvaco CFM News magazine, November 1983.

Here’s a little Forester Flashback of Richard in his early forestry days. He’s on the cover of Westvaco CFM News magazine, November 1983.

The sky is falling!

Chicken Little:  “Oh, help! The sky is falling!”
Henny Penny:   “How do you know?”
Chicken Little:  “I saw it with  my own eyes, and heard it with my own ears, and part of it fell on my head!”

If Chicken Little thought the world was coming to an end after a little acorn landed on his head, he and Henny Penny would have lost their minds in our house this weekend! Saturday’s major task was knocking the plaster off the ceilings. And yes, a lot of it fell on our heads.

It’s bad enough to have the plaster falling in your face, but we got the added surprise of loose insulation raining down upon us. There’s no way to spin it, this was a dirty, itchy, no good, very bad job. However, unlike Chicken Little, we know this isn’t a sign that the world is coming to an end, but more like a beacon of hope to know this dirtiest of jobs done and behind us!

We were again lucky to have lots of volunteers for demo day number two—Matthew’s sister Rebecca, my parents, my sister Emily, and our friend Skyler all came to help. Plus, we hired a local handyman named Doug to help with the really tough stuff.

Here’s a recap of all our dusty, dirty fun:

Matthew makin' it rain.

Matthew makin’ it rain.

IMG_0021

Loose insulation everywhere!

It's a dirty, dusty job, but somebody's gotta do it!

It’s a dirty, dusty job, but somebody’s gotta do it!

demo pics

Wheelbarrow load after wheelbarrow load to fill up Big Red…again!

We haven't scared Rebecca away yet!

We haven’t scared Rebecca away yet!

Even though my mom was down a hand, she went to town pulling nails out of the studs. A broken arm can't slow her down!

Even though my mom was down a hand, she went to town pulling nails out of the studs. A broken arm can’t slow her down!

My dad, the forester, came to help with a special wood project. ;)

My dad, the forester, came to help with a special wood project. 😉

My sister, Emily, is stylish as always with purple earplugs that perfectly matched her sweatshirt.

My sister, Emily, is stylish as always with sassy purple earplugs to coordinate with her sweatshirt.

Sisters that demo together, stay together.

Sisters that demo together, stay together. (We missed you, Rebecca!!)

Sledgehammer Sisters. #thoseharperwomen

Sledgehammer Sisters. #thoseharperwomen

Skyler joins the demo party!

Skyler joins the demo party!

Making progress!

Making progress!

Hammer down! (This actually happened twice!!!)

Hammer down! (This actually happened twice!!!)

Finished!

Finished!

IMG_0077

Another busy day... another full dumpster.

Another busy day… another full dumpster.

The Great Clean Out

Okay, brace yourselves. You’re about to get the grand tour of the interior of our house…

Not only does our nest need to be updated, but the house was never completely cleaned out before it was abandoned. So we had our work cut out for us to muddle through the clutter and separate anything of value from the trash. Luckily, we had many helpers! Matthew’s Mom, Dad and youngest sister Rebecca, plus my parents, The Harpers, and our good friend RJ showed up to lend a hand with the remaining yard clean up and relocate everything inside the house deemed “throw away” to Big Red, our giant dumpster.

Before we venture inside let’s talk about taming the jungle that’s grown up around the house. Saturday, with the help of our family and friends, we implemented Phase II of the exterior make over. We like to call it a “close shave” of the landscaping…don’t worry, we plan to let a lot of it grow back, but to make room to repair the cedar shakes, we had to really give the chainsaw a work out!

Yard Clean-up:

This slideshow requires JavaScript.

Pretty big difference, huh?

Are you ready for the inside tour?  Here goes:

This slideshow requires JavaScript.

Okay, so at this point, you’re probably thinking “WHOA—they have lost their cotton-pickin’ minds!” but don’t doubt us yet… it’s really hard to see the forest for the trees with all the “stuff” everywhere. We promise, there’s a really special house under there.

There were even a few “Keepers” found among the mess and we’re excited to eventually incorporate these items into the finished product.

"Keeper" Pile

“Keeper” Pile

We are counting our blessings after an extremely productive day and owe a huge thank you to our families and friends who came to get their hands dirty! With all we accomplished and all the hazards involved, we made it through the day with very little excitement…but there were a few little hiccups!

A Newton who shall not be named was enthusiastically sweeping and put the broom handle right through the window!

Gotta watch those broom handles!

Gotta watch those broom handles!

Chainsaw Scare! My dad (who is a very experienced chainsaw operator!) accidentally touched the slowing chainsaw blade to his leg and it ripped through his jeans leaving what was basically a deep scratch in his thigh. Amazingly lucky!

Too close for comfort! Yikes!

Too close for comfort! Yikes!

…and since that made three Hurt Harpers, we had to document!

The Three Hurt Harpers.

The Three Hurt Harpers.

Lauren had hand surgery, Richard cut his leg, and Jennifer has a broken wrist! It might be safe to say that the Newtons carried most of the weight this time.

Eggs of Wisdom:

  • No matter what you get yourself into, family will jump right in – without question – to help you succeed (and we have two of the very best!).
  • Construction Dumpsters are not really as big as they look…we overflowed that bad boy.
  • You can never have too many pairs of gloves. (Work gloves, rubber gloves, garden gloves…do I sound like Bubba Gump, yet?)