Going Gray!

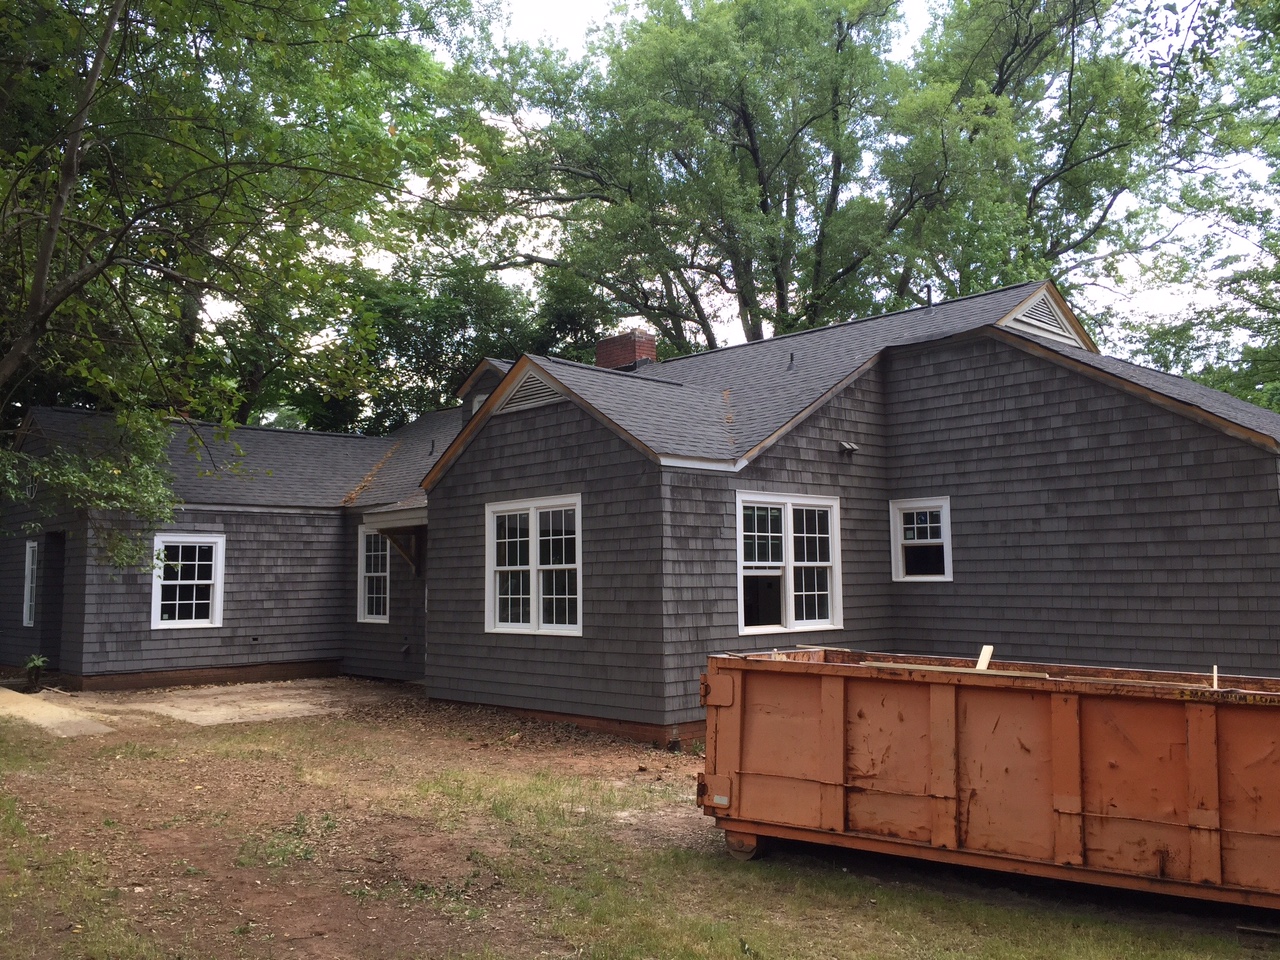
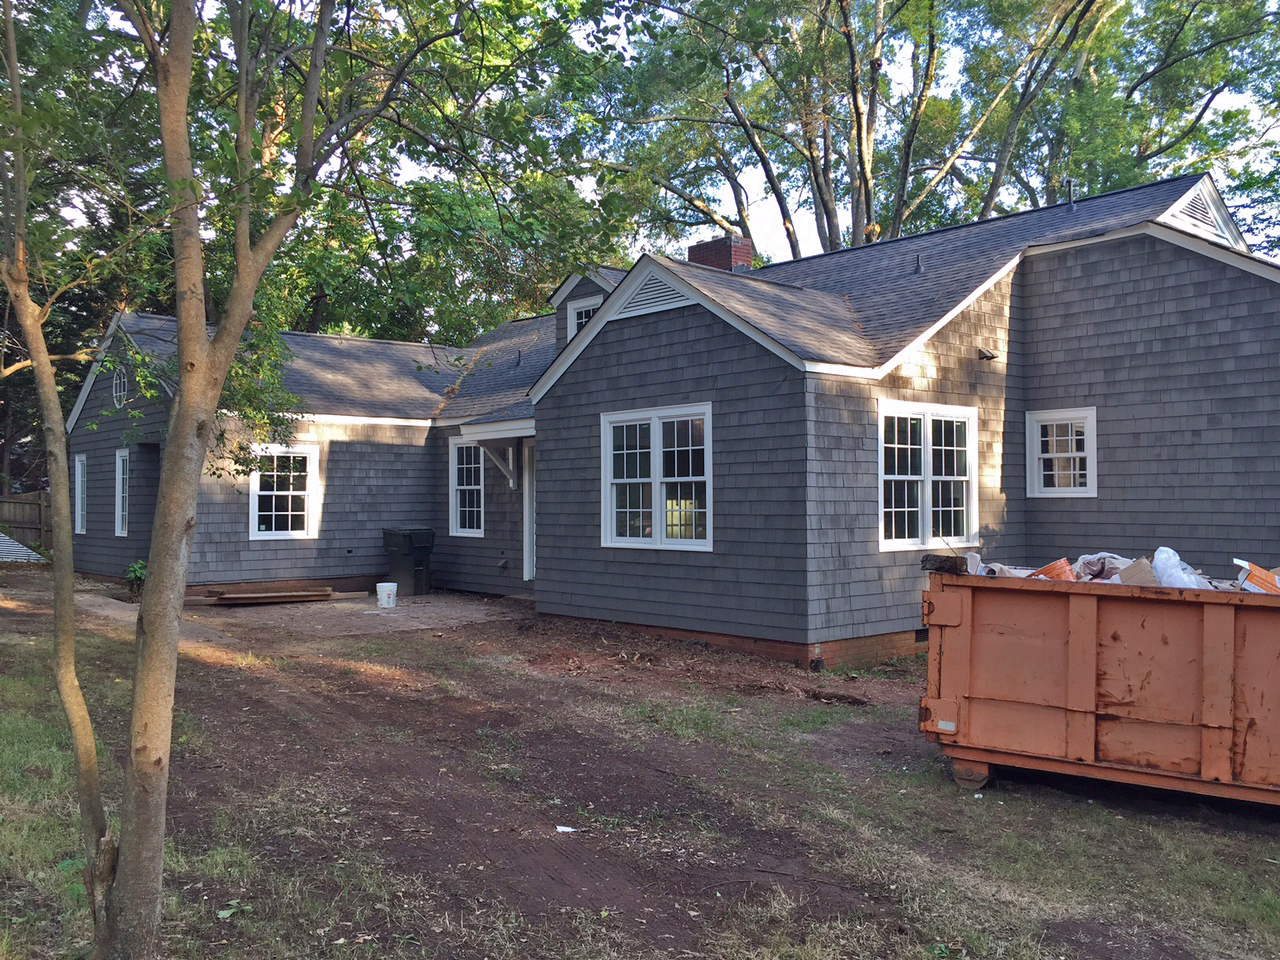
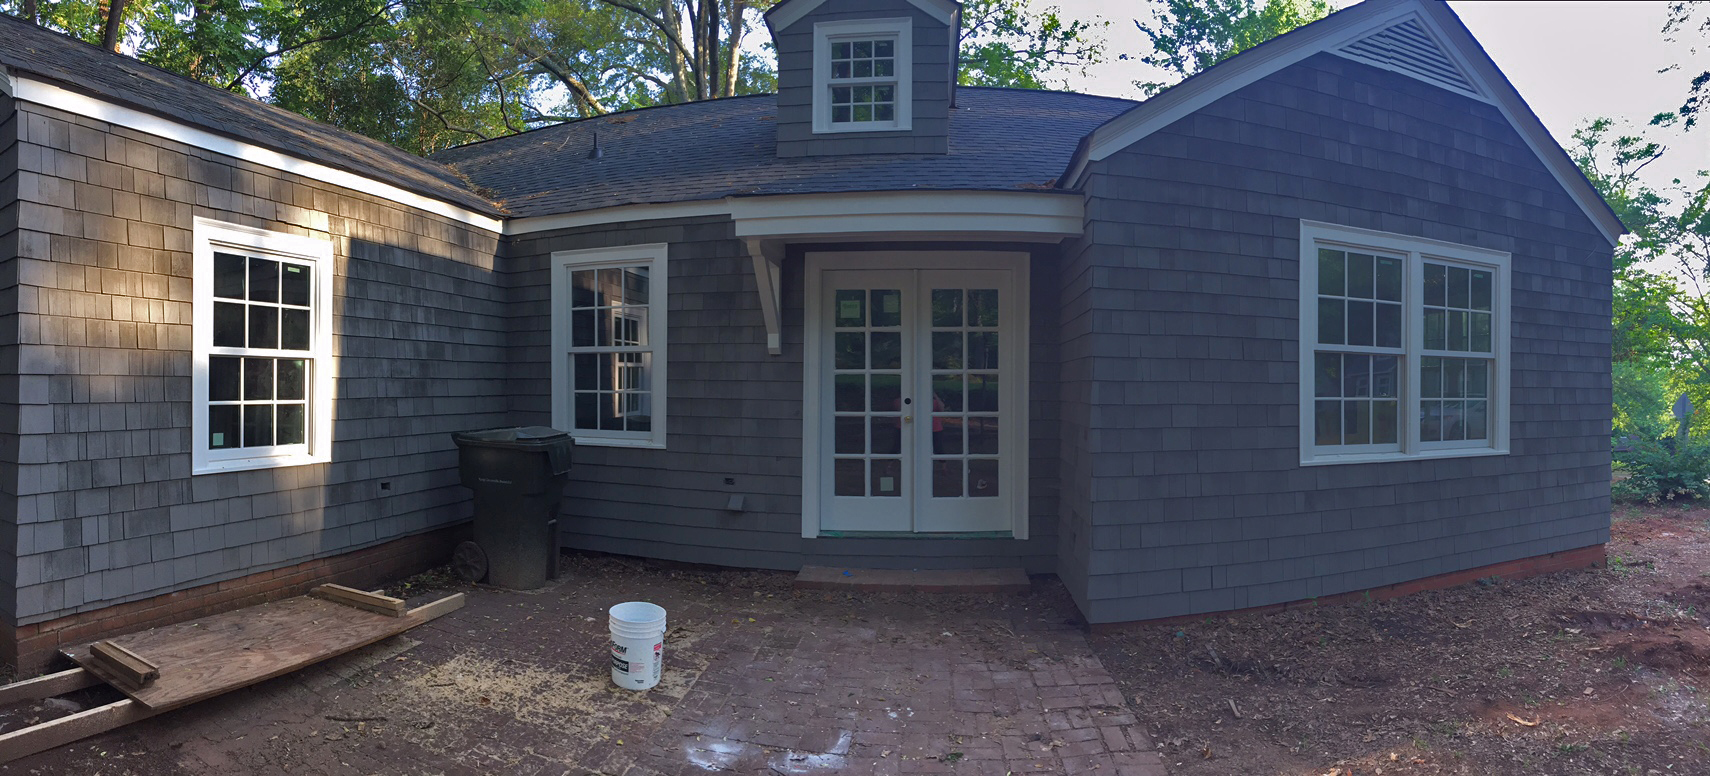
Hooray — we’ve gone gray! 

No, I’m not talking about our hair color beginning to fade as a result of nearly eight months of home renovation (although, the lone long-locked Newton has noticed a few new silver strands). We have finally said goodbye to the patchwork shingles and painted the exterior of our house! We settled on a medium gray color for the cedar shakes and then called in reinforcements to help with the transformation.

The slightly more senior Mr. and Mrs. Newton (Matthew’s parents) joined the painting party and we were able to prime and paint the exterior of our little nest in two weekends’ time. Not too shabby for a bunch of amateurs—well, three amateurs and our fearless leader, Matthew’s father, Wayne, who owned his own paint contracting business for 30+ years… as the sole professional on site, he kept the rest of us from messing anything up! Painting all those shakes was no easy task and start-to-finish it took us a month of weekends if you count the prep work too, but we were strutting around with grins of accomplishment when it was all done!

We began by prepping the exterior (a lot more work than I thought!):

IMG_8527

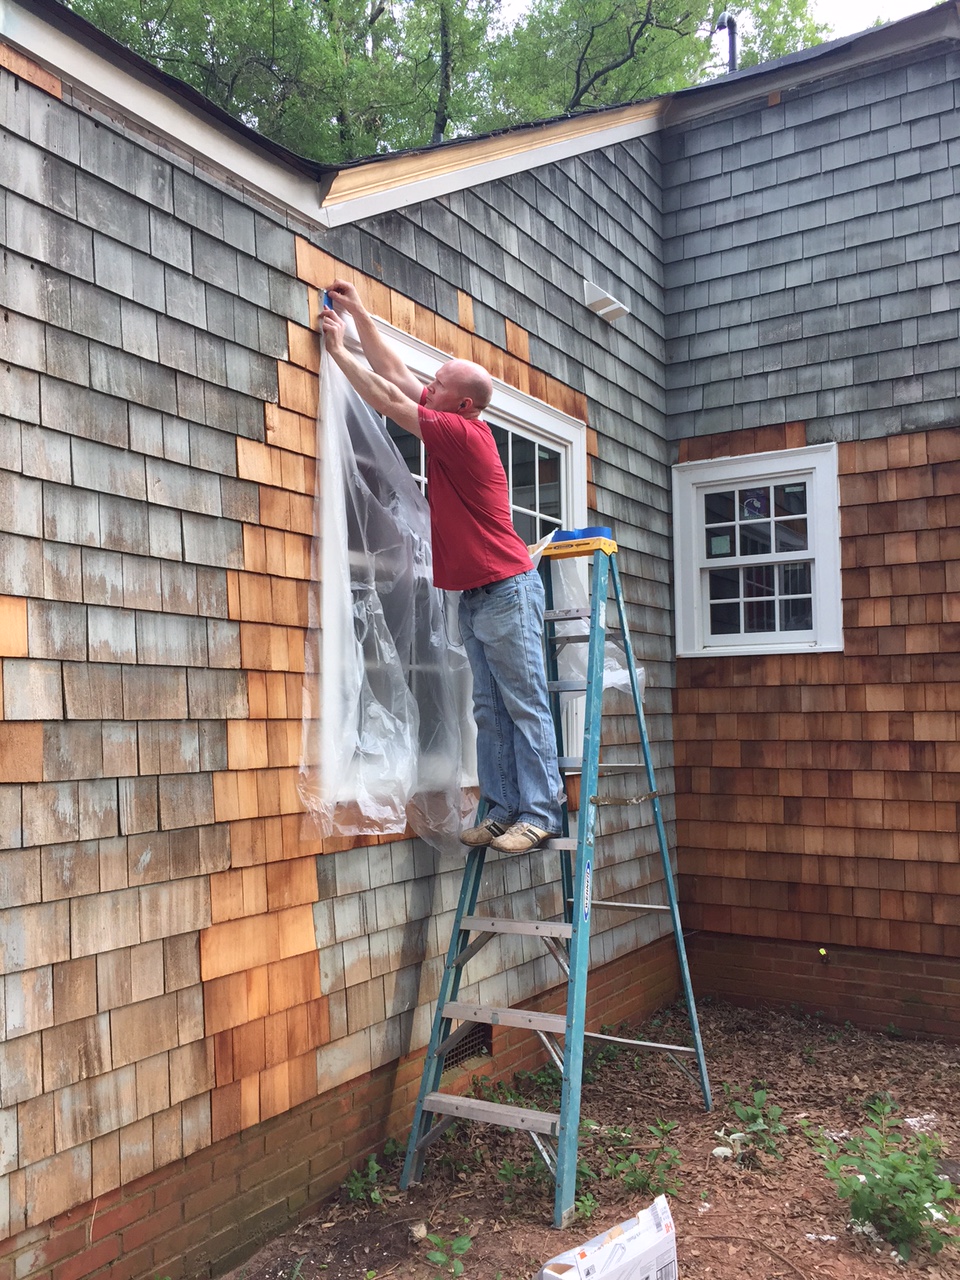
Taping off the windows!

IMG_8440

Puttying all the little nail holes!

IMG_8453

Caulking windows!

IMG_8451

Double caulking!

IMG_8816

Triple caulking!

IMG_8466

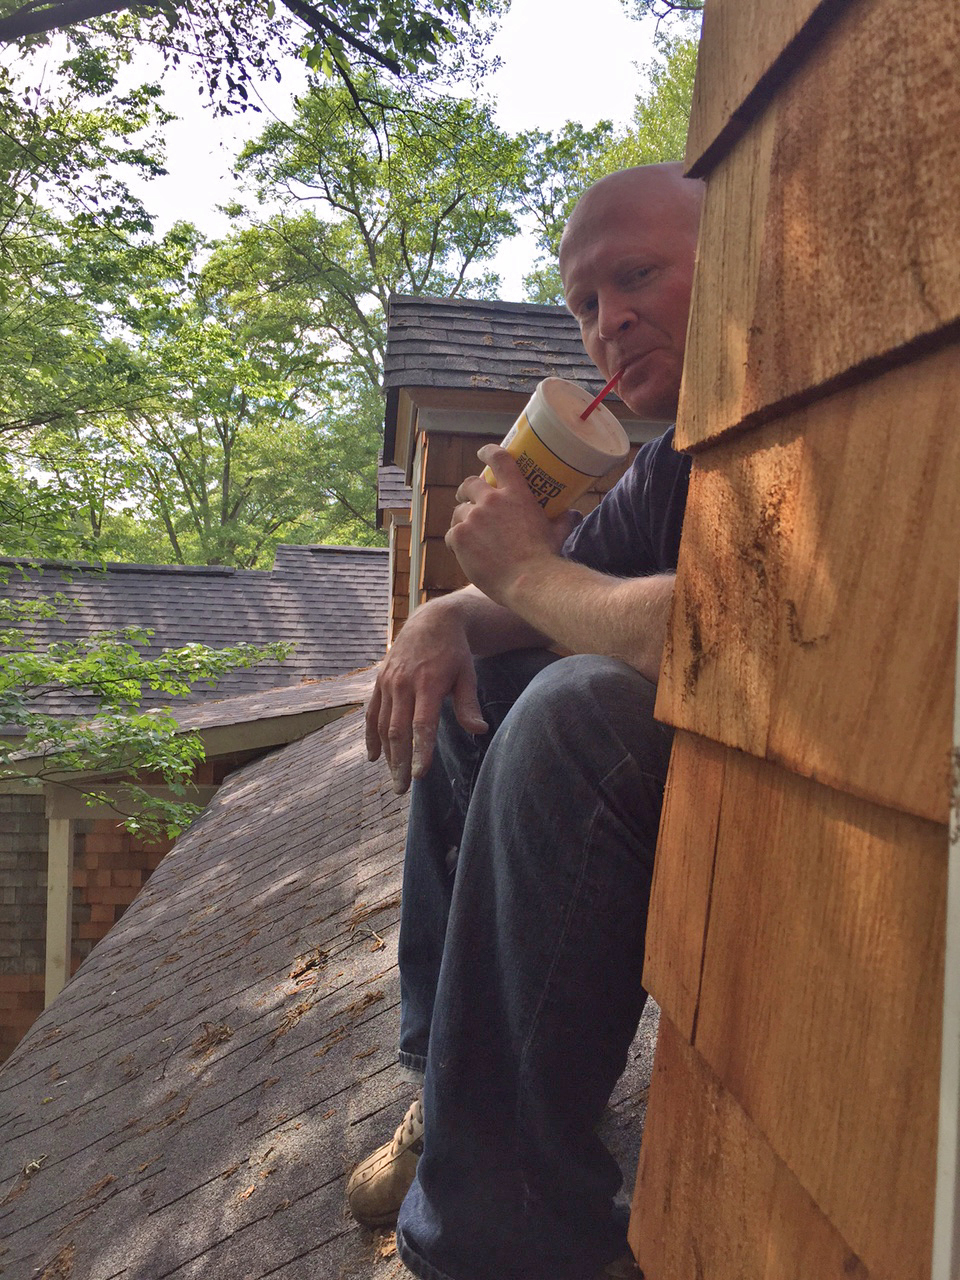
Rooftop refreshment 😉

Here we go! Check out the power of a coat of paint:

IMG_8814

Shaking up the paint! (My staring totally helped…)

IMG_8535

Primer coat is on!

IMG_8611

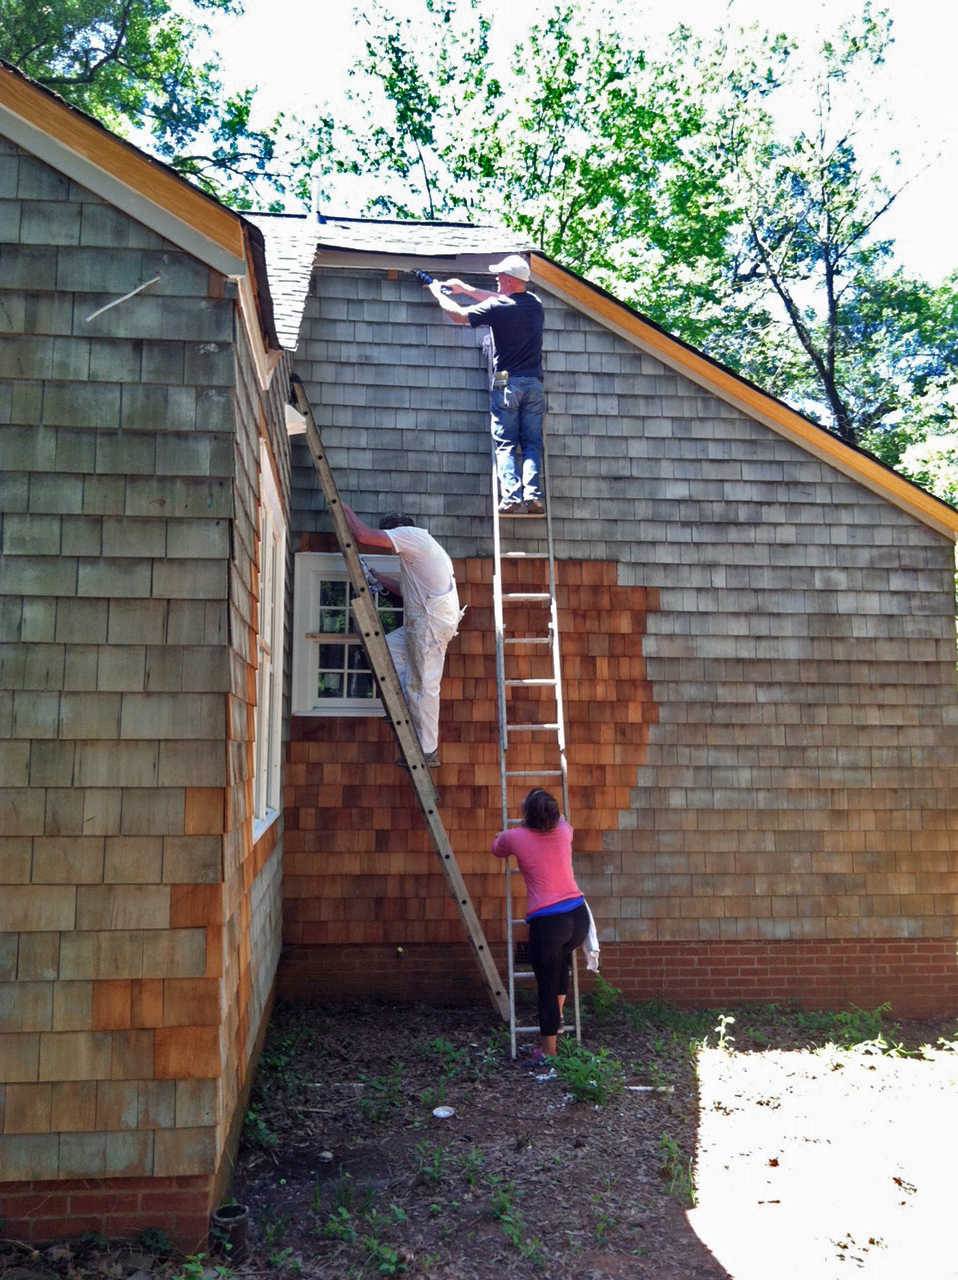
Mr. Newton – head painter in charge – spraying more primer.

IMG_8609

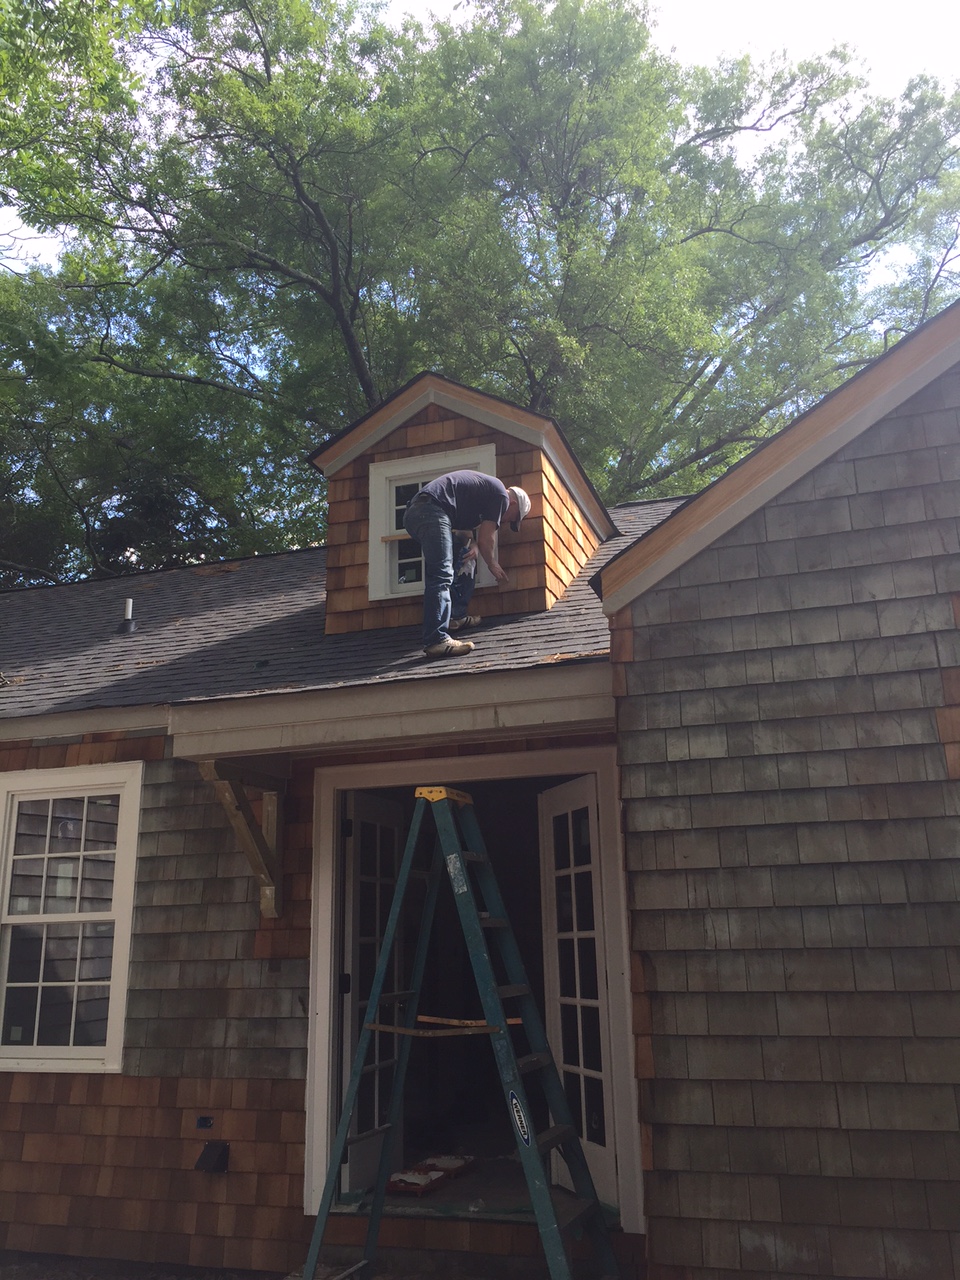
Two Newtons and a dormer.

IMG_8567

Three Newtons and a dormer. 🙂

IMG_8542

All primed and ready for the final coat!

IMG_8626

Revving up the sprayer for the final coat!

IMG_8622

Matthew and his Momma taking a little break.

IMG_8631

Final coat of gray is on; ready to start painting all the trim along the roof!

IMG_8708

IMG_8694

IMG_8682

Trim is looking crisp and white!

IMG_8797

IMG_8787

IMG_8781

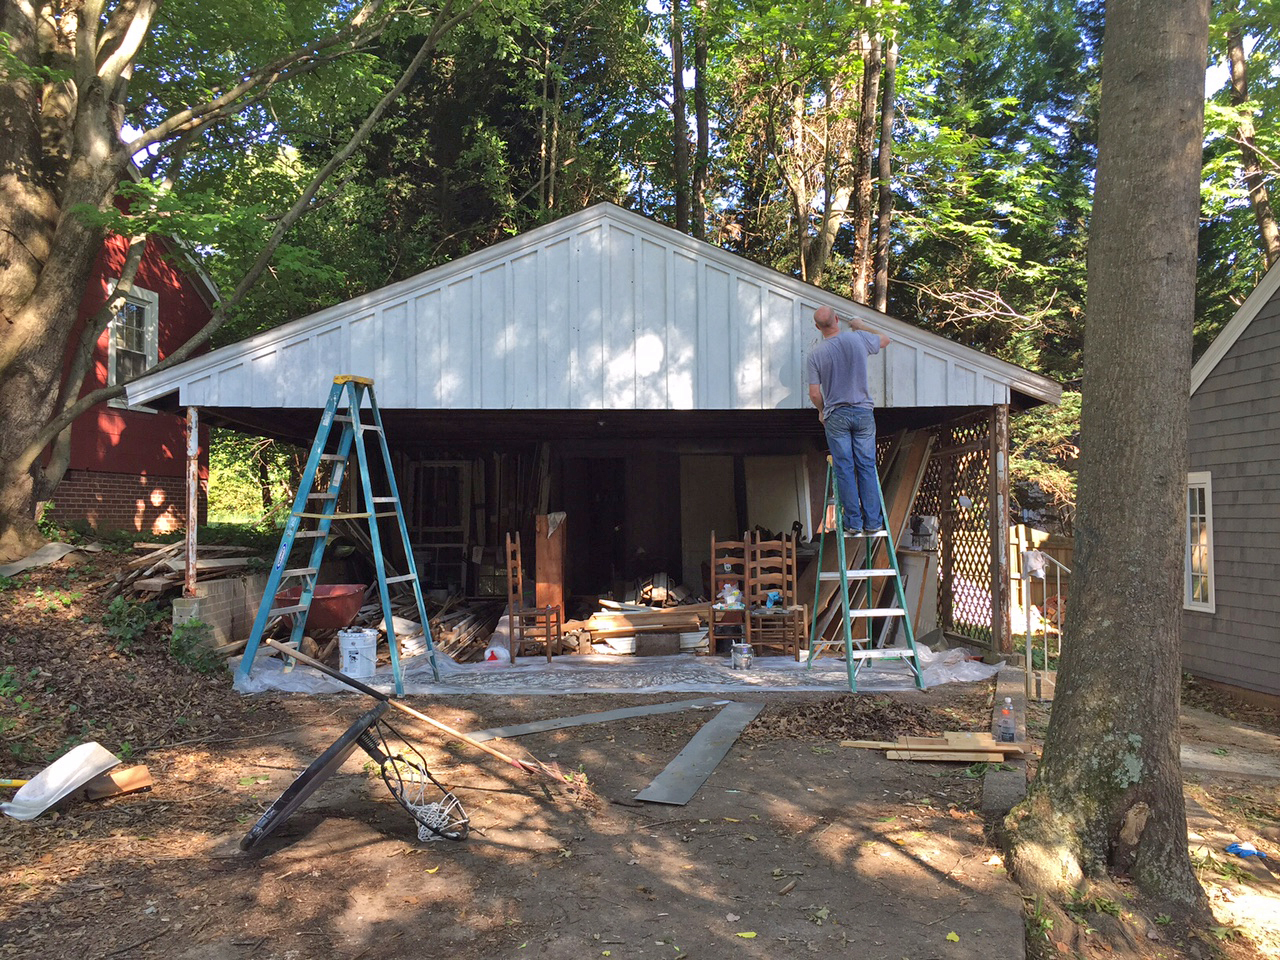
Oops! We almost forgot the garage…

IMG_8832

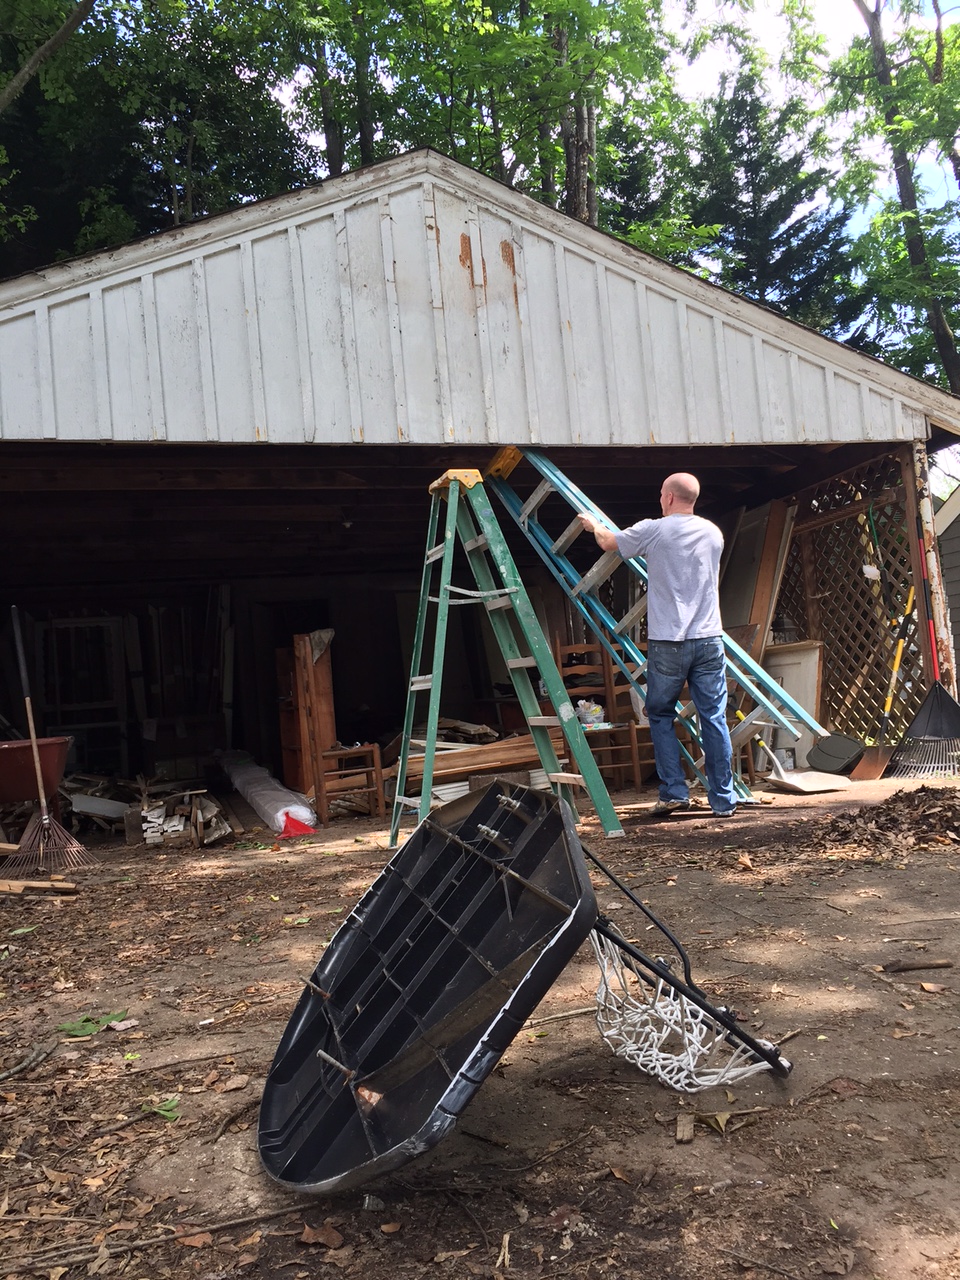
Goodbye, basketball goal!

IMG_8827 copy

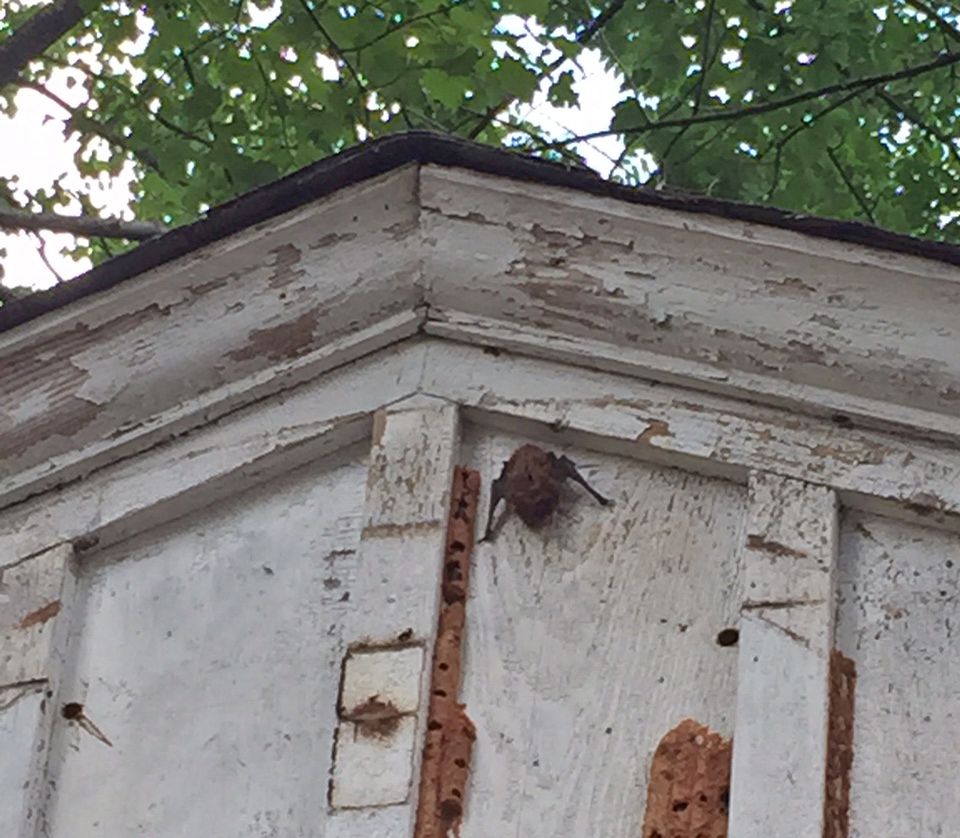
Hello, Bat who was hiding underneath the goal. (Sorry little guy!)
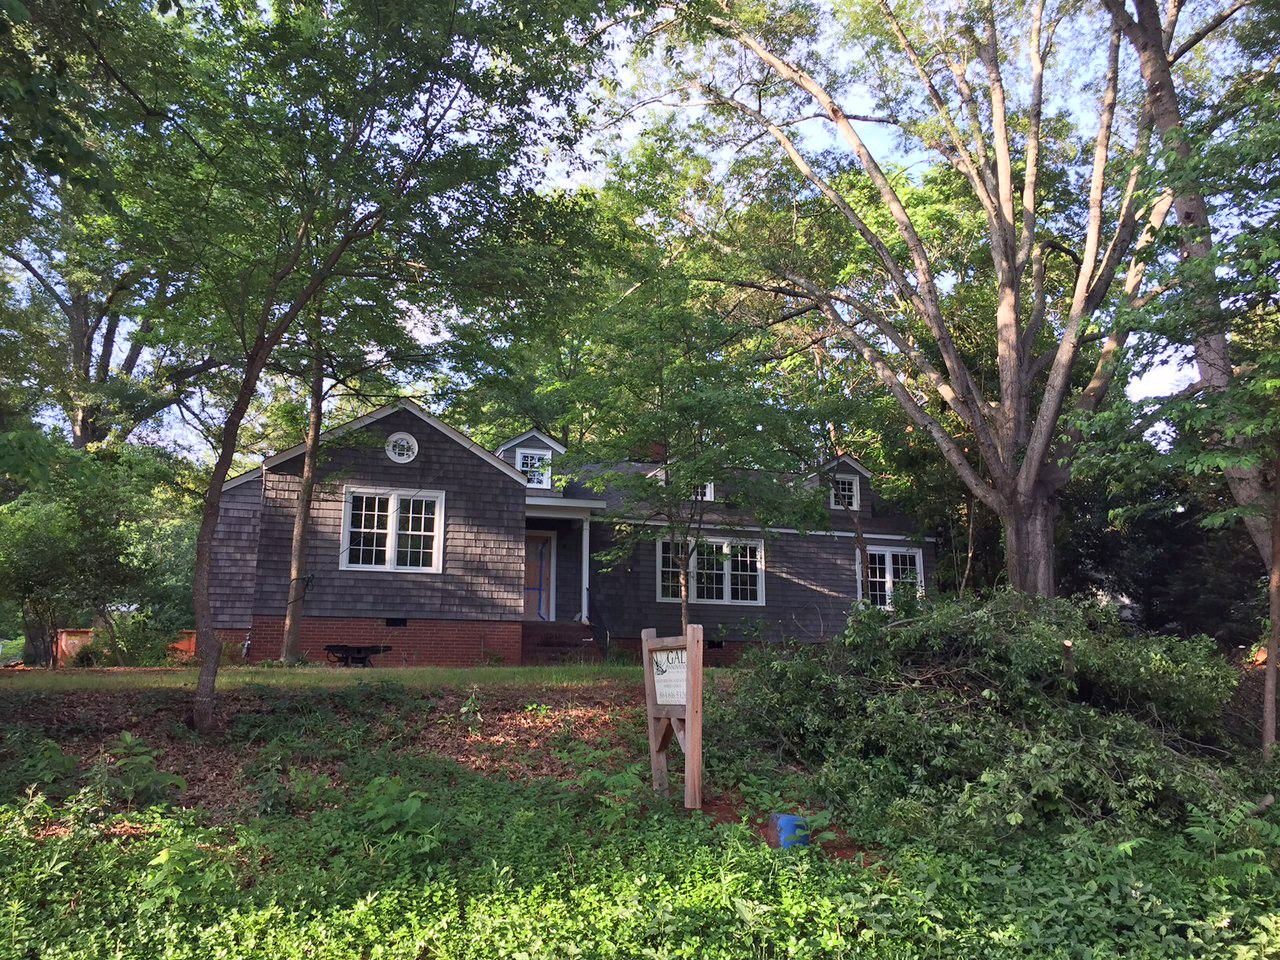
IMG_8847

IMG_8843

IMG_8840


IMG_8921

All done!

IMG_8869

Hello, gorgeous gray! All that hard work paid off… we are really digging our Nest’s new look.

IMG_8868
IMG_8919

IMG_8916

IMG_8912

Many, many thanks to the Newtons for helping us with such a big job – we couldn’t have done it without them!!!

A few Eggs of Wisdom…

  • It’s true, many hands make light work.
  • Happy music and time with family makes even the hardest jobs more fun.
  • If you have a choice between rolling/brushing paint and using one of those handy sprayers, choose the sprayer every time! 😉

Drywall, y’all!

It feels a little like we have come full circle… the Nest has come so far since we were swinging sledgehammers to take down walls. Now, we are celebrating new ones!

It’s honestly hard to put into words how exciting it is to have solid walls again and see all the changes we’ve made take shape. Not to mention, drywall marks the beginning of the “pretty things” like trim, paint colors, cabinets, and more! Get ready, y’all—we’re about to really start dressing up the Nest!

Great Room/Kitchen (The great room ceiling will be covered by tongue and groove, so no drywall there!)

Great Room/Kitchen (The great room ceiling will be covered by tongue and groove, so no drywall there!)

Kitchen view.

Kitchen view.

View of great room and kitchen from the back door. Looking good!

View of great room and kitchen from the back door. Looking good!

Who needs a ladder? Stilts are the way to go!!

Who needs a ladder? Stilts are the way to go!!

Dining Room

Dining Room

Dining Room opposite view, looking toward butler's pantry and stairs to second floor.

Dining room opposite view, looking toward butler’s pantry and stairs to second floor.

Formal Living Room

Formal Living Room

Powder Room and Office

Powder Room and Office

Office, opposite view.

Office, opposite view.

Looking from formal living room into the powder room (thanks to my dad for adding that beautiful window on a whim -- more on that in a future blog post :) ).

Looking from formal living room into the powder room (thanks to my dad for adding that beautiful window on a whim — more on that in a future blog post 🙂 ).

Guest Bedroom #1

Guest Bedroom #1

Guest Bedroom #2

Guest Bedroom #2

Hallway/Hall Bathroom

Hallway/Hall Bathroom/Guest Bedroom

Super stilts to put the finishing touches on the master bedroom!

Super stilts to put the finishing touches on the master bedroom!

Master Bedroom!

Master Bedroom!

Master Bathroom

Master Bathroom

…and just because I am so impressed by the stilts, here is a little video of our guy in action:

How Appropriate

Ladies and Gentleman, we have chosen a paint color! (For the outside, at least. 🙂 )

8 paint swatch cards and 5 sample jugs later, we have stood close, stood back, squinted, discussed, and viewed them in nearly every hour of daylight… introducing the color chosen to grace the exterior of our nest:

Ta -daaaah! Sherwin Williams Gauntlet Gray

Ta-Daaah!  Sherwin Williams’ Gauntlet Gray it is.

Appropriately named for the “challenge” we’ve endured (Mostly kidding, it has been a lot of fun, too!) to bring the Newton Nest back to its former glory, Gauntlet Gray just seems like a fitting color in which to shroud our bundle of sticks.

Swatch testing!

Swatch testing!

We hope to paint the outside in just a few weeks—stay tuned!

Plumbing Rough-In: Check!

Our H2O is ready to go!

That’s right. Our old pipes are gone and they’ve been replaced with all new plumbing. We made quite a few changes to the original plumbing layout, so here’s the run down:

  • We added a tiny powder room tucked into the corner of the office, located just off the formal living room and kitchen. This addition will give us a bathroom that is convenient to the most high-traffic living spaces. Adding the waste pipe for the toilet was a little tricky because the office/powder room was once a porch (closed in by a previous owner) and it has a concrete floor that is nearly six inches thick! Needless to say, drilling a hole through that baby required a little extra brawn. Our plumber might not agree, but we think it was worth the additional effort. 🙂
  • We added a shower head to the hall bath which was only a tub with a hand-held spray attachment.
  • We said goodbye to the two old, rusty water heaters in the basement and replaced them with a tankless system. Energy efficiency and an endless supply of hot water? Yes, please!
  • We added plumbing for his-and-hers dual sinks in the master bathroom.
  • We relocated the laundry room. (To make way for a large master closet, oh yeah!)
  • And, lastly, we had our plumber stub-in hot/cold water and a waste pipe upstairs to give us the option to add a half bath to the bonus space upstairs should we decide we want to do that down the road.
Hello, new toilet hole!

Hello, new toilet hookup!

Our itsy-bitsy powder room! (You can see the toilet rough-in on the floor in the far left corner.)

Our itsy-bitsy powder room! (You can see the toilet rough-in on the floor in the far left corner.)

Kitchen sink rough in.

Kitchen sink rough-in.

Hall bathroom shower is in!

Hall bathroom shower is in!

Master bathroom plumbing.

Master bathroom plumbing.

Laundry!

Laundry!

Upstairs "maybe" bathroom. :)

Pipes for our upstairs “maybe one day” bathroom. 🙂

So, as you can see, we have replaced everything! Well, almost everything… the only plumbing items being spared are the original cast-iron tubs. They need a good cleaning and to be reglazed, but we think they’re pretty special. (And they’re also pretty heavy, so leaving them in place is easier on everyone! ha!)

Master Bath  |  Hall Bath

Master Bath   |   Hall Bath

Replacing the water line from the street to the house was always in the plan, but the biggest “question mark” during this whole re-plumbing process was whether or not the waste/sewer pipes leading from the house to the street (which are buried underground) were in good shape. Many times with old houses like ours the underground pipes have cracks, debris, roots that have grown into them, and all kinds of other problems that can be an expensive fix. So, we had a professional come use a nifty little camera scope tool to take a gander at our pipes… miraculously, we passed muster and did NOT have to dig up and replace our waste line! Hallelujah!!

Water line trench... thank goodness we didn't have to dig up the waste line, too!

Water line trench… thank goodness we didn’t have to dig up the waste line, too!

Now, all this pipe talk is a little boring, but as part of this exercise, we got to make our plumbing fixture choices, too. Finally! We get to pick out some “pretties” for the house! Here’s a glimpse of what we chose:

Plumbing pretties!!

Plumbing pretties!!


As a fitting finish to the plumbing update…… let’s all wave goodbye to the Nest’s old, nasty hot water heaters!

A couple of local scrappers took these beauties off our hands.

A couple of local scrappers took these beauties off our hands.

Hooray for new pipes!